This No Churn Pistachio Caramel Cone Ice Cream is everything you love about gourmet ice cream, made right at home, without an ice cream machine.
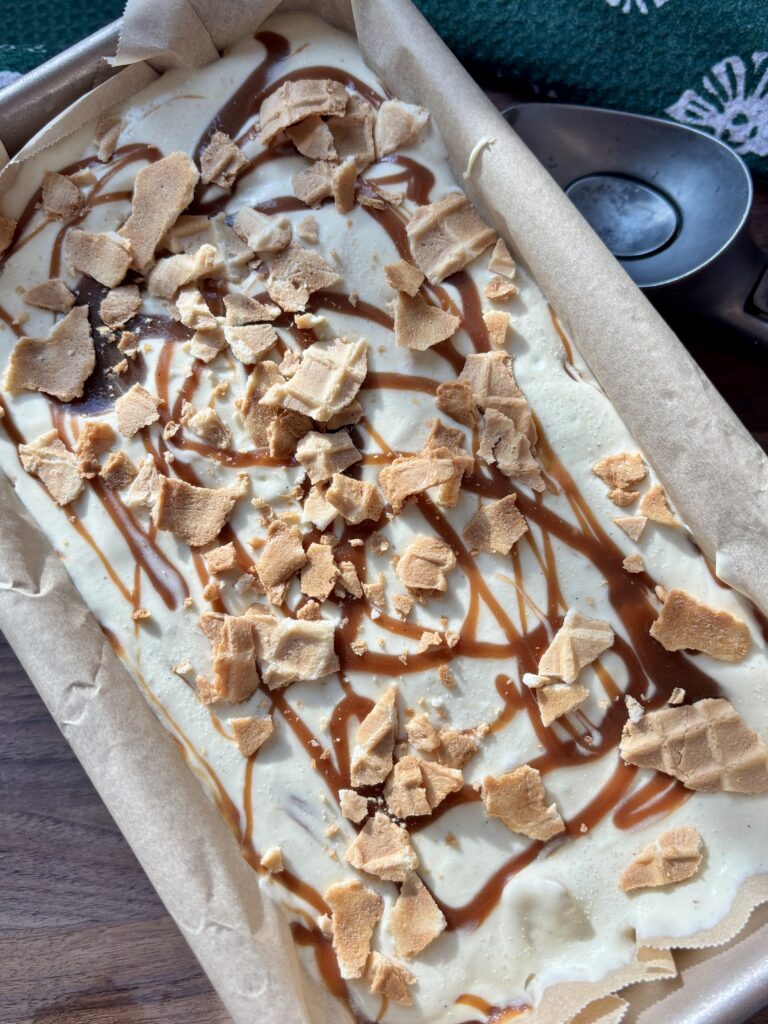
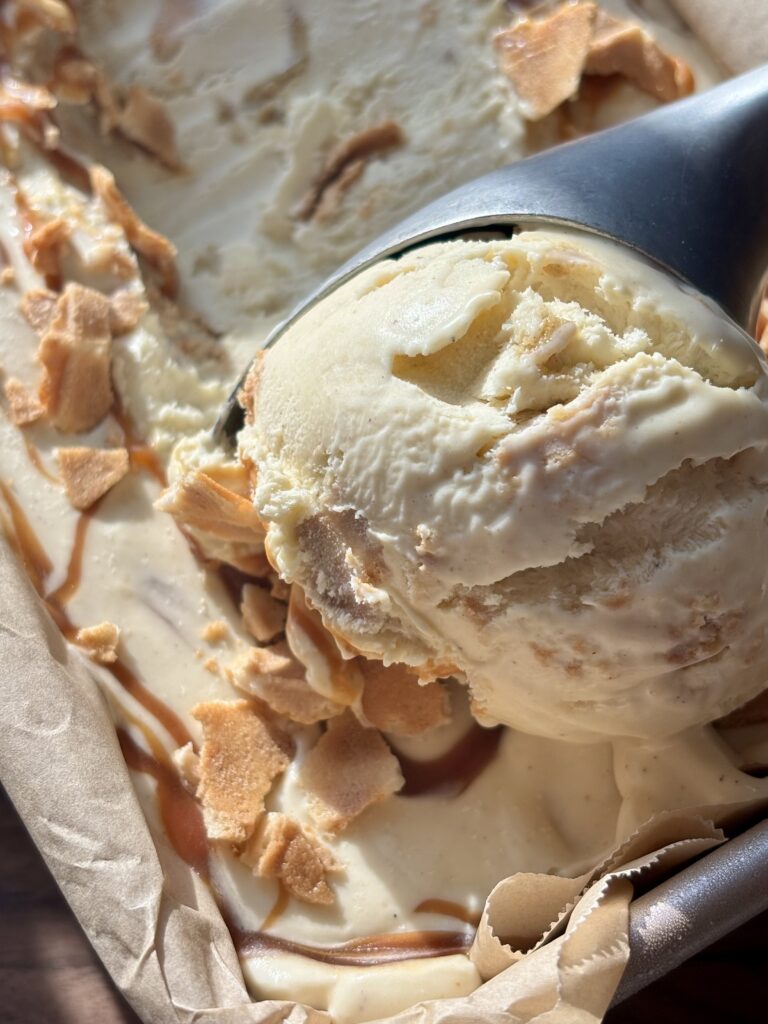
It’s ultra-creamy, velvety smooth, and loaded with rich pistachio flavor, gooey ribbons of salted caramel, and big crunchy pieces of waffle cone. Every bite of this ice cream tastes like you are at a fancy ice cream parlor, but this recipe couldn’t be easier to do right at home.
So whether you are craving something sweet and nostalgic, or just want a no fuss frozen dessert, this recipe delivers every time. With just a handful of ingredients and a few minutes of mixing, you’ll have a decadent homemade treat that freezes beautifully and scoops like a dream.
If you love pistachio, caramel, or classic ice cream truck cone vibes, then this is the flavor you’ll be making all year long.

Why you’ll love this recipe!
What ingredients do I need?
- Heavy cream (cold): Whips into stiff peaks to give the ice cream its signature silky, scoopable texture.
- Sweetened condensed milk: The base of all great no-churn ice creams — sweet, creamy, and stabilizing.
- Pistachio butter: Pure pistachio richness that adds deep, nutty flavor without dyes or extracts. However, you can also make your own by using my recipe here.
- Vanilla extract or vanilla bean paste: Adds warmth and boosts the flavor of the pistachio and caramel.
- Sea salt: Balances sweetness and intensifies the caramel + pistachio notes.
- Sea salt caramel: Creates dreamy, gooey swirls throughout the ice cream.
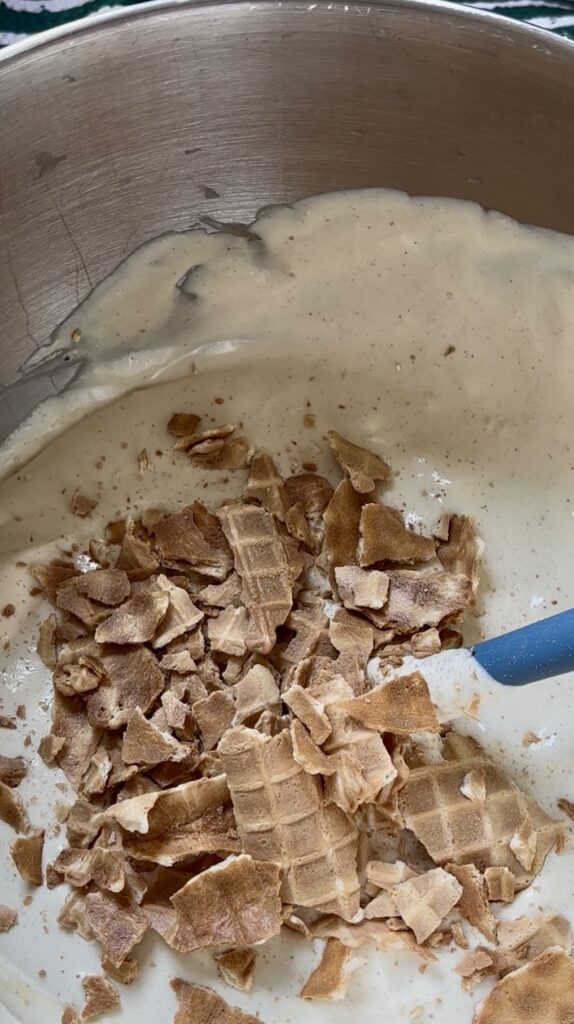
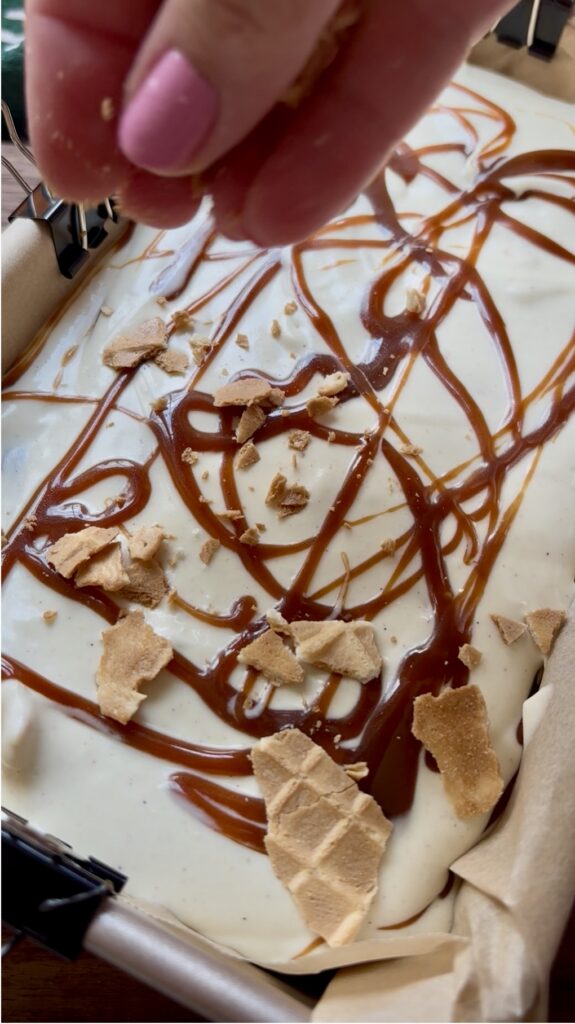
- Crushed waffle cones: Adds crunchy, nostalgic ice-cream-truck texture in every scoop.

Recipe Variations
- Pistachio Chocolate Chunk: Add chopped dark chocolate or mini chocolate chips.
- Pistachio Turtle: Add pecans, caramel, and chocolate drizzle.
- Salted Pistachio Crunch: Fold in chopped roasted pistachios for extra nuttiness.
- Caramel Swirl Coffee: Omit the pistachio butter and add 1–2 tsp espresso powder to the condensed milk mixture.
- Dairy-free: Use coconut cream and dairy-free condensed milk.
- Gluten-free: Omit the waffle cones or use gluten-free cones.
Pro Tips
- Chill your bowl and beaters! Using cold equipment helps the cream whip faster and stay more stable.
- Fold everything together, don’t stir. This keeps the mixture airy and prevents deflating the whipped cream.
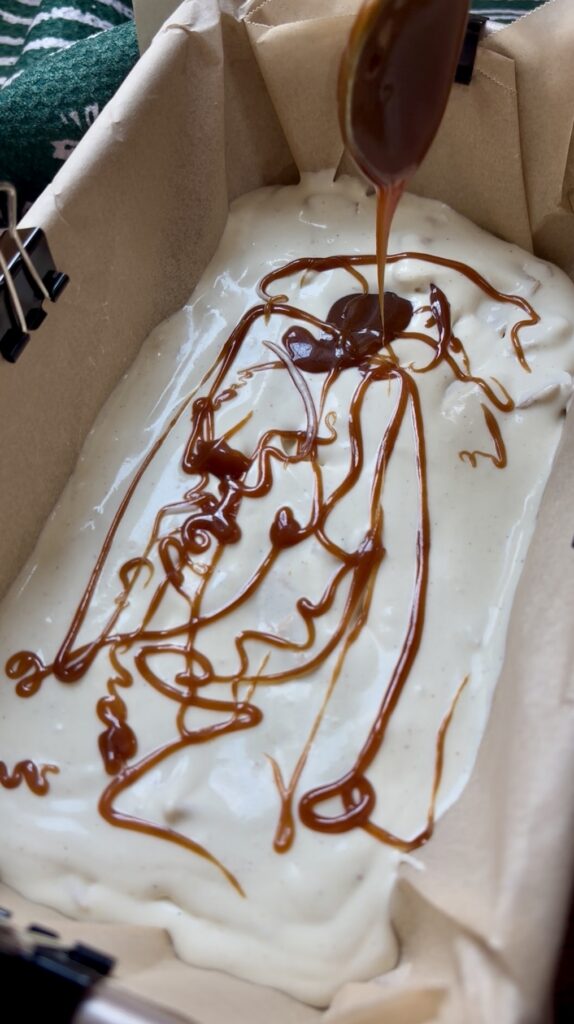
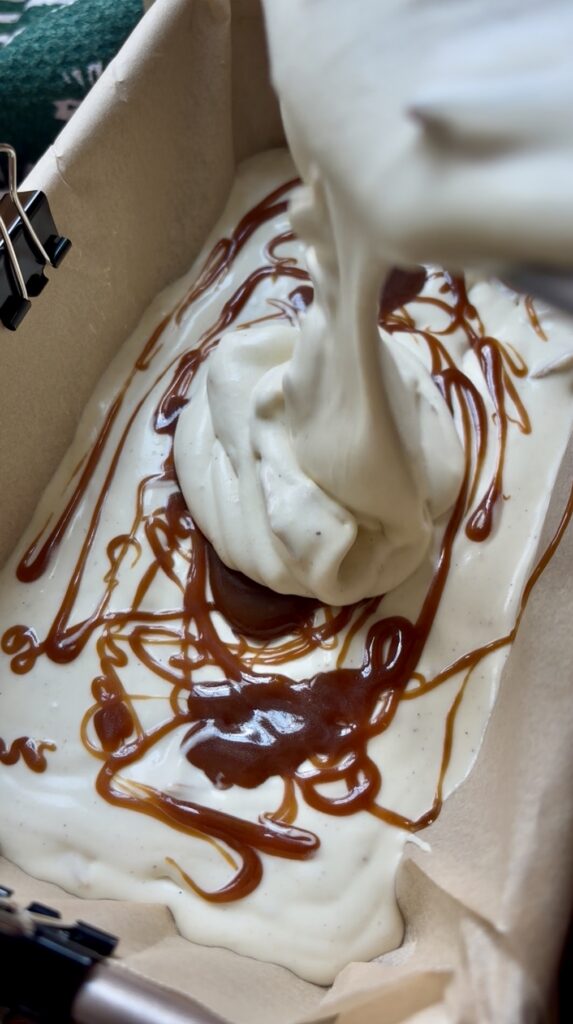
- Layer and drizzle in the caramel, don’t mix it in. This gives it those gorgeous, clean swirls instead of blending into the base.
- Freeze at least 6 hours, overnight is even better for firm, scoopable ice cream.
- Use a metal loaf pan. It gets colder faster and helps the ice cream set evenly.
Can I Substitute?
Yes! Like always though, any substitutions made to the recipe can result in a change in texture and/or flavor.
- Pistachio butter: Almond butter, cashew butter, or hazelnut butter (flavor will vary). Or just omit with a nut allergy.
- Vanilla bean paste: Regular vanilla extract works well.
- Sea salt caramel: Homemade caramel (like mine here), dulce de leche, or chocolate fudge sauce.
- Waffle cones: Sugar cones, pretzel pieces, or chopped shortbread cookies.
- Heavy cream: There’s no full substitute, but coconut cream can work for a dairy-free version with a slightly different texture.
Leftovers and Storage
- Storage: Keep tightly covered in a loaf pan or airtight freezer container for up to 2 weeks.
- Texture tip: If it becomes too firm, let the ice cream sit at room temp for 5–7 minutes before scooping.
- Avoid freezer burn: Press parchment directly on top before covering with foil or a lid.
- Make-ahead: This recipe thrives when made ahead, perfect for entertaining or holiday desserts.
But, I Still Have A Few Questions…
Do I need an ice cream machine for this recipe?
No! This is a completely no churn ice cream recipe, which means you do not need any special equipment or an ice cream maker. The combination of whipped heavy cream and sweetened condensed milk creates a smooth, creamy texture that mimics traditional churned ice cream.
Can I use shelled pistachios instead of pistachio butter?
Pistachio butter gives this ice cream its smooth texture and concentrated pistachio flavor, so regular pistachios are not a direct substitute. However, you can finely chop or pulse shelled pistachios and fold them into the ice cream for added crunch and texture. You can also make homemade pistachio butter if desired.
Can I double the recipe?
Absolutely! This recipe doubles very well. Simply use a larger freezer-safe container or divide the mixture between two loaf pans. Keep in mind that larger batches may need slightly longer freezing time.
Why is my ice cream icy instead of creamy?
Ice crystals usually happen when the whipped cream is under-whipped, the mixture is overmixed, or the ice cream is not stored tightly covered. Be sure to whip the cream to stiff peaks and use an airtight container to help maintain a creamy texture.
My caramel sinks to the bottom, is that normal?
Yes, this can happen naturally since caramel is heavier than the ice cream base. Layering the caramel throughout the mixture instead of fully mixing it in helps create beautiful swirls and keeps the flavor evenly distributed.
How long does no churn ice cream take to freeze?
Most no churn ice creams need at least 6–8 hours to fully set, but overnight is best for the creamiest texture and easiest scooping.
Can I add extra mix-ins?
Definitely! Chopped pistachios, crushed waffle cones, mini chocolate chips, or extra caramel swirls all work beautifully in this recipe.
How should I store homemade no churn ice cream?
Store tightly covered in a freezer-safe airtight container for up to 2 weeks for best texture and flavor. Pressing a layer of plastic wrap directly onto the surface can help prevent ice crystals.
Why is my ice cream too hard to scoop?
Homemade no churn ice cream freezes firmer than store-bought ice cream because it does not contain stabilizers. Let it sit at room temperature for 5–10 minutes before scooping for the best texture. I also love my ice cream scoop! It is amazing and uses the heat from your hand to help you scoop. And this one linked here, is the best out there!
Let’s engage!
Make sure to tag @thehomechefmomma on Instagram or Facebook, and leave a review or comment if you make these. I always get so excited to see your creations, variations of the recipe, and feedback! Just remember to be kind in your comments, there is still a person behind this screen! 🙂
No Churn Pistachio Caramel Cone Ice Cream
Ingredients
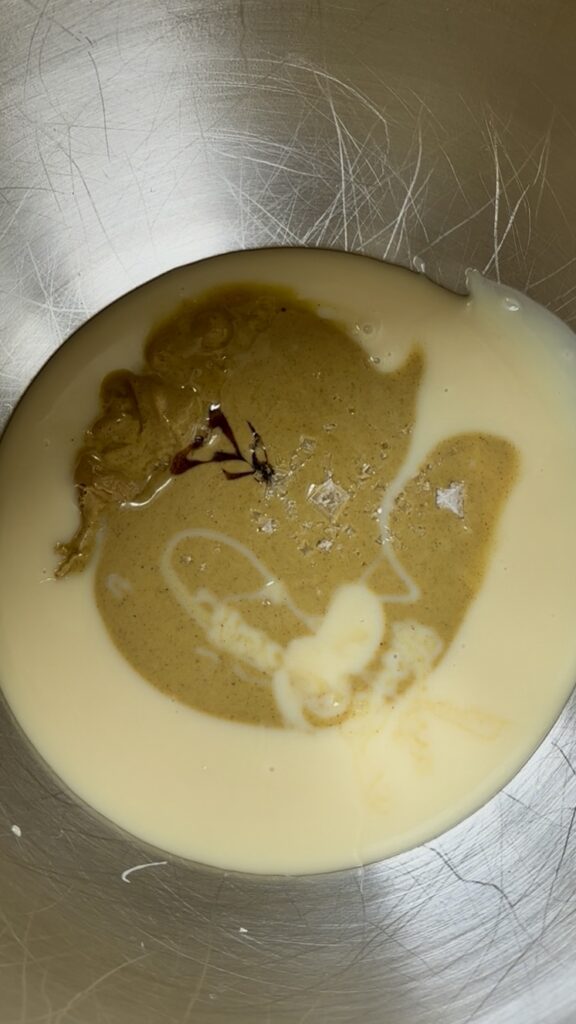
- 2 c. Heavy cream cold
- 14 oz sweetened condensed milk
- 4 oz pistachio butter
- 1 tsp vanilla bean paste or vanilla extract
- 1 tsp sea salt
- 1/2 c. Sea salt caramel your favorite or use my recipe!
- 3-4 Crushed waffle cones
Instructions
- Line a loaf pan with parchment paper and stick in the freezer to get cold.
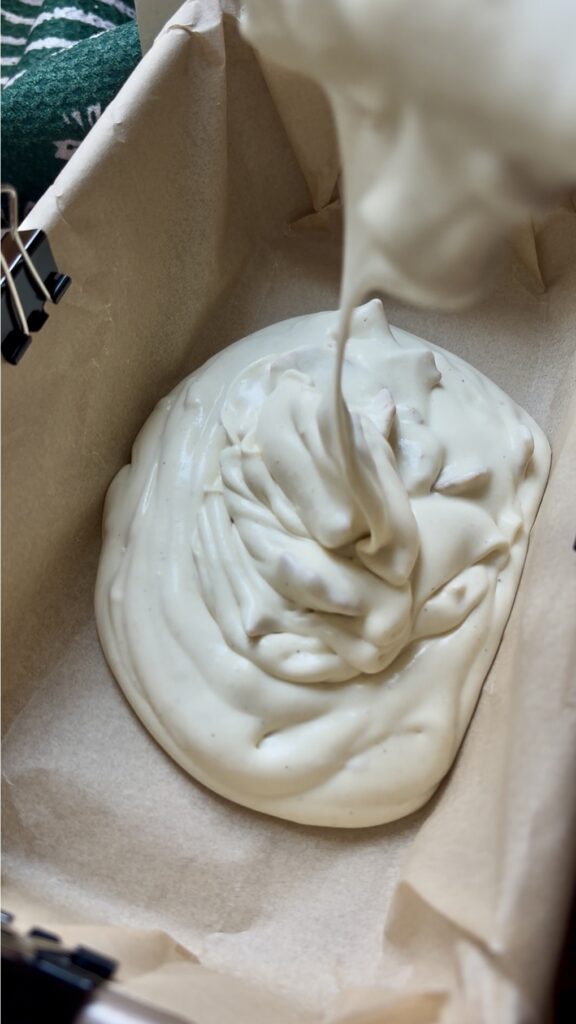
- In a large cold bowl, whisk together condensed milk, pistachio butter, vanilla, and salt.
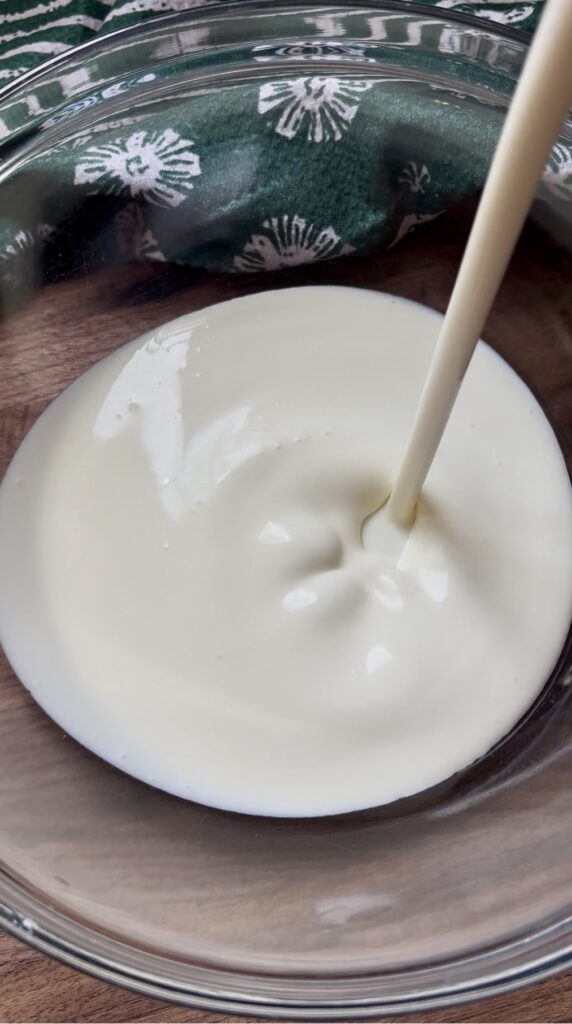
- In the bowl of a stand mixer, or using a hand mixer, whisk the heavy cream until stiff peaks form.
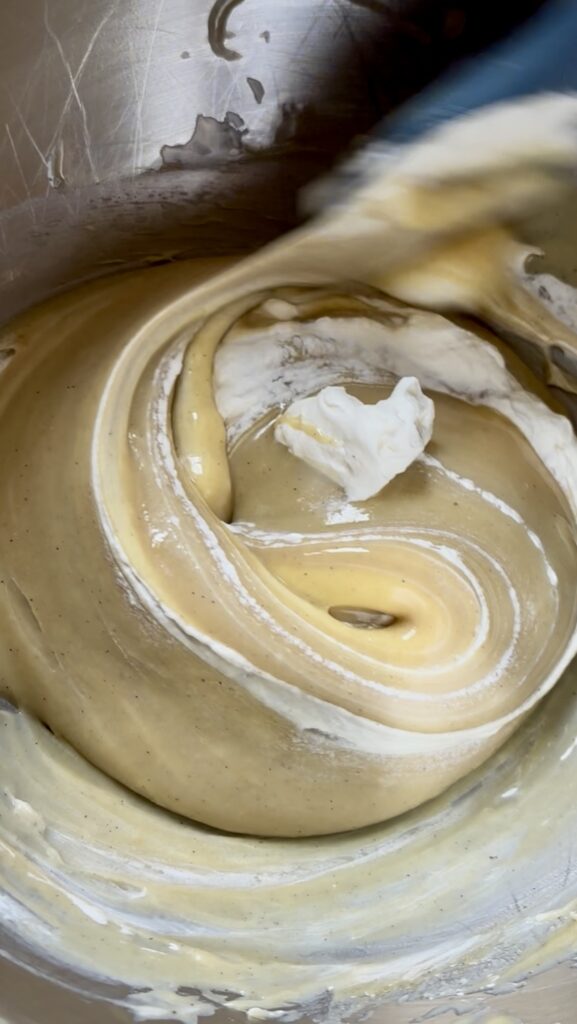
- Fold half of the whipped heavy cream into the condensed milk mix. Once incorporated, add the other half and fold in again.
- Fold in waffle cones.
- Remove loaf pan from freezer and scoop some of the cream mix into the bottom, drizzle with caramel. Repeat.
- Cover tightly and place in freezer for at least 6 hours.
No Churn Pistachio Ice Cream | No Churn Ice Cream Recipe | Pistachio Caramel Cone Ice Cream | Pistachio Desert Recipe | Easy Ice Cream Recipe | Waffle Cone Ice Cream | Pistachio Caramel Swirl | Ice Cream Recipe without Machine | Pistachio Cone Ice Cream | No Churn Pistachio Caramel Cone Ice Cream | Ice Cream Recipe | Dessert Recipe | Deserts | Frozen Dessert | Frozen Treat Recipes
Nutritional Content Disclaimer
I choose not to include nutritional information with my recipes, as these values can be calculated from the ingredients provided. With my background as a pediatric nurse practitioner and my own family experience with disordered eating, I understand how focusing on numbers can affect our relationship with food. My philosophy is that all foods have a place—sweet, savory, nourishing, or indulgent. I aim to share recipes that support a healthy, joyful approach to eating. My hope is that this space also encourages a balanced, healthy relationship with food for you and your family too.