
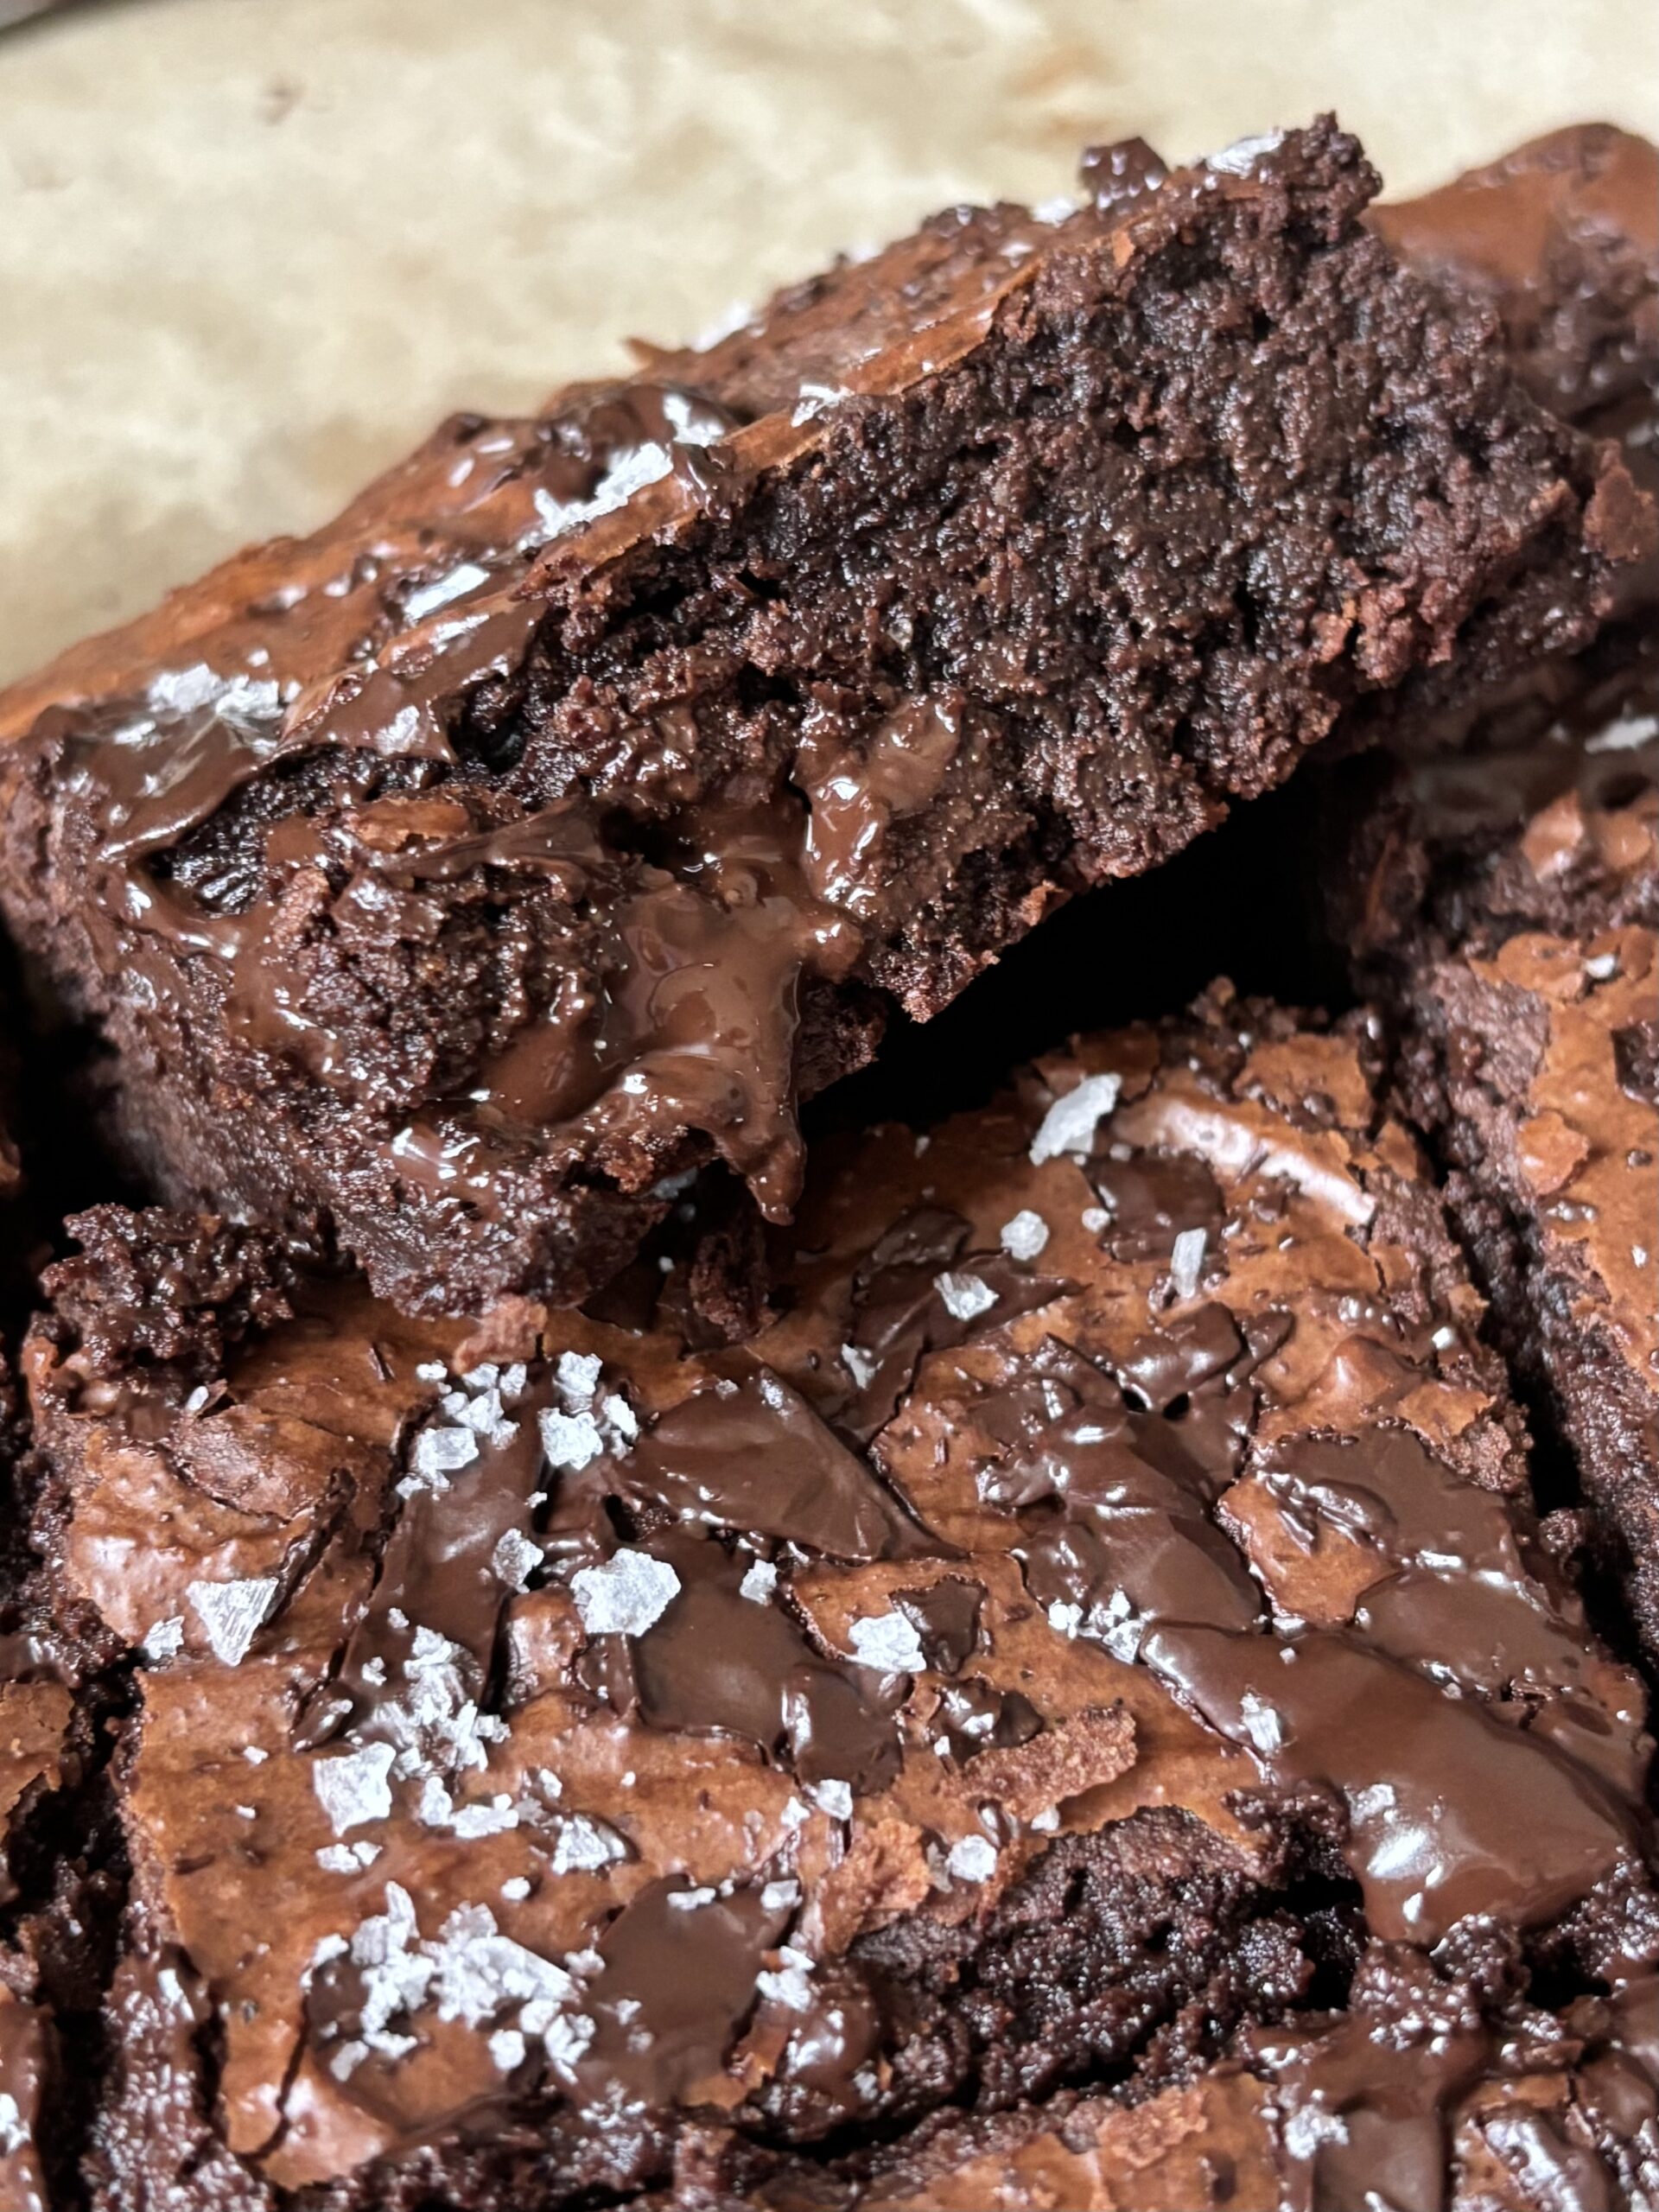
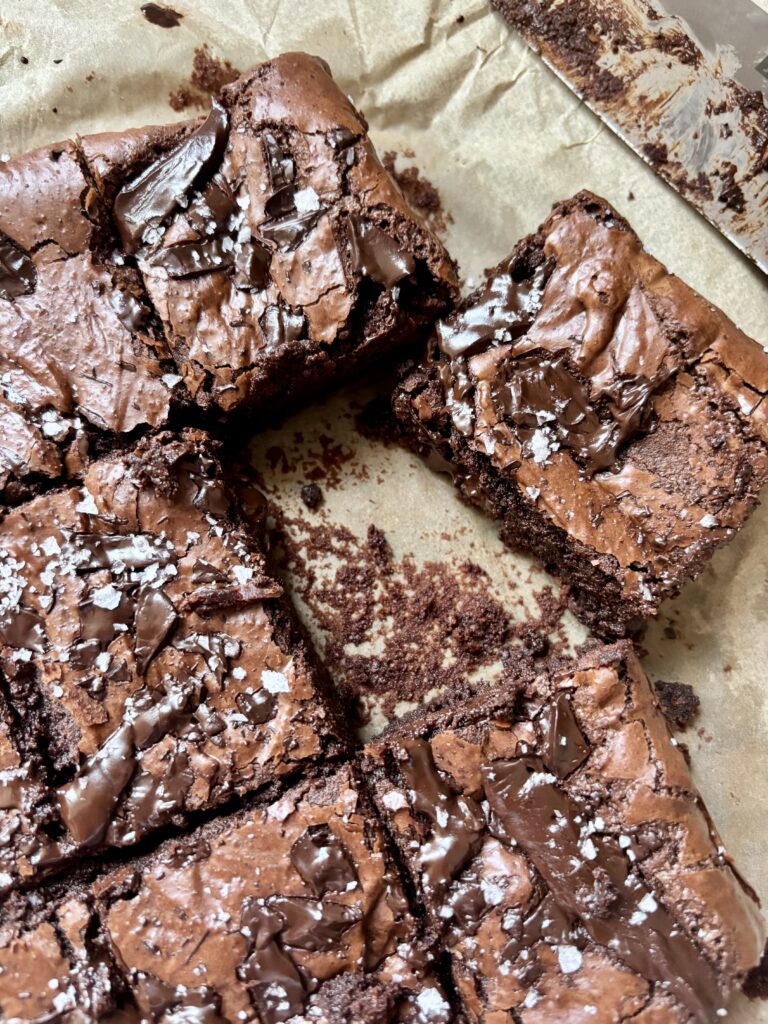
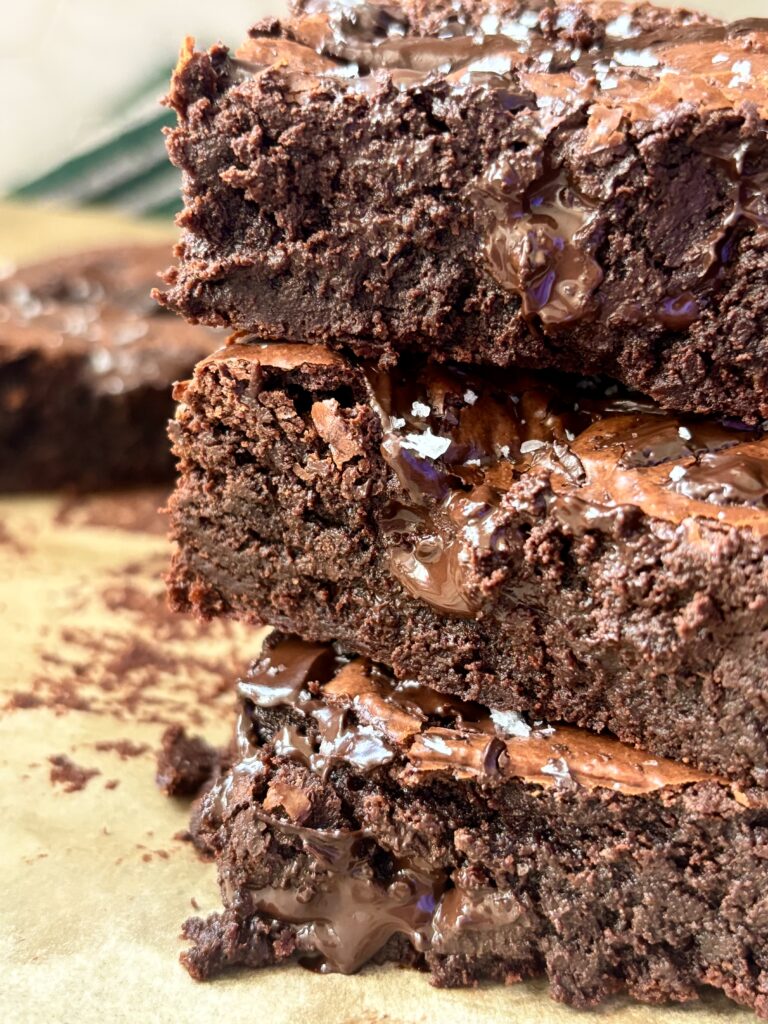
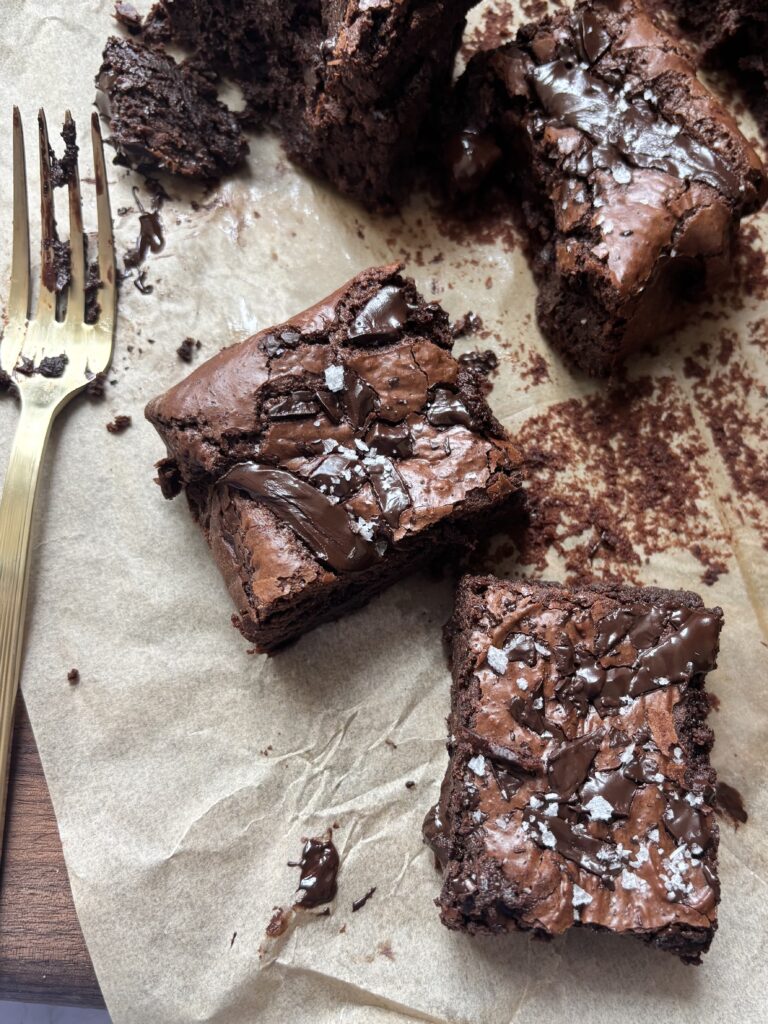
Meet the BEST Fudgy Dark Chocolate Brownies ever! Seriously, there is a reason these went viral and are still my most popular recipe on the website. This recipe is for those who love brownies with deep chocolate flavor, chewy edges, a rich fudgy center, and that gorgeous shiny, crackly top, these brownies are for you. This is not a cakey brownie recipe or a boxed-mix copycat. These brownies are thick, intensely chocolatey, and packed with gooey pockets of dark chocolate in every bite.
I spent two years testing and tweaking this recipe before I felt confident sharing it, and every detail has a purpose. The combination of cocoa powder, melted dark chocolate, chopped dark chocolate, butter, and an extra egg yolk creates an incredibly rich brownie with the fudgy texture I was after. There is no baking powder or baking soda in the recipe because I wanted a dense, chewy brownie rather than a cakey one.
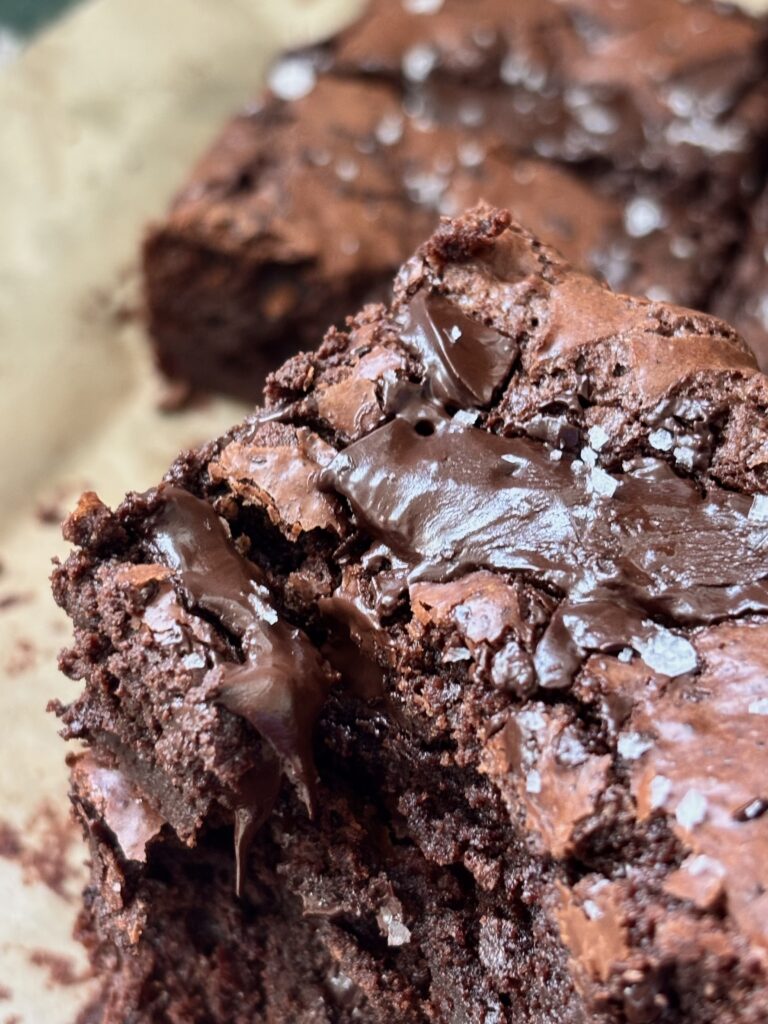
The recipe also uses a two-part sugar method that helps create the signature shiny, crackly brownie top. Heating part of the sugar with the butter and then whipping the remaining sugar with the eggs gives the batter a glossy texture and helps create that delicate crust on top while the center stays rich and fudgy.
These homemade brownies make an incredible everyday dessert, but they are also special enough for holidays, parties, bake sales, gifting, or whenever you need a serious chocolate fix. And because they come together with simple ingredients, you don’t need a boxed mix to make bakery-style brownies at home.
If you have been searching for the ultimate fudgy brownie recipe, then you are in the right place. Just don’t forget the flaky sea salt on top!
Why you’ll love this recipe!
What Makes These Brownies So Fudgy?
The fudgy texture comes from a combination of ingredients and techniques rather than one secret ingredient. Each part of the recipe works together to create that dense, gooey center.
- Melted dark chocolate gives the brownies a rich, intense chocolate flavor and contributes to their fudgy texture. Instead of relying solely on cocoa powder, this recipe uses both cocoa powder and real melted chocolate for a deeper chocolate experience.
- The extra egg yolk adds richness and fat without adding the extra liquid and structure that comes with another whole egg. This helps create a dense, chewy brownie rather than a light, cakey one.
- Butter contributes richness and keeps the brownies tender. Because this recipe doesn’t use a large amount of flour compared with the amount of fat and chocolate, the finished brownies stay wonderfully dense.
- Cocoa powder intensifies the chocolate flavor while adding enough dry structure to help the brownies hold together.
- The flour stays relatively low. Too much flour can push a brownie toward a cakier texture. This recipe uses just enough to give the brownies structure while allowing the chocolate, butter, and eggs to shine.
- There is no baking powder or baking soda. During testing, I found that adding chemical leaveners created a more cake-like texture. Since the goal was an ultra-fudgy brownie, I left them out.
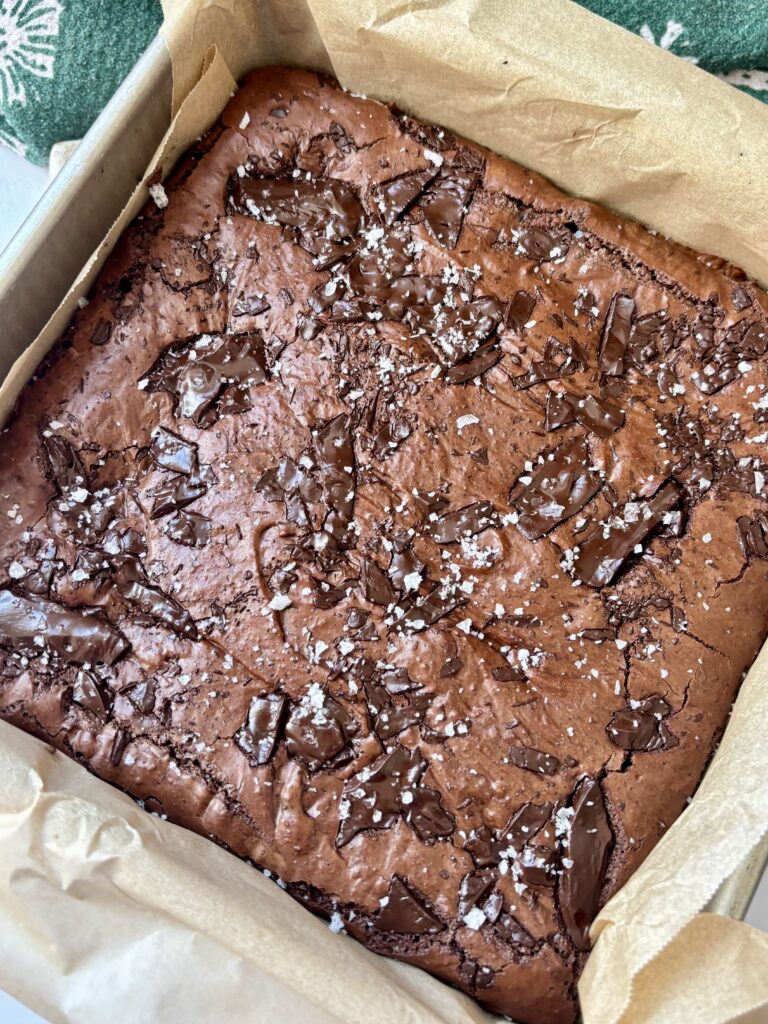
- Finally, don’t overbake them. The center should still have a slight jiggle when the brownies come out of the oven. They continue to set as they cool, so pulling them from the oven at the right time is essential for that soft, fudgy center.
What ingredients do I need?
- Unsalted butter: Butter provides richness and helps create the tender, fudgy texture. Heating it with part of the sugar also helps create the glossy batter that contributes to the crackly top.
- Granulated sugar: Sugar does more than sweeten the brownies. It contributes to the chewy texture and helps create the shiny, delicate crust on top. For that reason, I don’t recommend significantly reducing the sugar.
- Eggs and egg yolk: The eggs provide structure while helping create a rich, chewy texture. The extra egg yolk adds additional fat and richness, which helps keep the brownies dense and fudgy.
- Vanilla bean paste or vanilla extract: Vanilla rounds out the chocolate flavor and adds another layer of warmth to the brownies.
- Cocoa powder: Cocoa powder intensifies the chocolate flavor and adds structure without adding additional liquid.
- All-purpose flour: Flour gives the brownies enough structure to hold together while keeping the amount low enough for a fudgy rather than cakey texture.
- Espresso powder: Espresso powder is optional, but it enhances the depth of the chocolate flavor. It should not make the brownies taste like coffee when used in the small amount called for here.
- Sea salt: Salt balances the sweetness and brings out the flavor of the chocolate.
- Melted dark chocolate: This adds richness, moisture, and an extra layer of intense chocolate flavor to the batter.
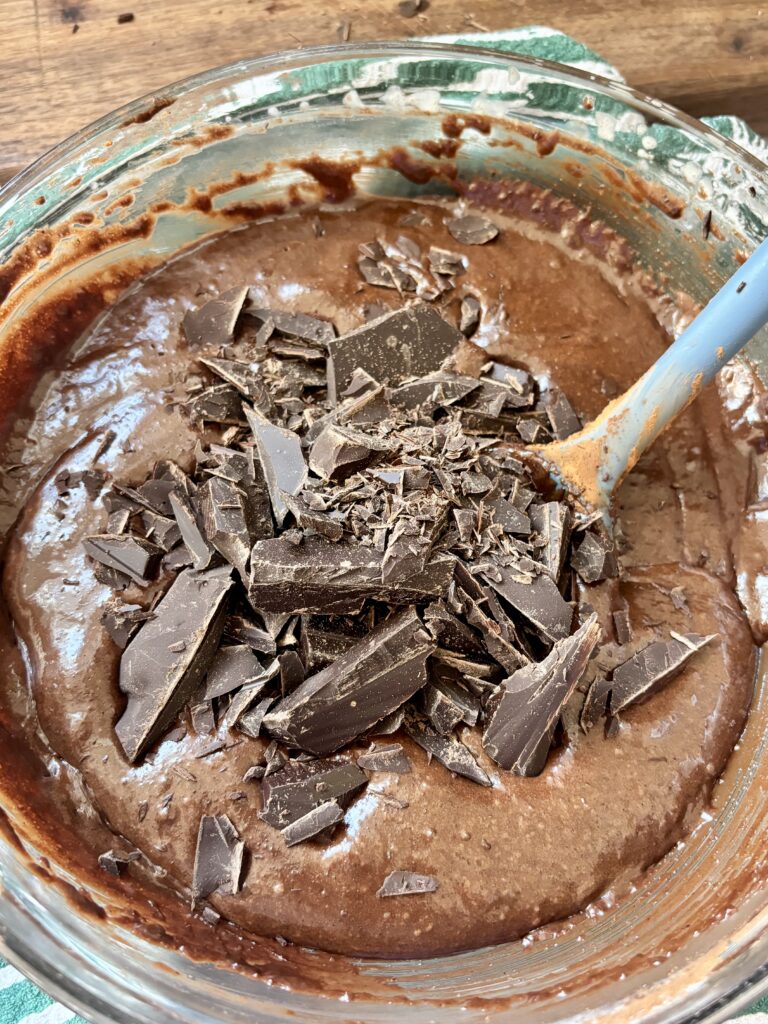
- Chopped dark chocolate: Chopped chocolate creates irregular pockets of melted chocolate throughout the brownies. I prefer chopped chocolate over chocolate chips because those larger pieces melt into delicious gooey pockets.
- Flaky sea salt: A final sprinkle of flaky sea salt adds a subtle crunch and balances the richness and sweetness of the brownies. Technically optional, but highly recommended!
Recipe Variations
- If it were up to me, I wouldn’t change a thing. But, there are some variations below if you want to be adventurous!
- Mocha Brownies: Increase the espresso powder to 1–2 teaspoons for a deeper mocha flavor. The espresso enhances the chocolate rather than making the brownies taste strongly like coffee.
- Peanut Butter Swirl Brownies: Dollop smooth peanut butter over the prepared batter and gently swirl it with a knife before baking.
- Nutty Dark Chocolate Brownies: Fold chopped walnuts, pecans, or almonds into the batter before transferring it to the pan.
- Mint Chocolate Brownies: Add a small amount of peppermint or mint extract to the batter, or fold in chopped chocolate-mint candies.
- Brown Butter Brownies: Brown the butter before using it in the recipe for a nutty, toasted flavor. Because this changes the moisture content slightly, this variation may produce a somewhat different texture.
Pro Tips
- Use good-quality chocolate. Chocolate makes up a significant portion of these brownies, so the quality really matters. I like to use dark chocolate around 72% cacao for a rich, deep chocolate flavor without making the brownies overwhelmingly bitter.
- Don’t skip the extra egg yolk. That additional yolk contributes richness and helps create the dense, fudgy texture that makes these brownies different from a cakey brownie.
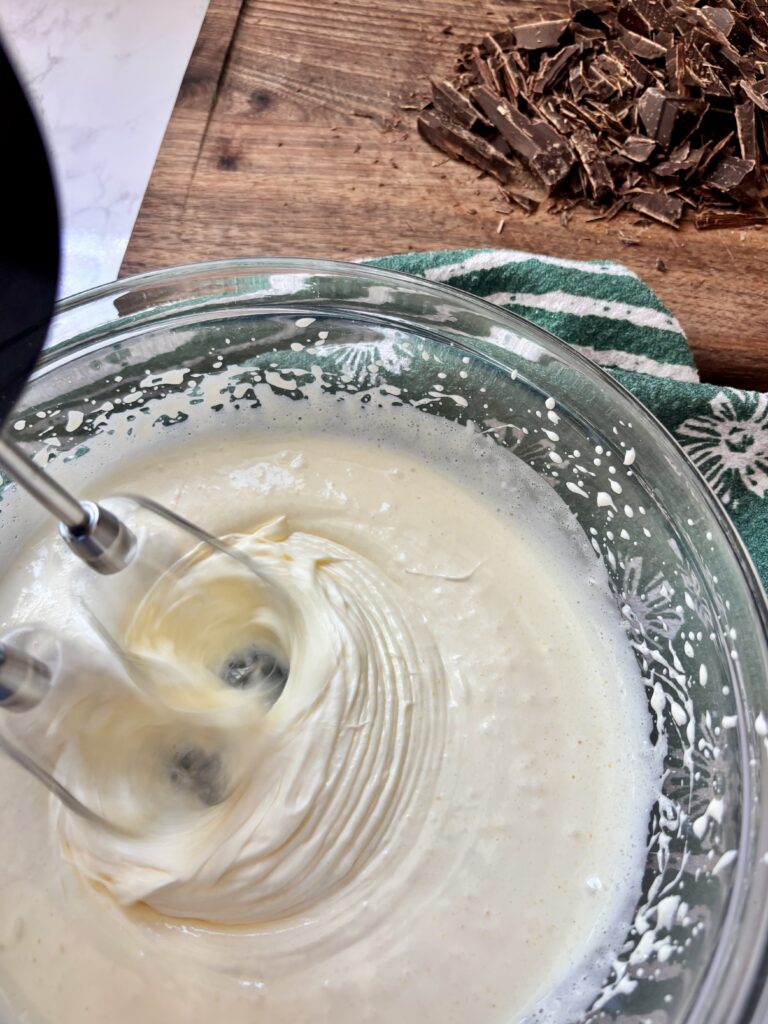
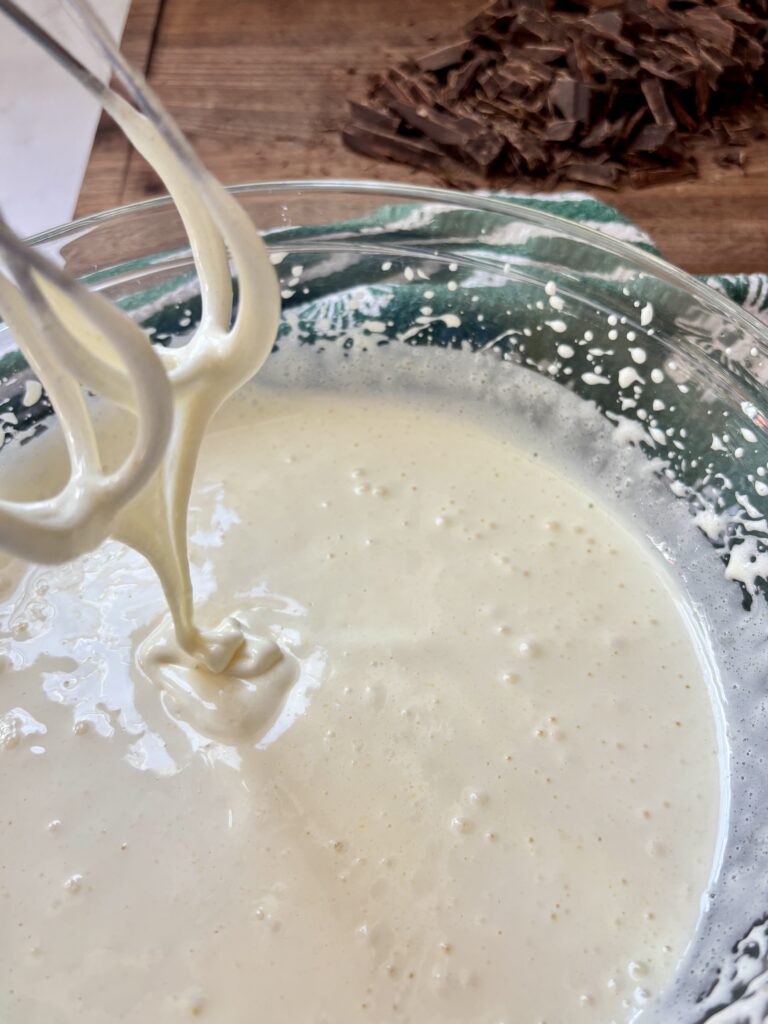
- Whip the eggs and sugar well. Beat the eggs, egg yolk, and sugar until the mixture becomes pale, thick, and creamy. I prefer to use a hand mixer for this step because it makes it easier to incorporate enough air and create the glossy mixture needed for the crackly top.
- t may be tempting to reduce the sugar, especially if you prefer less-sweet desserts, but don’t! The sugar plays an important role in both the texture and shiny crust. Reducing it can change the finished brownies.
- Don’t overmix the batter. Once you add the dry ingredients, mix only until everything is incorporated. Overmixing develops gluten and can make the brownies less tender and more cakey.
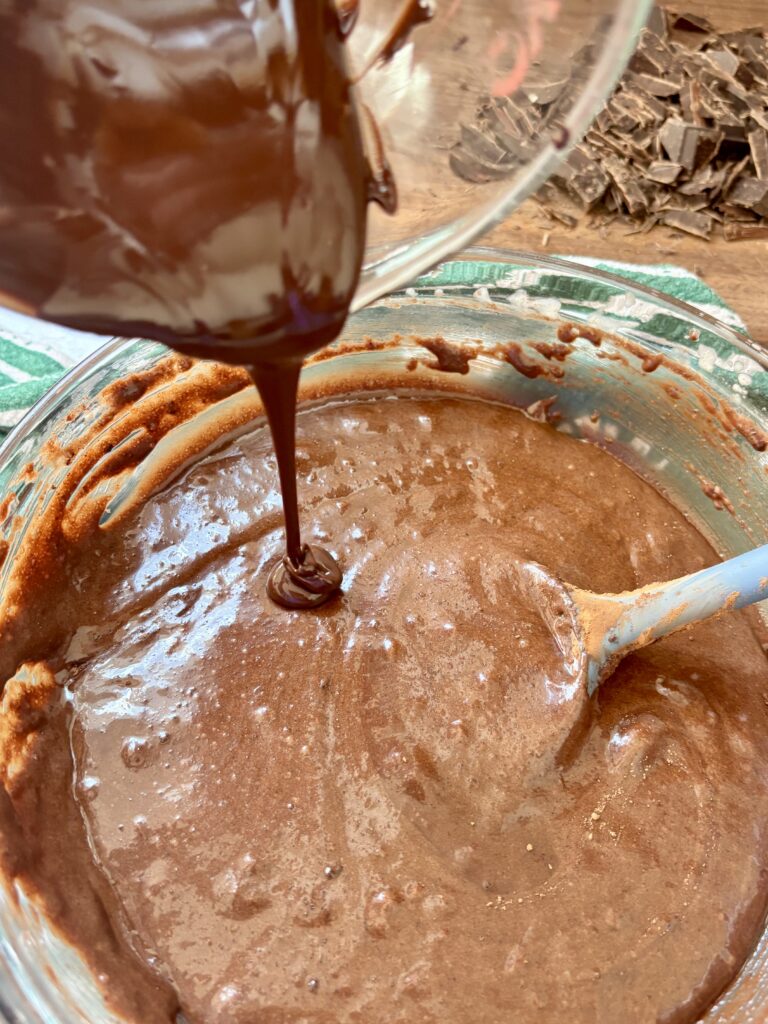
- Don’t forget the melted chocolate. The melted chocolate gets folded in after the dry ingredients. It adds a huge boost of chocolate flavor and helps create the rich, fudgy texture. If you aren’t sure how to melt the chocolate, check out my guide here.
- Watch the center, not just the clock. Ovens vary, so use the visual cues as your guide. The edges should look set, the top should be shiny and crackly, and the center should still have a slight jiggle.
- Let them cool completely. I know it is hard to wait, but this makes a huge difference. The brownies continue to set as they cool, and cutting them too soon can leave you with a messy, under-set center.
- Use parchment paper when baking. Leave an overhang on two sides of the pan so you can lift the entire brownie slab out once it has cooled. This makes slicing much easier.
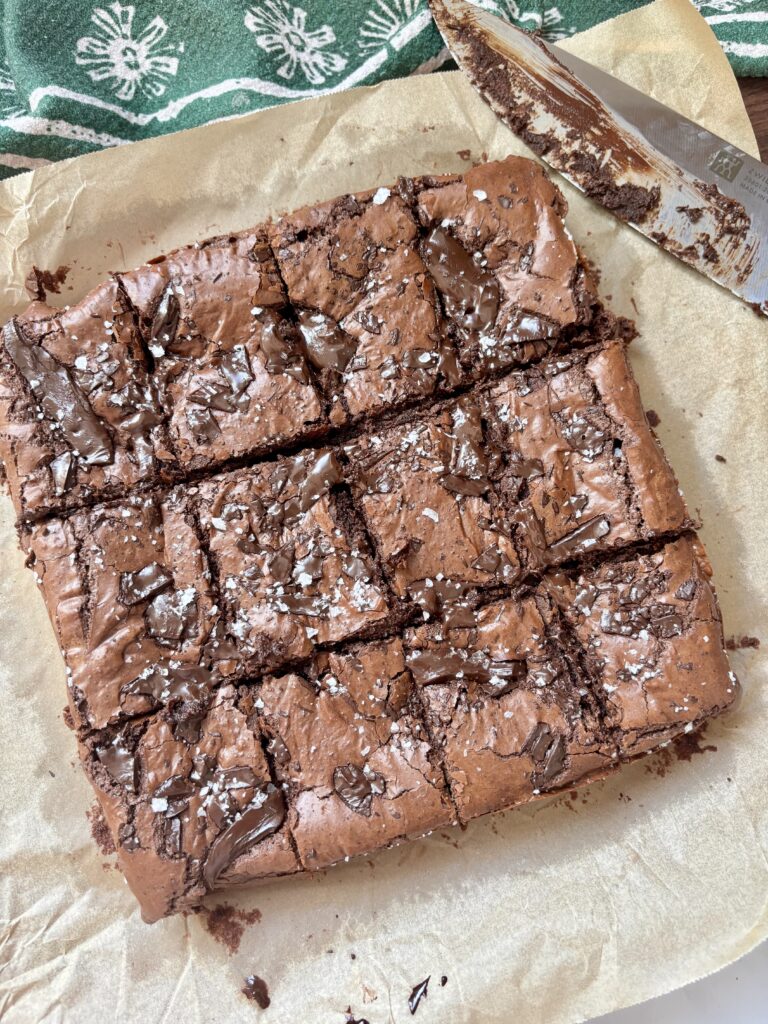
- For clean slices, chill first. If you want those picture-perfect bakery-style squares, let the brownies cool completely and then briefly chill them before slicing. Use a sharp knife and wipe it clean between cuts.
- ALWAYS ADD THE FLAKY SEA SALT! The little bit of salt on top cuts through the richness of the chocolate and makes every bite taste even more chocolatey.
Tips for That Signature Crackly, Shiny Top
- That delicate, shiny crust is one of my favorite things about these brownies, and a few specific steps help create it:
- Heat the butter and sugar together. The warm butter mixture helps dissolve some of the sugar and creates a glossy foundation for the batter.
- Whip the eggs and sugar until thick and glossy. This step is important. The eggs and sugar should become noticeably lighter, thicker, and creamy before you move on.
- Don’t be tempted to reduce the sugar. Sugar plays an important role in creating the thin, shiny crust that forms on top of the brownies.
- Use warm ingredients when called for. The warm butter and sugar mixture helps the sugar incorporate into the batter properly.
- Don’t overmix the batter once you add the flour. Mix just until the dry ingredients disappear. Excessive mixing can affect the texture and can make the brownies more cakey.
- Don’t overbake! A crackly top doesn’t mean the entire brownie should feel firm when it comes out of the oven. The edges should be set while the center still has a slight jiggle. The brownies will continue to set as they cool.
Can I Substitute?
Yes! Like always though, any substitutions made to the recipe can result in a change in texture and/or flavor.
- Dark chocolate: You can use semi-sweet chocolate chips or baking chocolate in place of the dark chocolate. Keep in mind that sweeter chocolate will produce sweeter brownies. For the richest flavor, I prefer dark chocolate around 70–75% cacao.
- Cocoa powder: Dutch-process cocoa powder works beautifully and gives the brownies a darker color and deep chocolate flavor. Natural cocoa powder can also work, although it may give the brownies a slightly different flavor and color.
- Granulated sugar: You can replace part of the granulated sugar with brown sugar for a slightly chewier texture and deeper flavor. I recommend replacing only part of the sugar rather than all of it because granulated sugar plays an important role in the shiny, crackly top.
- Espresso powder: The espresso powder is completely optional. Leave it out if you don’t have it. You can also use instant coffee granules if needed.
- Vanilla bean paste: Use vanilla extract in the same amount if that’s what you have on hand.
- Flaky sea salt: You can leave it off if you don’t have flaky sea salt, although I highly recommend it for the flavor contrast.
Dietary Substitutions
- Gluten Free: Use a 1:1 gluten free baking flour in place of the all purpose flour. For best results, choose a blend that contains xanthan gum to help maintain structure.
- Dairy Free: Replace the unsalted butter with a dairy free butter alternative. Use dairy free dark chocolate for both the melted and chopped chocolate, making sure it contains at least 70% cacao for richness.
- Vegan: Substitute the butter with a vegan butter and use dairy-free dark chocolate. Replace the eggs with a commercial egg replacer formulated for baking. Note that the brownies will be softer and less crackly than the original. You can also try replacing with 2 flax eggs (brownies will be slightly softer and less tall).
Leftovers and Storage
- Room temperature: Store completely cooled brownies in an airtight container at room temperature for up to 3–4 days. Keeping them tightly covered helps prevent them from drying out.
- Refrigerator: Store the brownies in an airtight container in the refrigerator for up to 1 week. Refrigeration makes the brownies firmer and even denser, which some people love. Let them sit at room temperature for a few minutes before serving, or warm them briefly if you prefer a softer texture.
- Freezer: Freeze brownies for up to 2–3 months. For the best results, cut them into individual portions and wrap each brownie tightly in plastic wrap or freezer-safe wrapping before placing them in a freezer-safe container or bag.
- To thaw: Let individual brownies thaw at room temperature. You can also microwave a brownie for about 10–15 seconds to bring back that warm, gooey texture.
- For the best texture: If you’re making these brownies ahead for an event, I actually recommend making them the day before. They have time to cool completely and the texture becomes even more rich and fudgy overnight.
But, I Still Have A Few Questions…
Why are these brownies so fudgy?
The fudgy texture comes from the combination of melted dark chocolate, cocoa powder, butter, an extra egg yolk, and a relatively small amount of flour. The recipe also skips baking powder and baking soda, which keeps the brownies dense rather than cakey.
Why don’t these brownies use baking powder or baking soda?
I tested versions with chemical leaveners and found that they pushed the brownies toward a more cake-like texture. Since I wanted an ultra-fudgy brownie, I left them out.
Why is there an extra egg yolk in this recipe?
The extra yolk adds richness and fat, which helps create a dense, chewy, fudgy texture without adding the additional liquid and structure that comes from another whole egg.
Can I leave out the espresso powder?
Yes. Espresso powder is completely optional. It enhances the depth of the chocolate flavor but should not make the brownies taste like coffee.
Can I use instant coffee instead of espresso powder?
Yes. Instant coffee granules can work as a substitute. Use a small amount because the purpose is to enhance the chocolate rather than create a strong coffee flavor.
Can I use chocolate chips instead of chopped dark chocolate?
Yes. Chocolate chips will work, but chopped chocolate creates larger, irregular pockets of melted chocolate throughout the brownies. That’s one reason I prefer chopped chocolate for this recipe.
Can I use milk chocolate instead of dark chocolate?
Yes, but expect sweeter brownies. Milk chocolate contains more sugar and less cocoa than dark chocolate, so it will change the flavor and overall sweetness.
What percentage of dark chocolate works best?
I prefer chocolate around 72% cacao because it gives the brownies a rich, intense chocolate flavor without becoming too bitter. Chocolate in the 70–75% range is a good place to start.
Can I use Dutch-process cocoa powder?
Yes. Dutch-process cocoa gives the brownies a darker color and deeper chocolate flavor. Natural cocoa powder can also work.
Can I reduce the sugar?
I don’t recommend significantly reducing the sugar. Sugar contributes to sweetness, but it also affects the texture and helps create the shiny, crackly top.
Can I replace some of the white sugar with brown sugar?
Yes. Replacing part of the granulated sugar with brown sugar can give the brownies a slightly chewier texture and deeper flavor. However, changing the sugar ratio may also affect the crackly top.
Why do you heat the butter and sugar together?
Heating the butter and sugar helps dissolve some of the sugar and creates a glossy mixture. This contributes to the texture and helps with the shiny crust on top.
Why do I need to whip the eggs and sugar?
Whipping the eggs and sugar until thick and pale helps create the structure and glossy batter needed for the brownies’ signature texture and crackly top.
Why do I add the melted chocolate after the dry ingredients?
Adding the melted chocolate toward the end helps keep the batter thick and glossy while adding an intense chocolate flavor and extra richness.
How do I know when fudgy brownies are done?
Look for set edges, a shiny and crackly top, and a center that still has a slight jiggle. The center should not look completely liquid, but it shouldn’t feel firm either. The brownies continue to set as they cool.
Why are my brownies cakey instead of fudgy?
Overbaking and overmixing can both affect the texture. Too much flour can also make brownies cakier. Make sure you measure the flour accurately, mix only until incorporated, and remove the brownies while the center still has a slight jiggle.
Why are my brownies dry?
The most common issue is overbaking. Start checking the brownies toward the lower end of the recommended baking time. They should have set edges and a slightly soft center when they come out of the oven.
Why did my brownies sink in the middle?
A slight amount of settling can happen as fudgy brownies cool. If the center is significantly sunken, they may have been underbaked or the batter may have been mixed differently than intended. Make sure the eggs and sugar are whipped properly and bake until the edges are set and the center has only a slight jiggle.
Why don’t my brownies have a shiny top?
The shiny crust depends on several factors, including the sugar, the egg-and-sugar mixture, and the mixing process. Make sure you whip the eggs and sugar until thick and glossy, don’t significantly reduce the sugar, and avoid overmixing once you add the flour.
Can I make these brownies in a 9×13-inch pan?
Yes. Double the recipe for a 9×13-inch pan. Keep the oven temperature at 325°F and begin checking for doneness around 40 minutes. Because ovens and pans vary, use the visual cues rather than relying only on the clock.
Can I use a 7×7-inch pan?
You can, but the brownies will be thicker. A smaller pan will likely require additional baking time, so start checking after the original baking time and continue baking as needed until the edges are set and the center is slightly soft rather than liquid.
Can I make these brownies ahead of time?
Absolutely. These brownies are excellent the next day. Making them ahead gives the brownies time to cool completely and allows the texture to fully set.
How do I get clean brownie slices?
Let the brownies cool completely before slicing. For especially clean edges, chill them first, then use a sharp knife and wipe the blade clean between cuts.
Can I freeze these brownies?
Yes. Cut the cooled brownies into individual portions, wrap them tightly, and freeze for up to 2–3 months.
How do I make brownies extra gooey?
The best way is to avoid overbaking them. Pull them from the oven when the edges are set and the center still has a slight jiggle. They will firm up as they cool.
Can I make these brownies without the melted chocolate?
I recommend following the recipe as written because the melted chocolate contributes significantly to the flavor and texture. If you need to make the recipe without it, the ingredient balance will change and I have not tested that version enough to guarantee the same result.
Can I make these gluten-free?
Yes. Use a 1:1 gluten-free flour blend designed for baking. Because different gluten-free blends behave differently, the final texture may vary slightly.
Do I have to use flaky sea salt?
No, but I highly recommend it. The salt balances the sweetness and intensifies the chocolate flavor while adding a subtle crunchy contrast.
Why are my brownies still soft after coming out of the oven?
That’s exactly what you want with a fudgy brownie. The brownies continue to cook and set from residual heat after you remove them from the oven. Let them cool completely before deciding whether they are too soft.
Can I double this recipe?
Yes. Double all ingredients and bake the batter in a 9×13-inch pan. The larger batch will take longer to bake, so start checking around 40 minutes and use the visual cues for doneness.
Other Recipes You’ll Love
Let’s engage!
Make sure to tag @thehomechefmomma on Instagram or Facebook, and leave a review or comment if you make these. I always get so excited to see your creations, variations of the recipe, and feedback! Just remember to be kind in your comments, there is still a person behind this screen! 🙂
Fudgy Dark Chocolate Brownies
Ingredients
- 12 tbsp unsalted butter
- 1 1/2 c. Granulated sugar divided
- 2 eggs
- 1 egg yolk
- 2 tsp vanilla bean paste or vanilla extract
- 2/3 c. cocoa powder
- 2/3 c. all purpose flour
- ½ teaspoon espresso powder
- 1/2 tsp sea salt
- 2 oz melted dark chocolate
- 6 oz roughly chopped dark chocolate 72% cacao
- Flaky sea salt
Instructions
- Preheat the oven to 325°F. Line an 8×8-inch baking pan with parchment paper, leaving an overhang for easy removal.
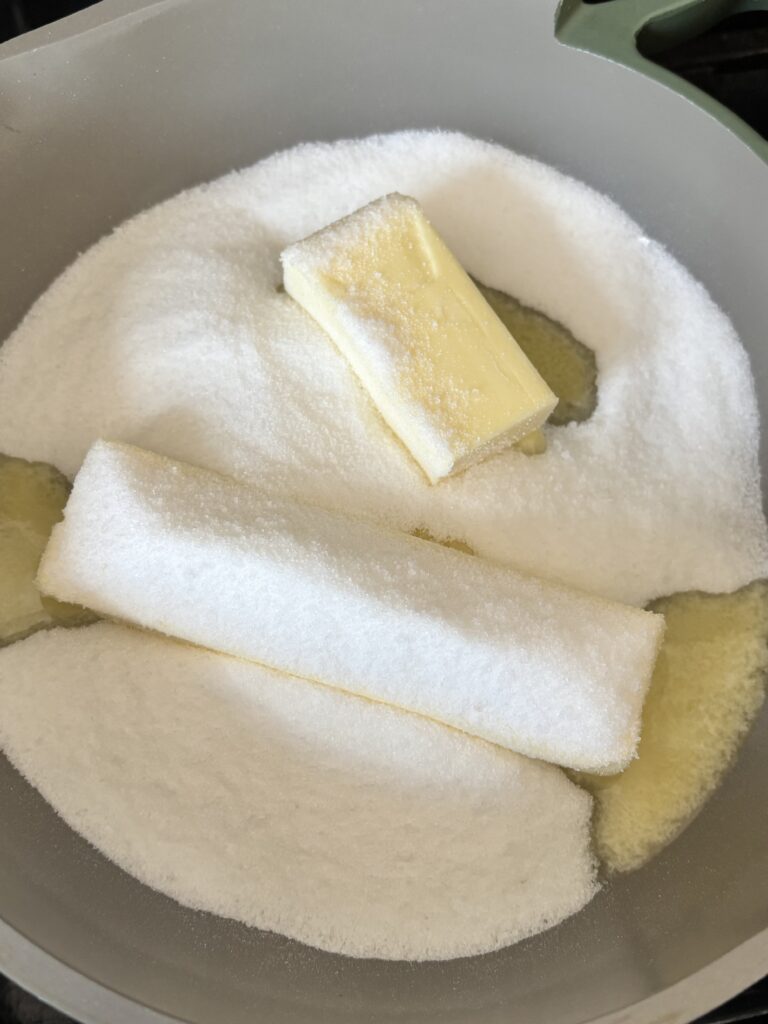
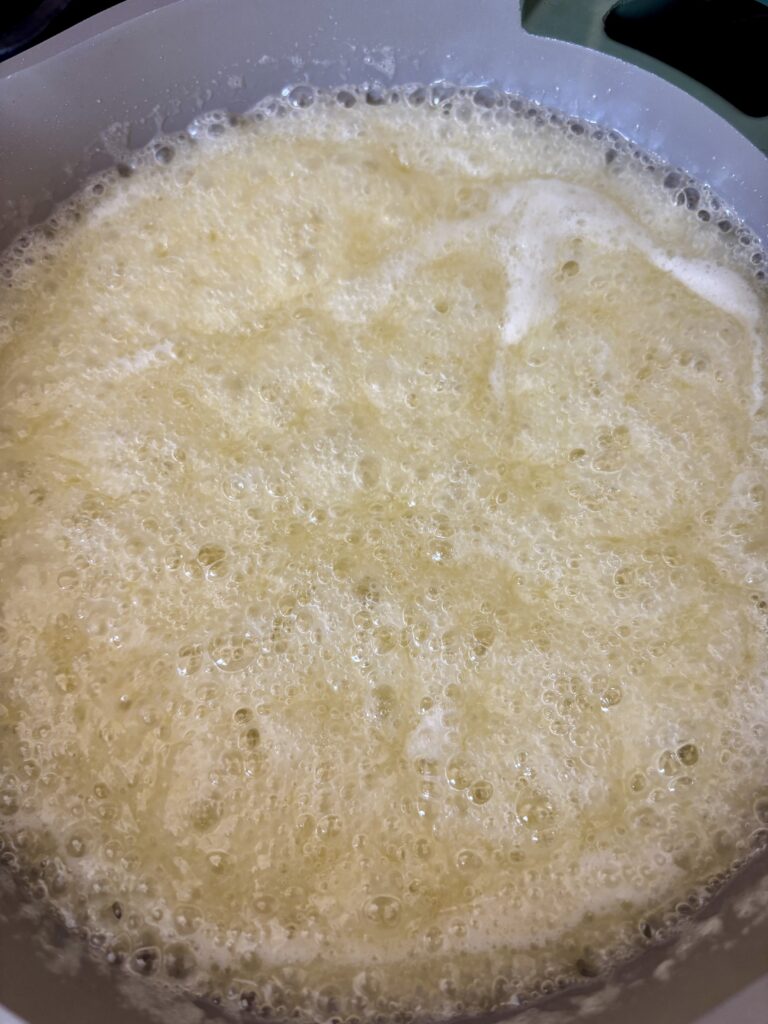
- In a small saucepan over medium-low heat, melt the butter with ¾ cup of the sugar, stirring until glossy and smooth. Bring to a gentle simmer and cook for 1–2 minutes, until syrupy and mostly dissolved. Remove from heat and let cool slightly.
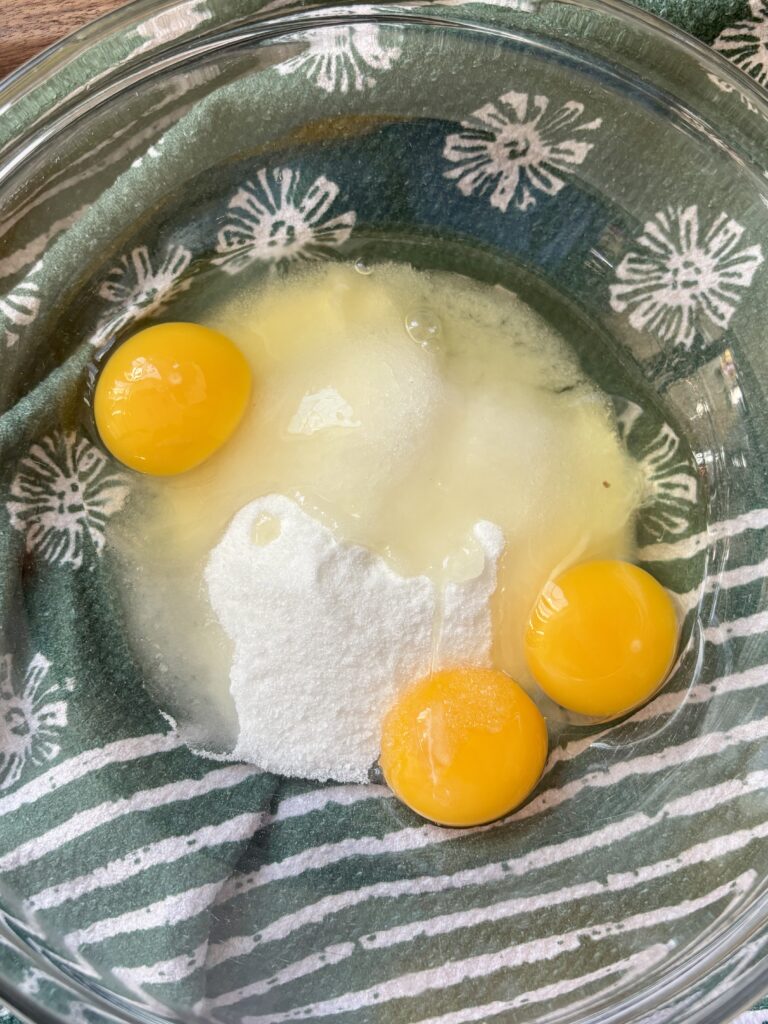
- In a large bowl, beat the eggs, egg yolk, and remaining ¾ cup sugar until thick, pale, and creamy, about 2–3 minutes. Beat in the vanilla.
- With the mixer on low, slowly stream in the warm butter mixture and mix until fully combined and glossy.
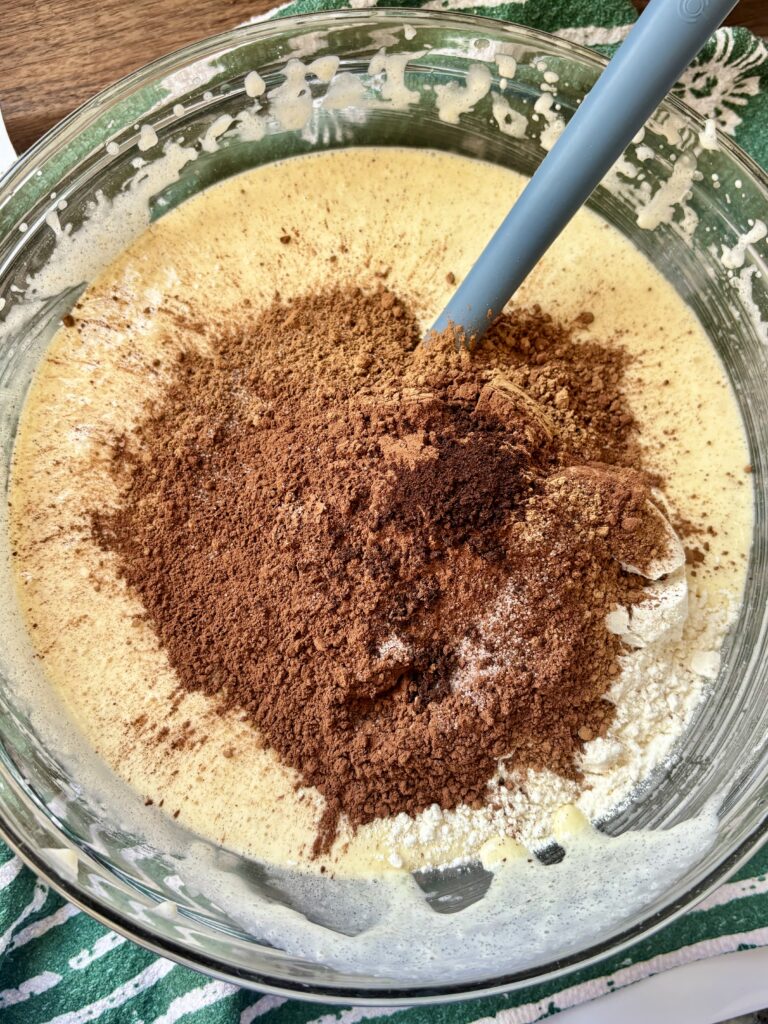
- Sift in the cocoa powder, flour, espresso powder (if using), and salt, mixing just until incorporated.
- Fold in the melted chocolate, then gently fold in the chopped dark chocolate.
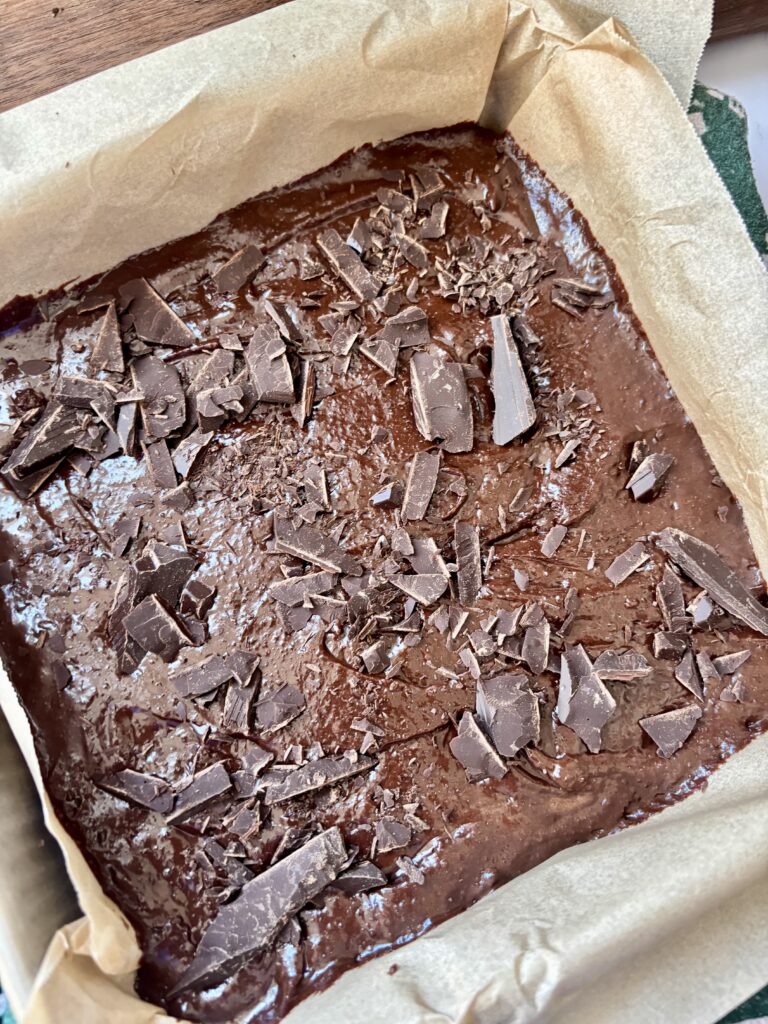
- Spread the batter evenly into the prepared pan and smooth the top. Sprinkle with additional chocolate if desired. Bake for 35–40 minutes, until the top is shiny and crackly, the edges are set, and the center still has a slight jiggle.
- Remove from the oven, sprinkle with flaky sea salt if using, and cool completely before slicing for the fudgiest texture and clean edges.
Notes
If you only remember a few things, make them these:
- Use good-quality dark chocolate around 70–75% cacao.
- Whip the eggs and sugar until thick and glossy.
- Don’t overmix once you add the flour.
- Don’t overbake. The center should still have a slight jiggle.
- Let the brownies cool completely before slicing.
- Finish with flaky sea salt. Trust me on this one!
Fudgy Dark Chocolate Brownies | Chewy Brownies Recipe | Shiny Top Brownies | Best Fudgy Brownies | Best Brownie Recipe | Chocolate Lovers Recipes | Rich Chocolate Brownies | Best Dark Chocolate Brownies | Gooey Brownies | Homemade Brownies | Brownie Recipe | Gooey Brownie Recipe | Dessert | Chocolate Dessert | Holiday Desserts

So wonderful! Thank you for sharing this beautiful recipe – and very much gratitude for the thoughtful and helpful nutritional disclaimer … this approach is so kind, and as someone with an e/d too I was so moved by your wisdom and supportive choice. With all good wishes. Jacqs 💐💐💐
I am so glad this resonated with you. I hope you find my little food blog a welcoming and safe space. This comment means so much to me. <3
I love all the tips and extra info you provided! These look amazing!
You are so welcome! They are delicious! I hope you love them!
In the recipe you didn’t say hen to add the 2 oz. of dark chocolate. [email protected]
Hello! You add the melted chocolate during the “Fold in Chocolate” section. I hope this helps!
What if I have a 9×13 pan only? Do I double the recipe? And if so how long do I put it in the oven for?
Hi! Yes, I would double the recipe and extend the baking time by a few minutes. Just watch it closer towards the end!
how much butter 12tbsp is in grams?
Hello! It is around 170g. 🙂
Can you leave the expresso out?
Yes you can! Espresso powder in this recipe just helps to enhance the chocolate, but it isn’t necessary!
I use decaf instant coffee when espresso is called for, tastes great and no caffeine…🥰
I love that substitution!
Do you have to have melted chocolate? All I have is baking powder Coco. Can’t afford to buy anything else.
Hello! I have not made them without the melted chocolate. However in theory it can be done! The general rule of thumb is that you replace each ounce of melted chocolate with 3 tbsp of cocoa powder and 1 tbsp of butter. So for this recipe replace the 2 oz melted dark chocolate with: 6 tablespoons cocoa powder and 2 tablespoons butter. I hope this helps!
This looks amazing. I know you said not to replace the sugar…but I was wondering if you had any experience using coconut sugar?
Hello! Thank you. They are SO good. I have not used coconut sugar all that much. But from my understanding it is okay to replace 1:1. It will most likely change the texture and flavor a some however.
OMG these are dangerously good and sinful!! Edges are ever so slightly chewy and the inside….soft and fudgy. They need to be under lock and key LOL! Thank you for sharing this amazing recipe!
Oh my gosh! What an amazing review! Thank you so much.
I just made it! It’s outstanding! Got a good chew to it inspite of just using the white sugar. There was a lovely shine and a good crust that formed.
The next time on I will try substituting half the sugar with brown sugar for that extra chew. However the family found it a bit too sweet inspite of reducing the quantity of chocolate by 25%, so will lighten the amount of sugar a bit by maybe 1/4 cup or 1/8th cup?
I’m so glad you loved it! I love a sweet, fudgy brownie myself!:)
Its a great recipe found the equal amounts of flour and cocoa powder interesting
Glad you liked the recipe. The ratio is perfection for this!
Does the recipe not require baking powder or baking soda?
Hello! It does not! When I was doing all my testing, I found that adding it gave it a texture like cake and I was going for FUDGY. The version without them won out. 🙂
is the one egg yolk necessary? thanks
Hello! Yes, it is necessary in my opinion. The extra egg yolk adds extra richness and fat, which helps make brownies denser and fudgier. Which is exactly what I was going for. 🙂
Hi the brownies look so yummy . Just wanted to check is there any detailed video of the brownie preparation
Hello! Thank you so much. I spent years perfecting this one! Unfortunately, I don’t have a detailed video at this time. I hope you still try the recipe anyways. 🙂
The brownies look so tempting I will be trying them this Christmas . I was bit confused for the 2oz of melted chocolate should I add butter to melt the chocolate ? If so what’s the quantity ?
Hi! You most definitely have to try this! You do not have to add butter to the chocolate, you melt the chocolate on its own and then add it to the batter towards the end. I have a post on how to melt the chocolate too if you need it! I can’t want to know what you think 🙂
Yes sure want to know how to melt the chocolate as well
I updated my whole Brownie post last night to make it more clear and included a direct link to the How to Melt Chocolate page. I hope this helps!
Thank u so much 😊
Hi I am not able to get 8*8 inch tin but found one 7*7 is that ok to use for the recipe and suggestion how should I go about
Hello! Yes, a 7×7″ pan can work, but it will be a thicker brownie, which would likely require a longer baking time. You may need to add anywhere from 5-15 minutes to the bake time, but start checking for doneness around the extra 5 minutes mark. You will know it is done when the edges are set and the middle is slightly soft (not liquid). I would also make sure to let the brownies cool completely before cutting to help them set better.
These were amazinggggg highly recommend 💕💕
Thank you so much! I’m so glad you loved them 🙂
I made these and they turned out soooo delicious!! These are the BEST brownies I have ever made and eaten! I even posted a video of them on my instagram @paiges.sweets417 !!!
Thank you so much! What an amazing review! Thank you for sharing it with your community as well!
What does this measurememt mean?
▢1 1/2 c. Granulated sugar divided
2/3 c. cocoa powder
▢2/3 c. all purpose flour
1 and 1/2 cup granulated sugar, divided
2/3 cup cocoa powder
2/3 cup all purpose flour
can i add melted milk chocolate instead of dark chocolate?
Yes! It may be a little sweeter than the traditional because milk chocolate has more sugar added to it!
Came here from your recipe reel on Instagram. Loved the detailed explanation and every extra info related to it. Just one question, can this be made in a microwave oven instead? If so, what would be the change in recipe and duration in oven?
Hi! I’m so glad you like this recipe! Question, are you talking about a traditional microwave or a convection oven?
Sorry I’ve made a mistake about the typo, it’s really late here and am trying to whip something to satisfy my late night fudgy craving.
No worries! 🙂 I hope you enjoyed them!
Unbelievably delicious… These are so thick and rich. I’ve never made from-scratch brownies before and these were easier than expected. I doubled the recipe to “makes 24” for a 9×13 and they turned out perfect.
Yay! What an unbelievable great review! There is nothing quite like a homemade brownie!!
Tried this last day. Did it without an oven but the recipe kept its perfection! Today I am again trying this because just once wasn’t enough for us! Amazing and thank you so much.
Yay! I’m so glad you enjoyed them. It’s so hard to stop eating these!
Would you mind to use metric measurements when you post a recipe, please? Thx
I will keep that in mind. Currently I do not use metric, one day I may. Until then, you are welcome to convert the measurements and enjoy the recipe! -Jenn
One of the best brownie recipes I’ve ever made!
Thank you, thank you! This means so much to me! 🙂
question, can I use a shot of espresso instead of espresso powder? if so when would I add it?
Hello! I haven’t tried it, but you can probably do that! You would have to adjust for the added liquid though, I would try removing about 1 tbsp of the butter. Let me know how it turns out!
Could you please share what the flour, butter, sugar and cocoa will be in gms /ounces. Thanks 🙂
I hope you enjoy this recipe!
12 tbsp unsalted butter — 170 g (6 oz)
1½ cups granulated sugar, divided — 300 g (10.6 oz)
2 large eggs — 100 g (3.5 oz), without shells
1 egg yolk — 18 g (0.6 oz)
2 tsp vanilla bean paste or vanilla extract — 10 g (0.35 oz)
⅔ cup cocoa powder — 57 g (2 oz)
⅔ cup all-purpose flour — 83 g (2.9 oz)
½ tsp espresso powder — 1 g (0.04 oz)
½ tsp sea salt — 3 g (0.1 oz)
2 oz melted dark chocolate — 57 g (2 oz)
6 oz roughly chopped dark chocolate, 72% cacao — 170 g (6 oz)
Flaky sea salt — for topping, to taste