
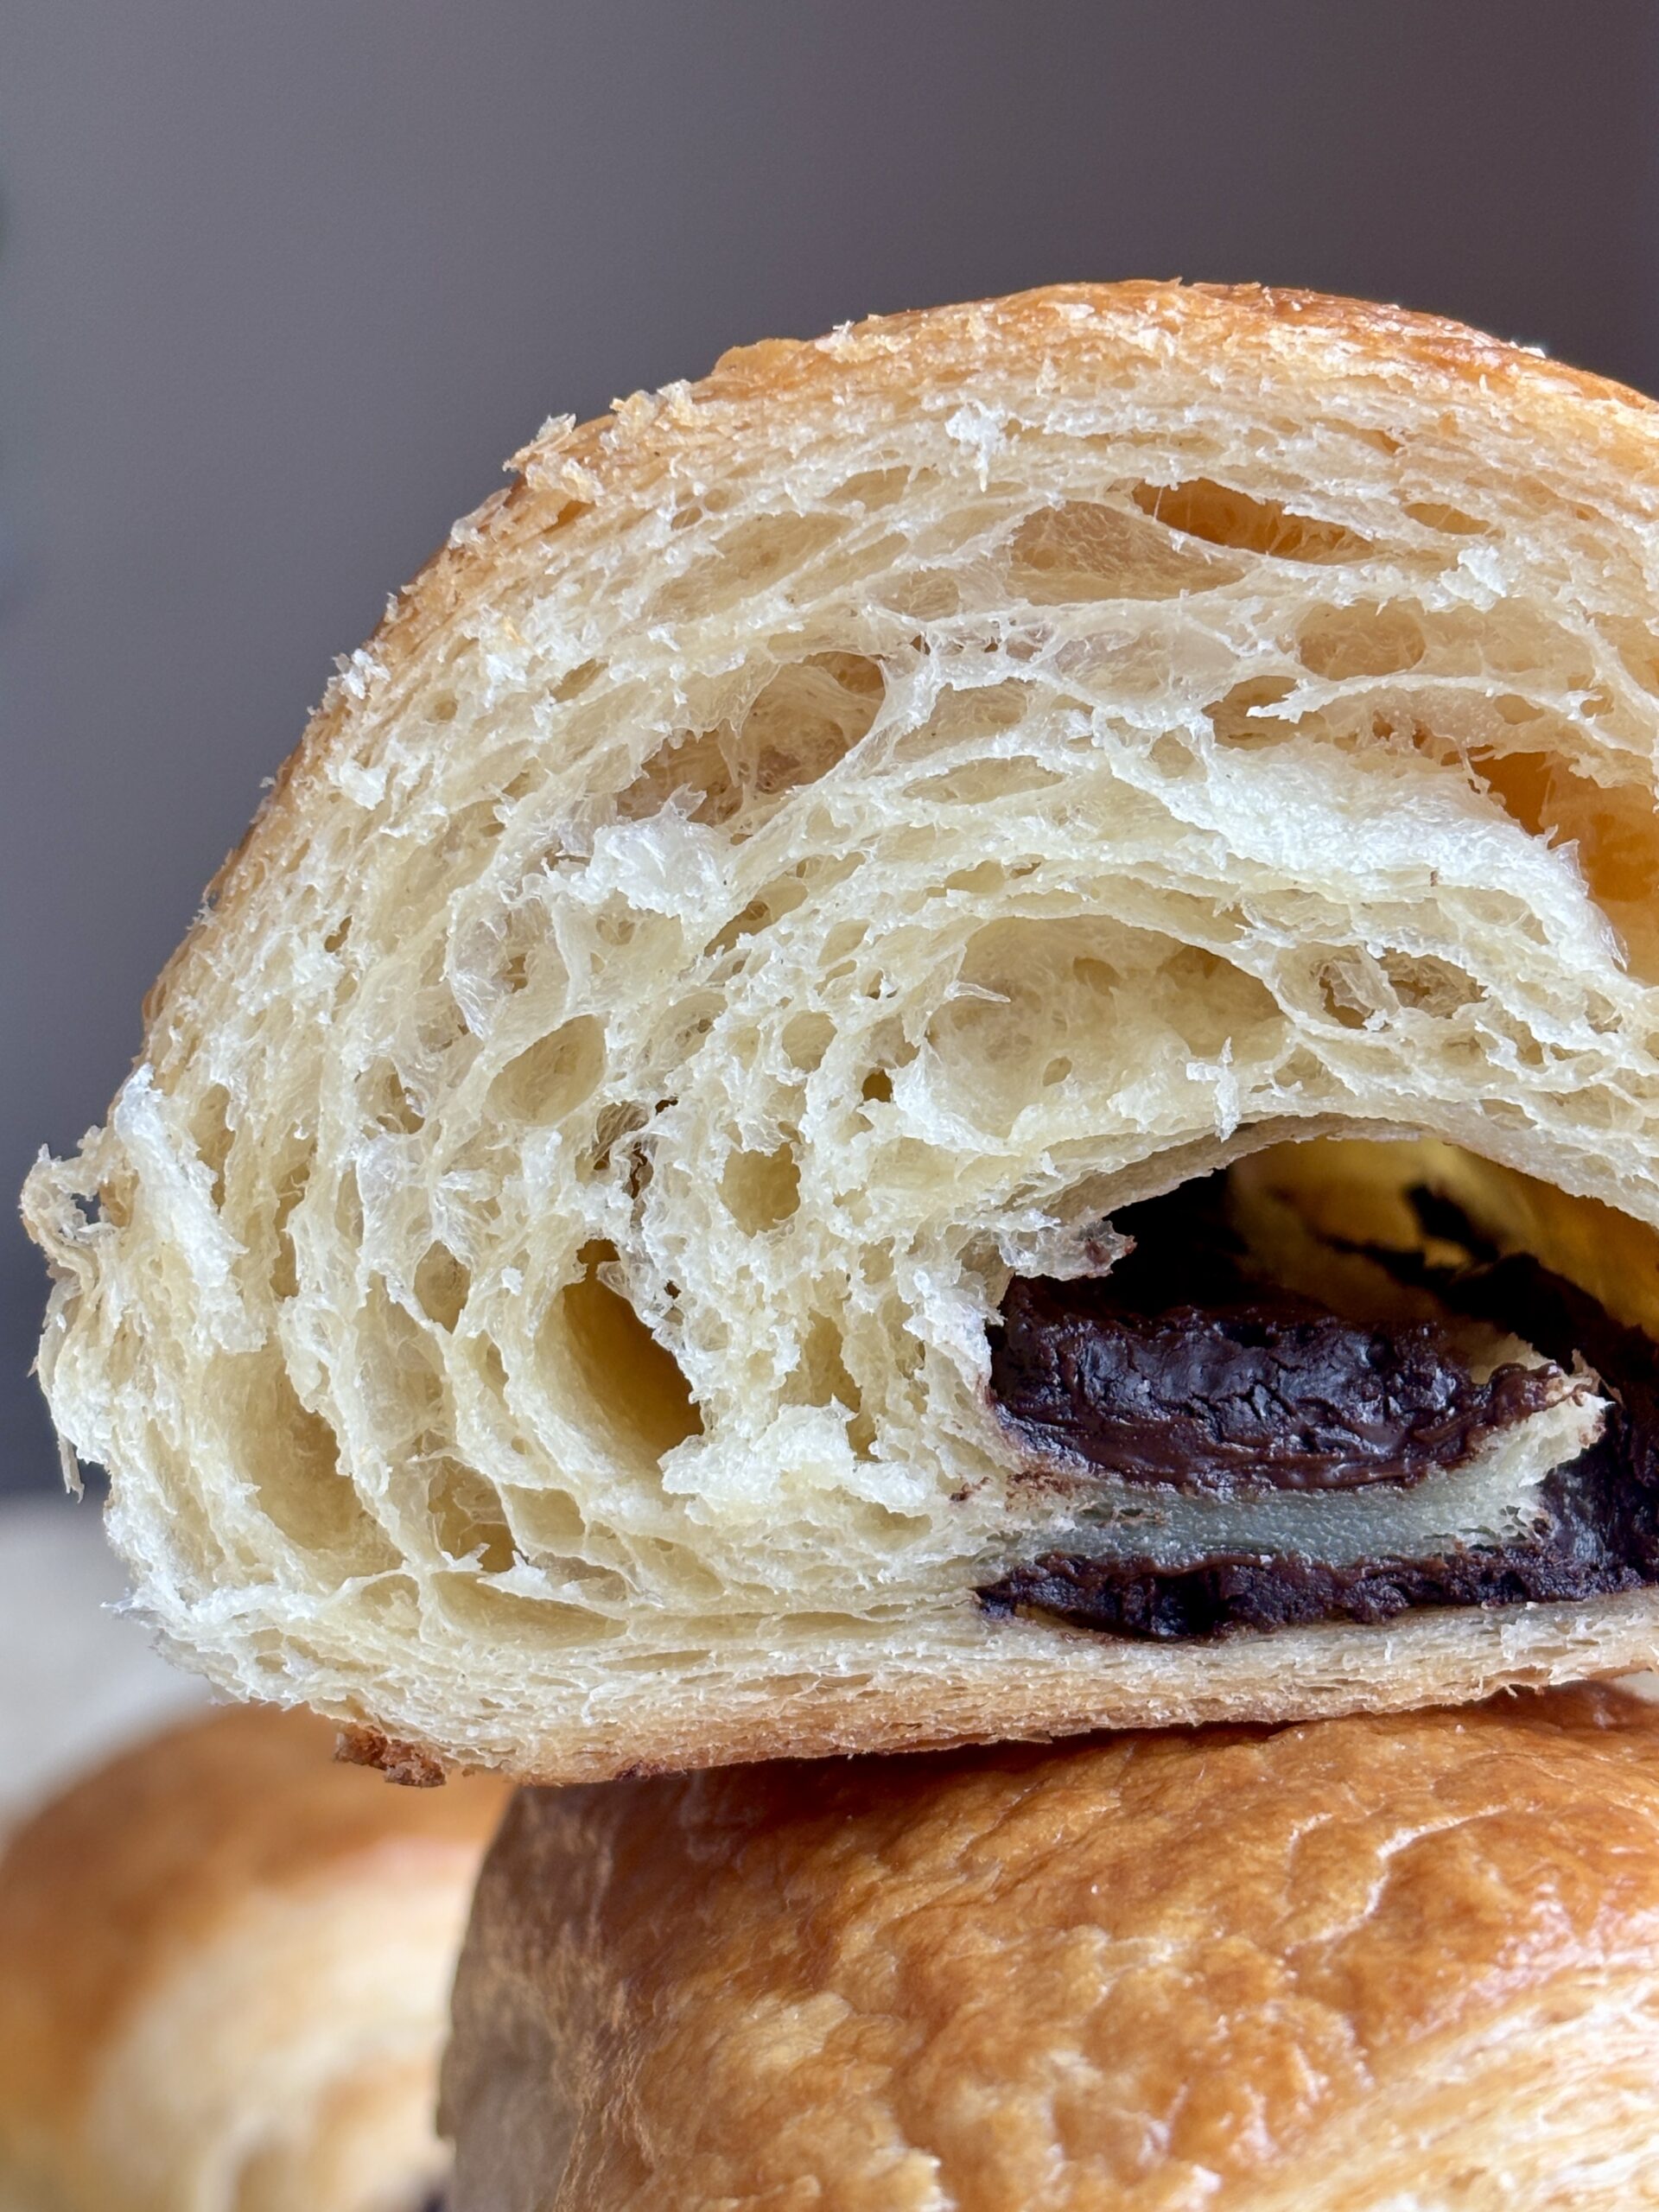
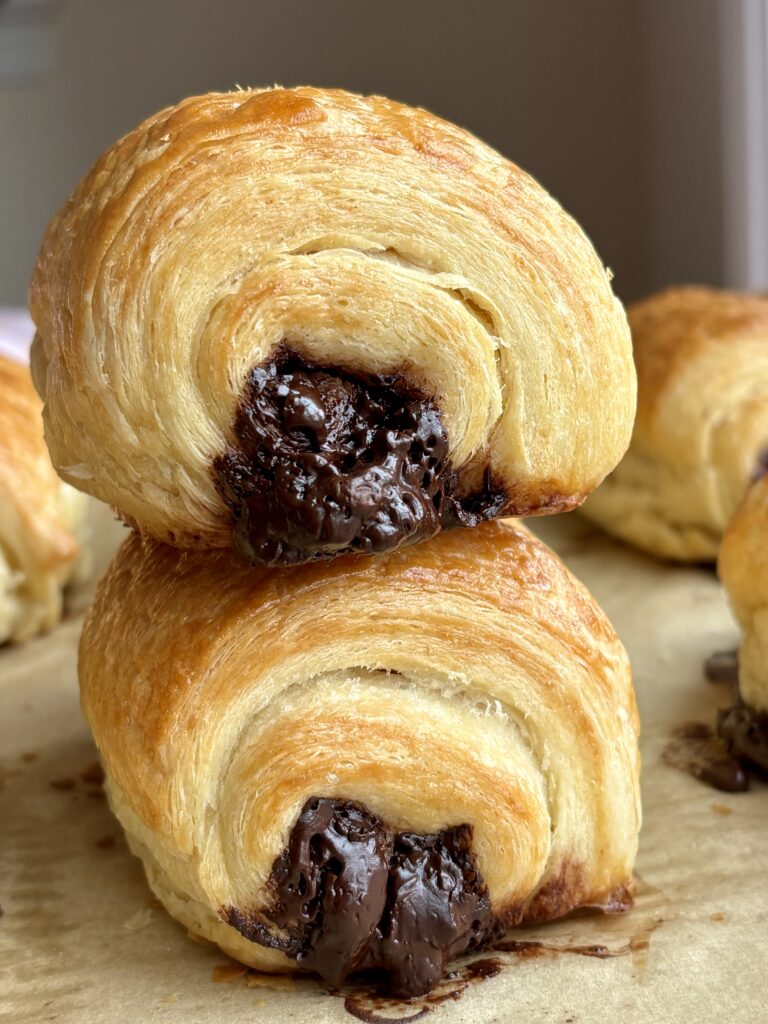
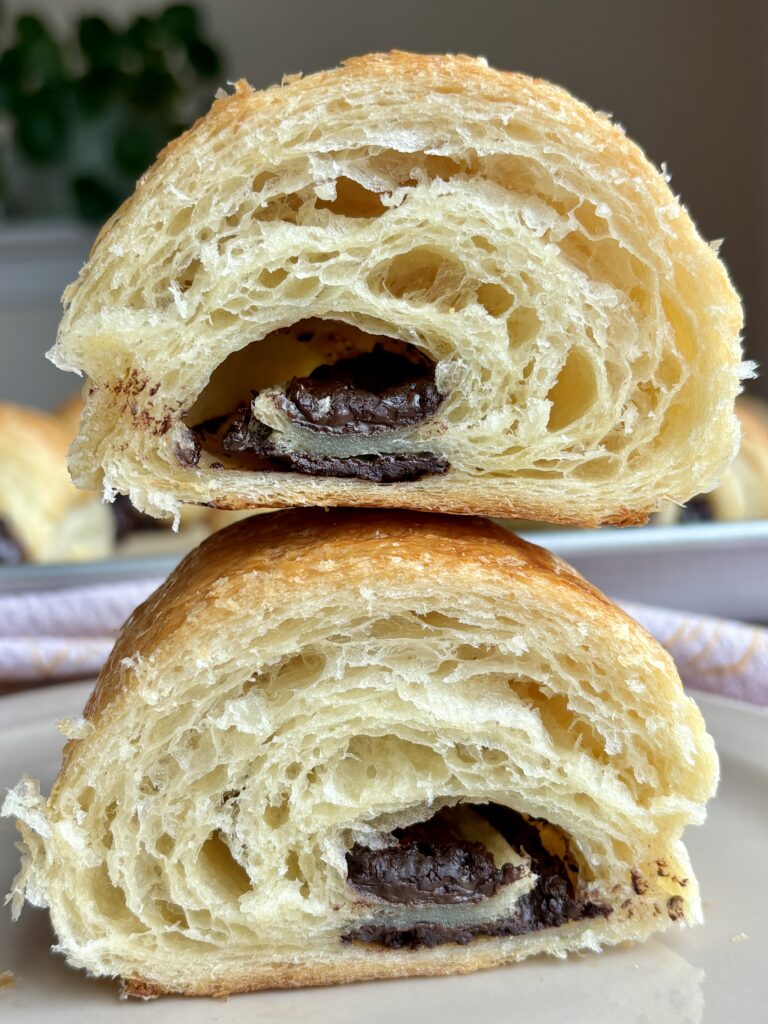
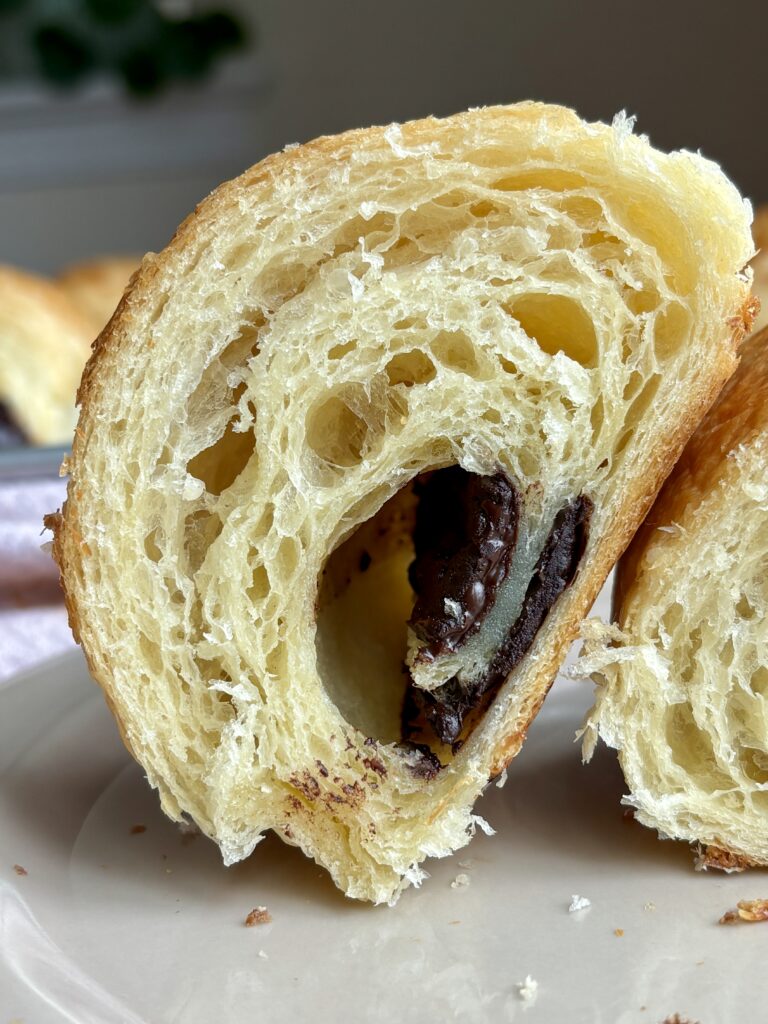
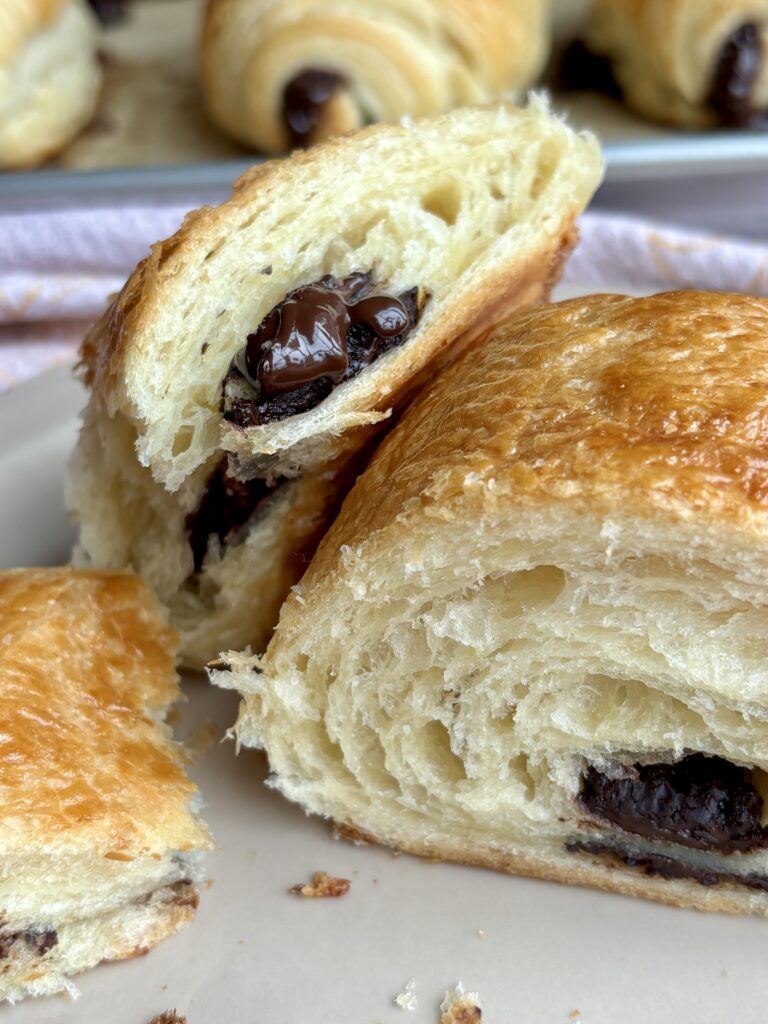
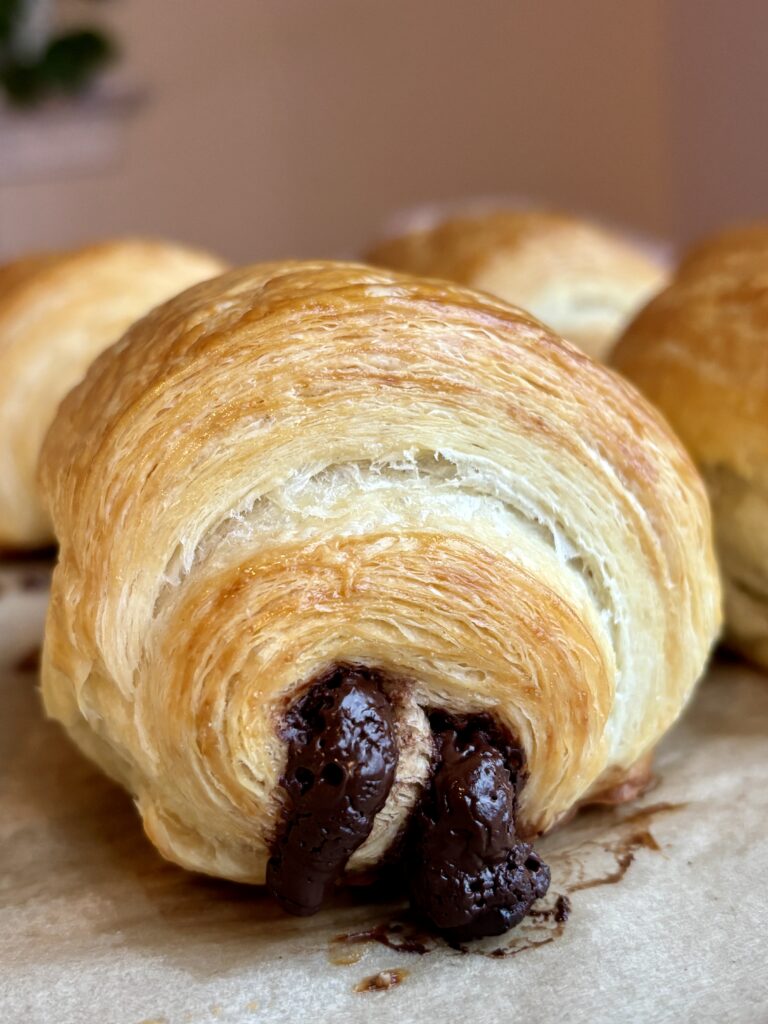
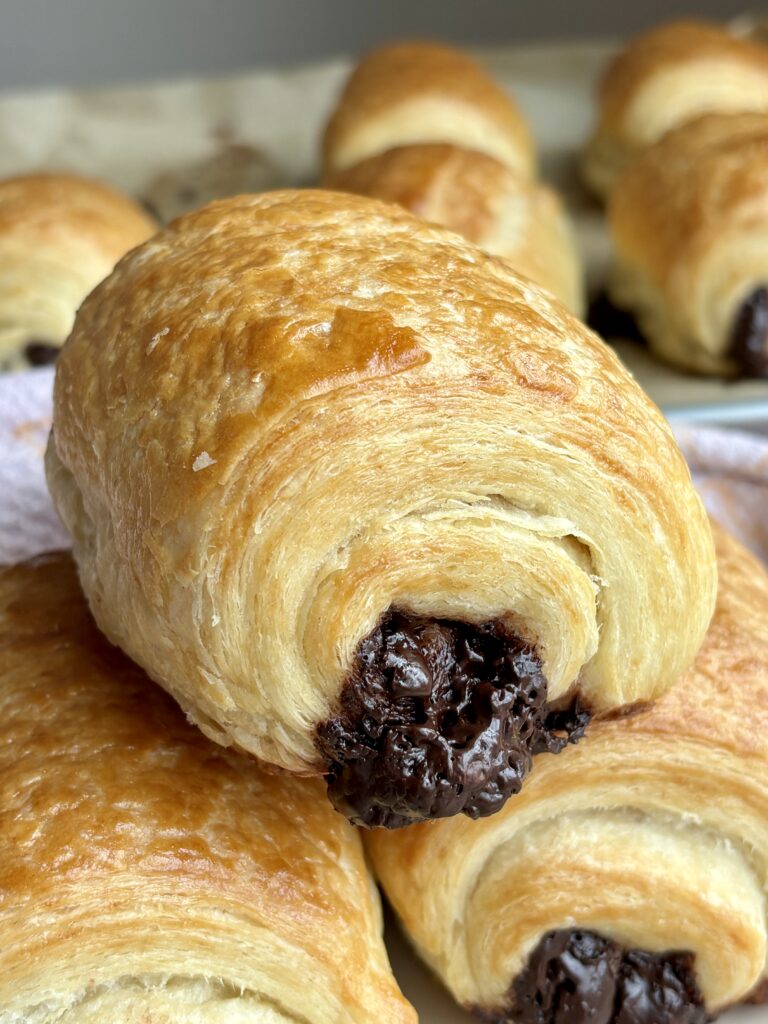
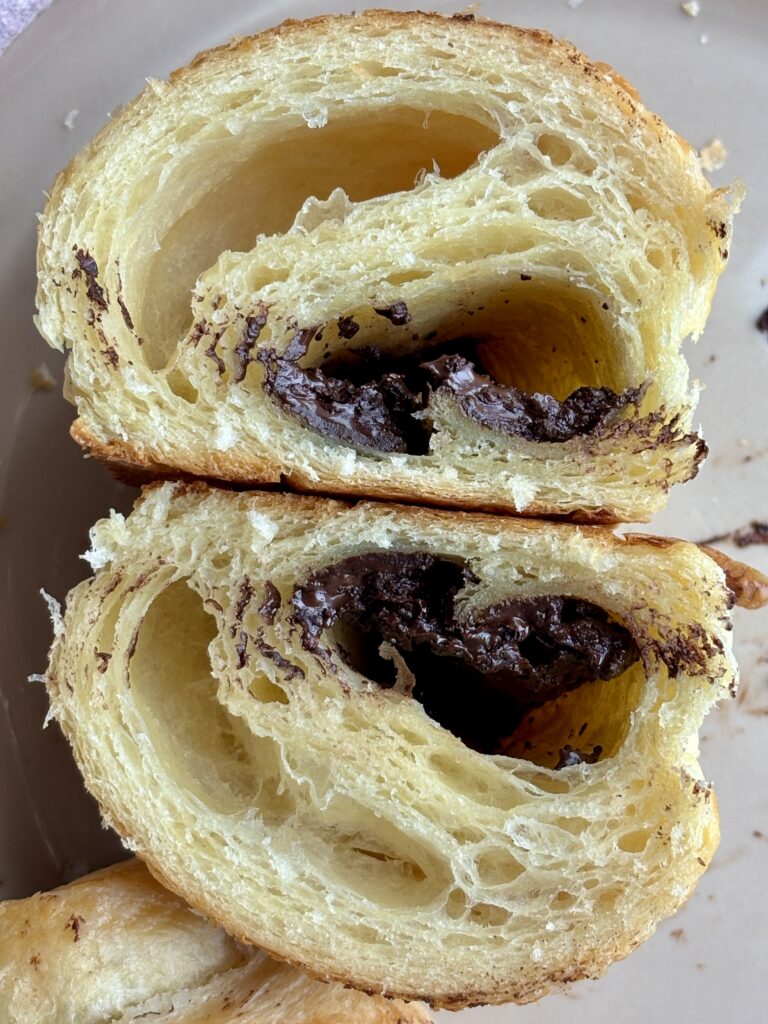
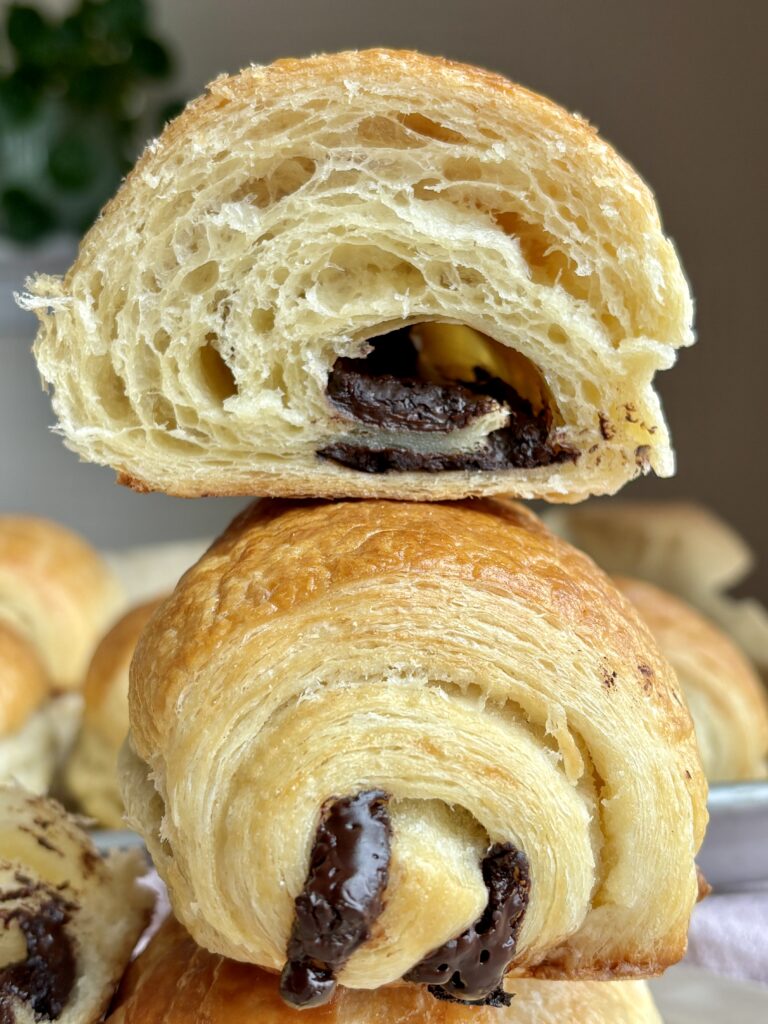
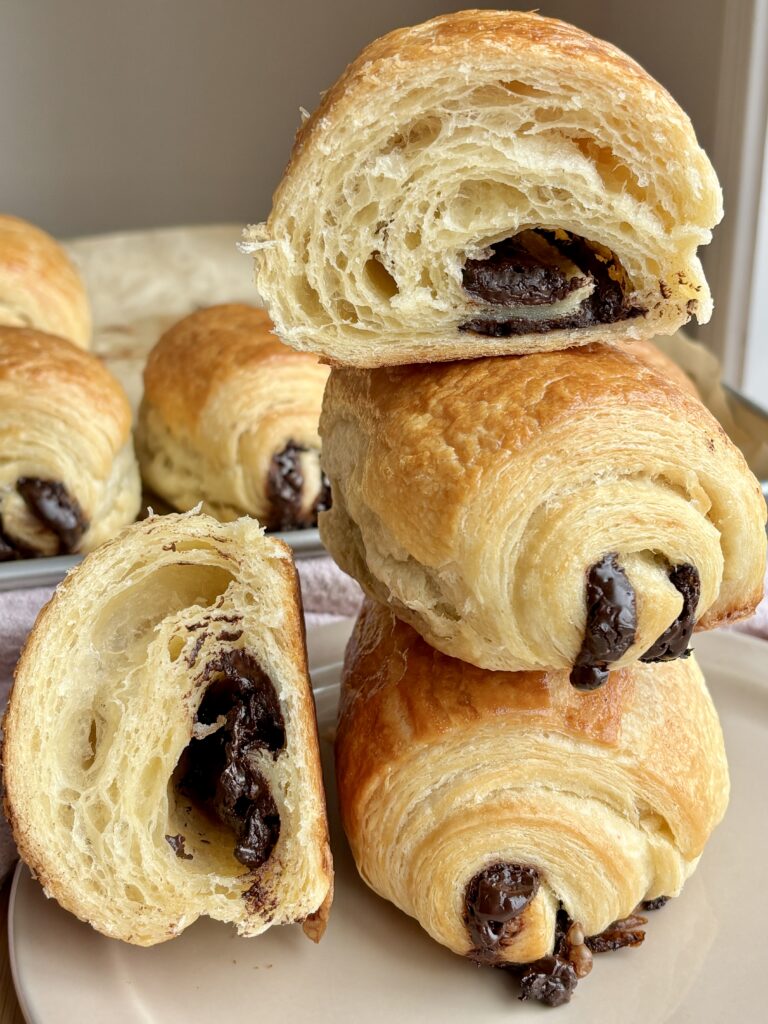
There is nothing quite like biting into a perfectly flaky chocolate croissant. Those delicate, buttery layers on the outside with a soft, airy honeycomb interior wrapped around rich, melty chocolate. And while croissants have a reputation for being intimidating, I have tested and tried this recipe so many times to help the process be more clear and approachable for you.
This recipe is designed to guide you through lamination step-by-step, ensuring those distinct layers, proper proofing, and that signature bakery style rise. Whether you follow the traditional 24-hour method, or opt for the same-day approach (my personal favorite), you’ll end up with beautifully golden, deeply flavorful chocolate croissants right from your own kitchen.
One of my favorite parts of this recipe is how flexible it is. You can prep ahead, adjust timing, and even make your own chocolate batons if you can’t find them (which happens more often than you’d think). The result? A bakery-level pastry that feels completely doable at home.
Why you’ll love this recipe!
What ingredients do I need?
- Warm Milk: Activates the yeast and adds richness.
- Granulated Sugar: Feeds the yeast and lightly sweetens the dough.
- Cold Water: Helps control dough temperature during mixing.
- Active Dry Yeast: Creates lift and structure.
- Bread Flour: Provides strength for lamination and chew.
- All-Purpose Flour: Keeps the texture tender and balanced.
- Salt: Enhances flavor and controls fermentation.
- Unsalted Butter (in dough): Adds softness and flavor.
- Lamination Butter: The key to flaky layers, but make sure to use high-quality butter (like Kerrygold)
- Egg and Heavy Cream:Creates a glossy, golden finish.
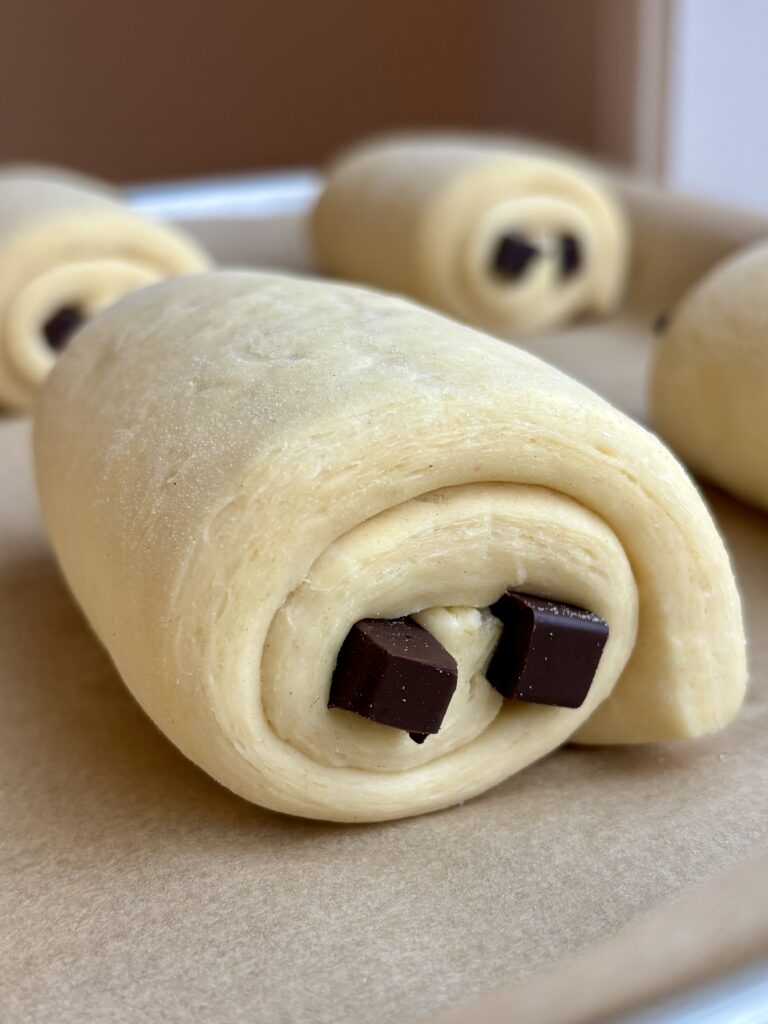
- Chocolate Batons: Classic filling for chocolate croissants.
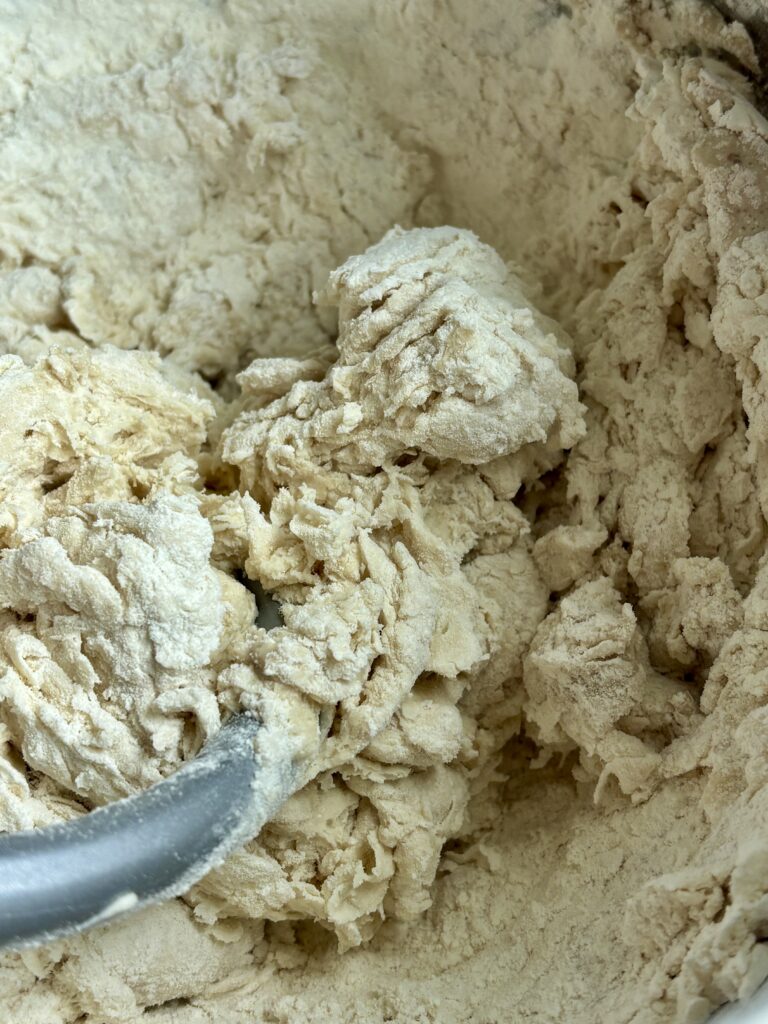
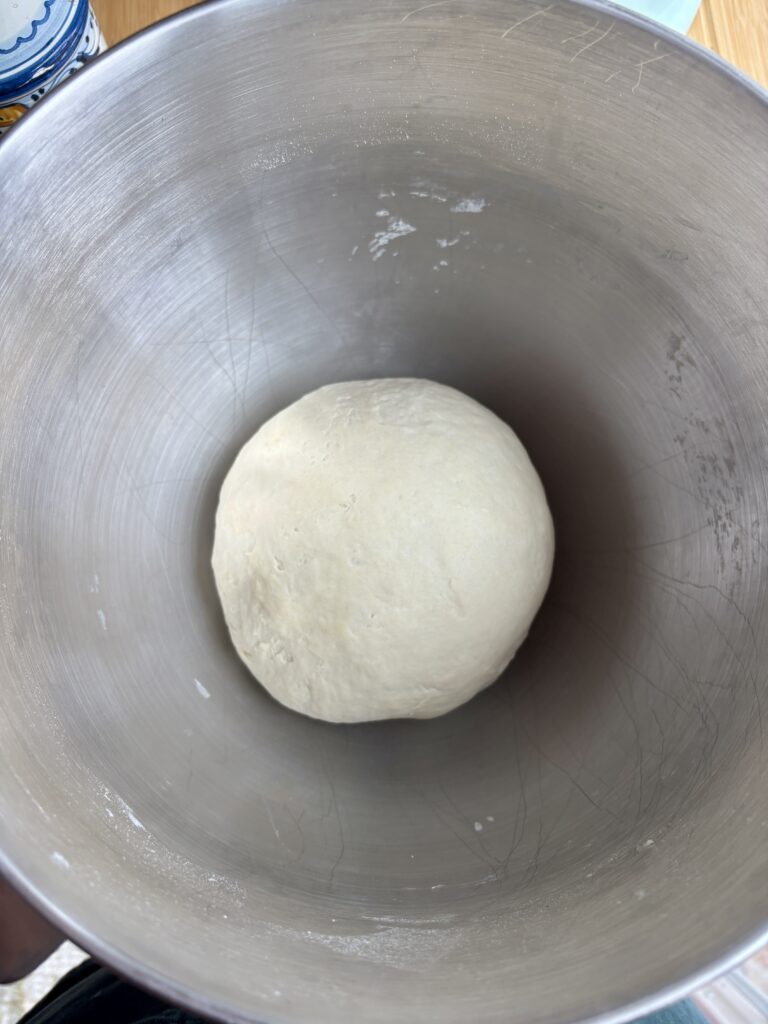
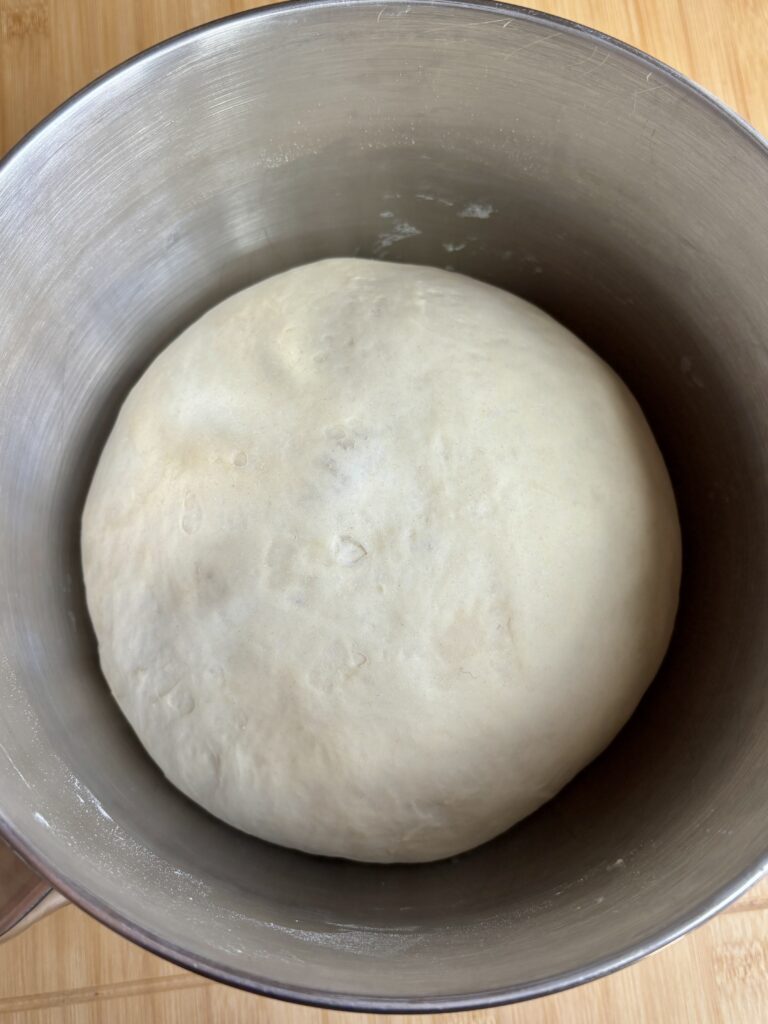
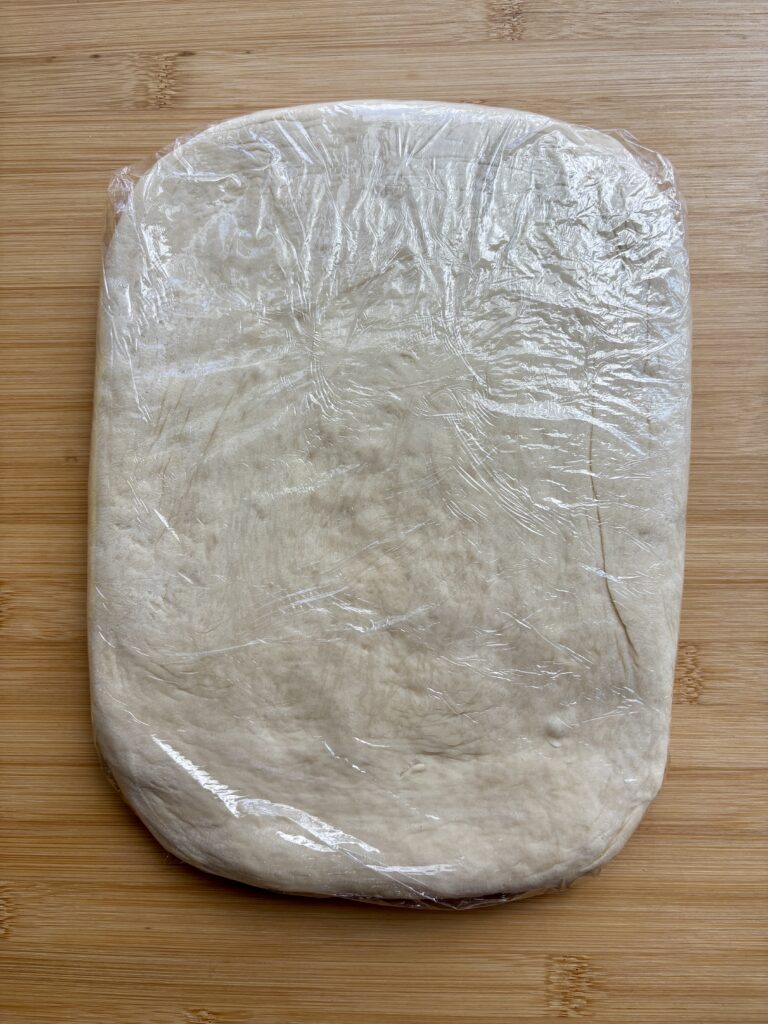
Preparing the Dough
Pro Tips
- The milk temperature matters more than you think. Aim for 100–110°F. Anything above 115°F can weaken or kill the yeast, and anything too cool will slow activation.
- The consistency of your butter is everything! Your butter should be cold but pliable. You should be able to bend it without cracking. If it’s too hard, it will break through the dough. Too soft, and it will melt into the layers.
- Aim to match the dough and butter texture. This is one of the biggest secrets to lamination success. They should feel similar in firmness before enclosing. (This is also part of the reason I prefer to make it all on the same day!)
- Keep everything cold (but not rock hard). If at any point the dough feels soft, sticky, or greasy then stop, dust that section with a tiny bit of flour and then chill.
- Roll with intention, not force. Gentle, even pressure keeps the layers intact. Pressing too hard can push the butter through the dough.
- Minimal flour is key. Too much flour during rolling can dry out your layers and affect the final texture. But using a little in spots where you see butter emerging, or where it is getting sticky, can also be helpful. Use your judgement and be light with the flour.
- Watch for butter smearing. If you see streaks or smears, immediately chill the dough before continuing.
- Don’t rush the proof! (This is often where I mess up) The proper proofing means an airy, honeycomb interior. Under-proofed croissants will be dense and leak butter. Look for visual cues, not just time.
- When properly proofed, croissants should be:
- Puffy
- Slightly jiggly
- Soft with rounded edges
- Preheat your oven fully (at least 40 minutes). A properly heated oven creates the steam needed for those signature layers. Believe it or not, this makes a BIG difference.
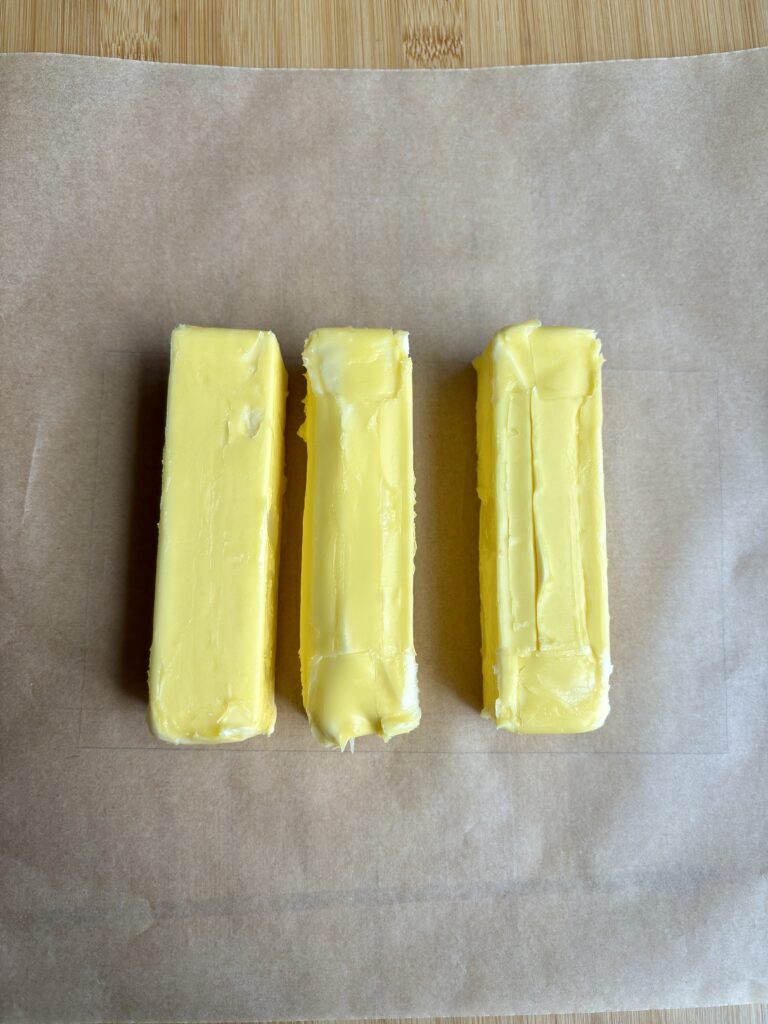
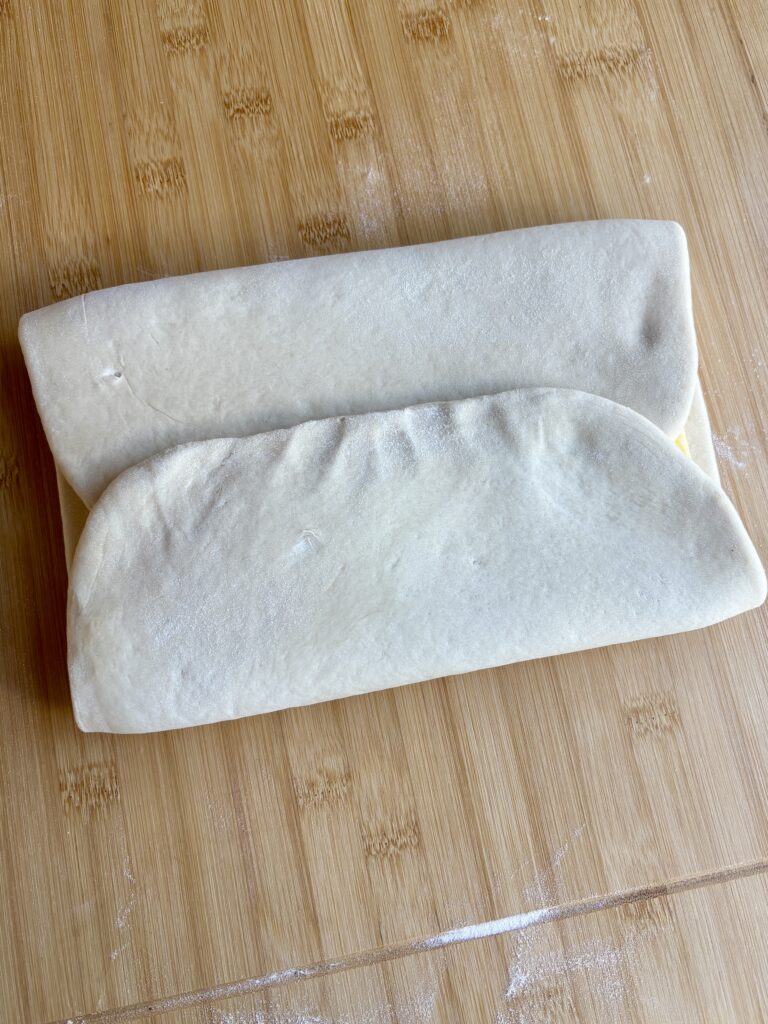
Butter for Lamination and First Fold


How to Make your Own Chocolate Batons
If finding chocolate batons is as hard for you as it was for me, then you can either use chopped chocolate bars, or make your own chocolate batons (which are more traditional in this recipe). Yes, it is an extra step, but honestly, the time and effort put into this is complete worth it!
Chocolate Baton Hack (If You Can’t Find Them)
- Silicone Mold Method:
- Melt your chocolate
- Pour, or pipe, into a silicone candy mold
- Freeze until solid
- Carefully pop them out the molds and use
- Piped Method:
- Melt your chocolate
- Pipe 4-inch lines onto a silicone mat using a piping bag
- Freeze until solid
- Use just like store bought batons
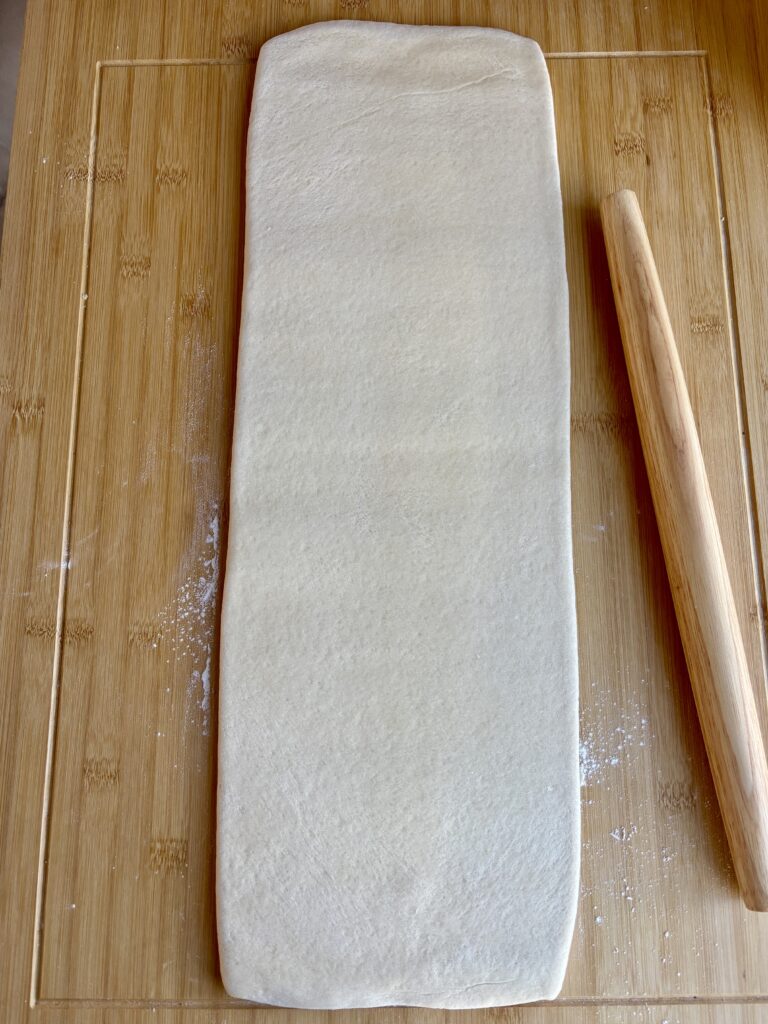
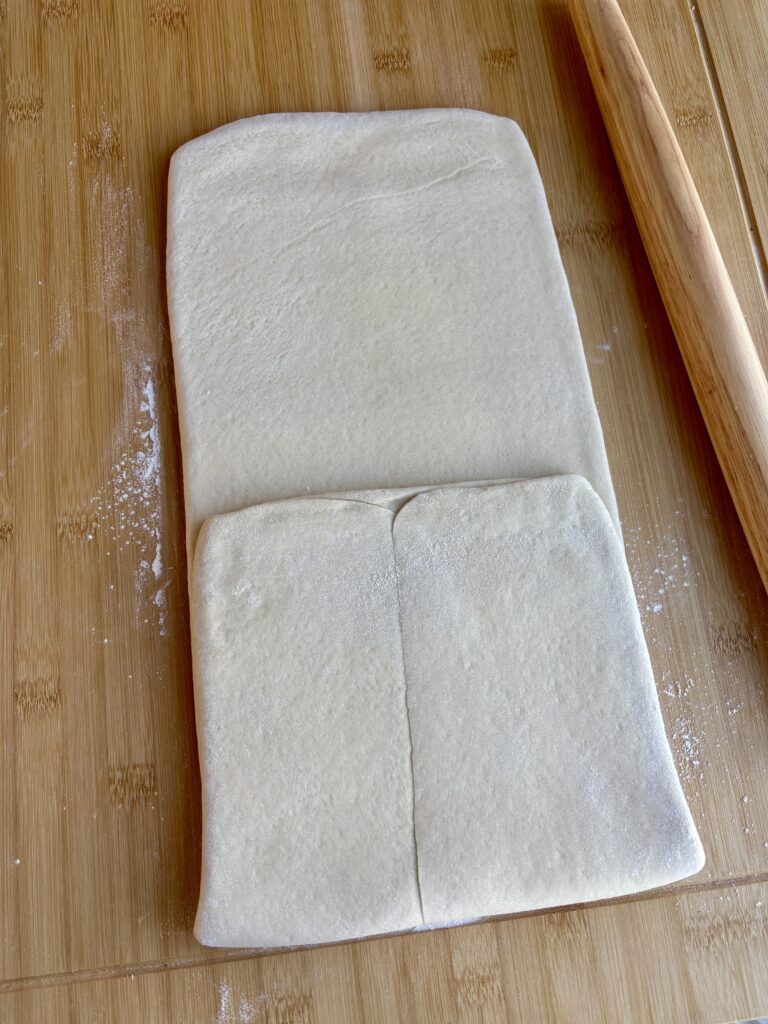
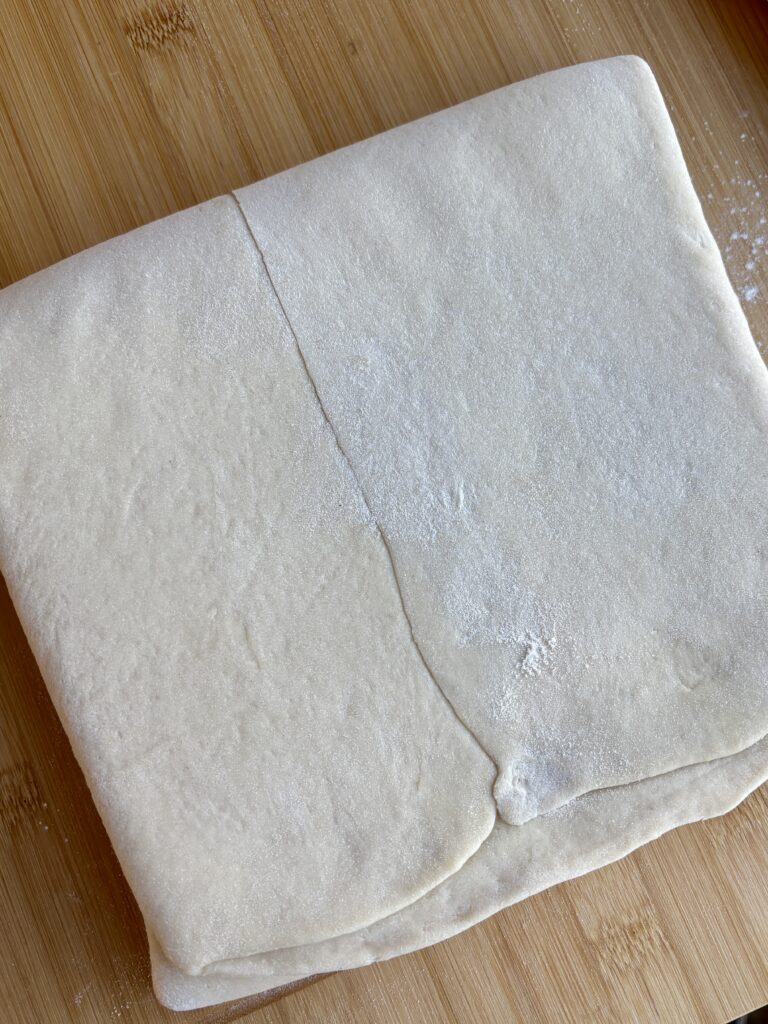
Lamination Folds 2-4


Can I Substitute?
Yes! Like always though, any substitutions made to the recipe can result in a change in texture and/or flavor.
- Bread flour: Use all all-purpose flour, if needed (slightly less chewy result)
- Active dry yeast: Instant yeast can replace active dry (and you would just skip blooming step)
- Heavy cream: Half-and-half can replace heavy cream in the egg wash
- Chocolate batons: Chocolate chips, or chopped chocolate, can substitute batons
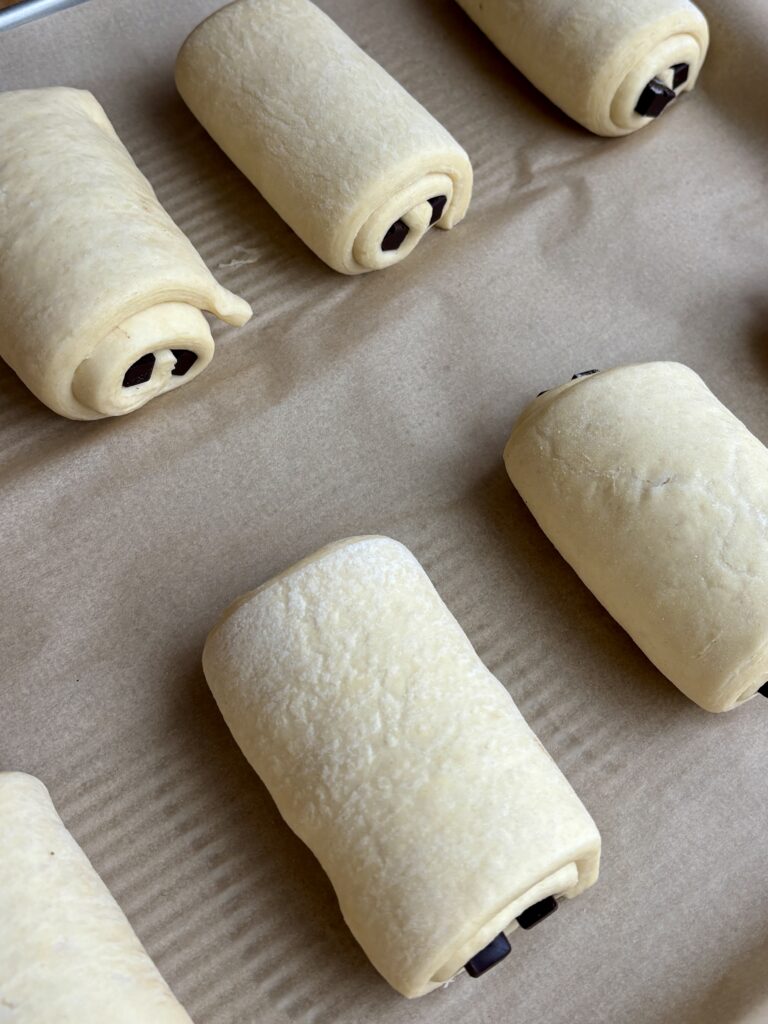
Shaping the Croissants and Final Proof

Leftovers and Storage
- Room Temperature Storage: Store croissants in an airtight container at room temperature for up to 2 days. They’re best enjoyed fresh, but still delicious reheated.
- Refrigeration: Not recommended for baked croissants, as it can dry them out and affect texture.
- Freezing (Your Best Option for Longevity)
- Option 1: Freeze Before Baking
- Shape croissants
- Place on tray and freeze until solid
- Transfer to freezer bag
- When ready to bake: thaw overnight in fridge, then proof and bake per instructions
- Option 2: Freeze After Baking
- Let croissants cool completely
- Wrap tightly and freeze up to 2 months
- Option 1: Freeze Before Baking
- How to Reheat Croissants
- Preheat oven to 325°F
- Bake 5–8 minutes (from room temp)
- Bake 10–12 minutes (from frozen-unbaked)
- This brings back that crisp, flaky exterior.
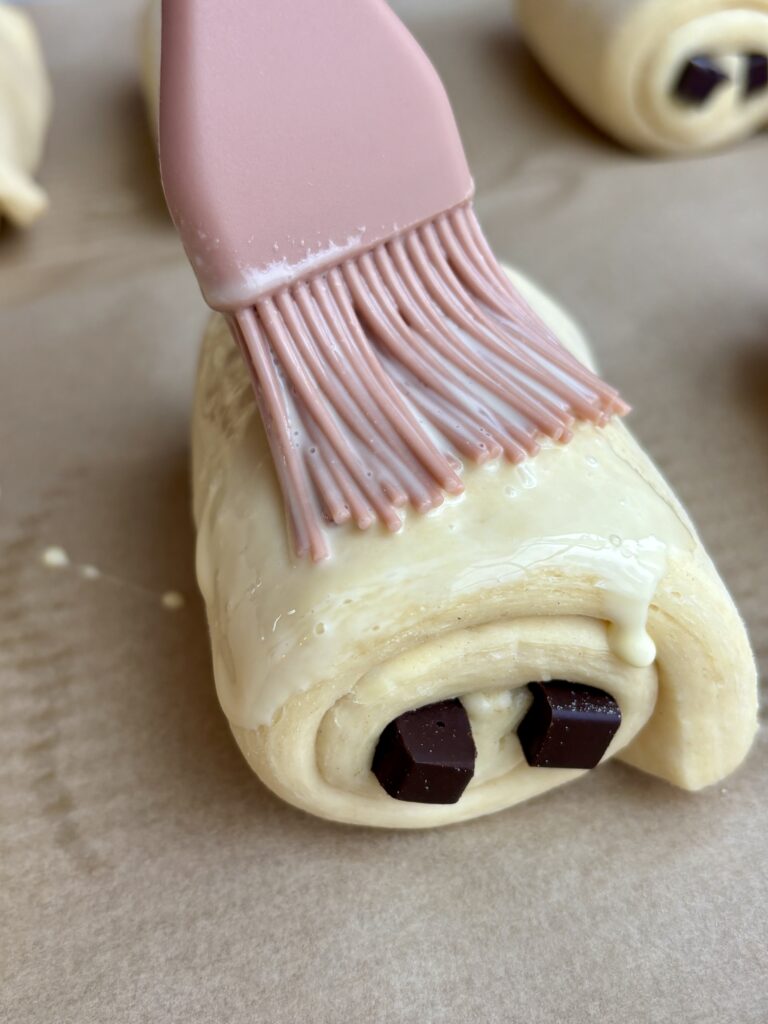
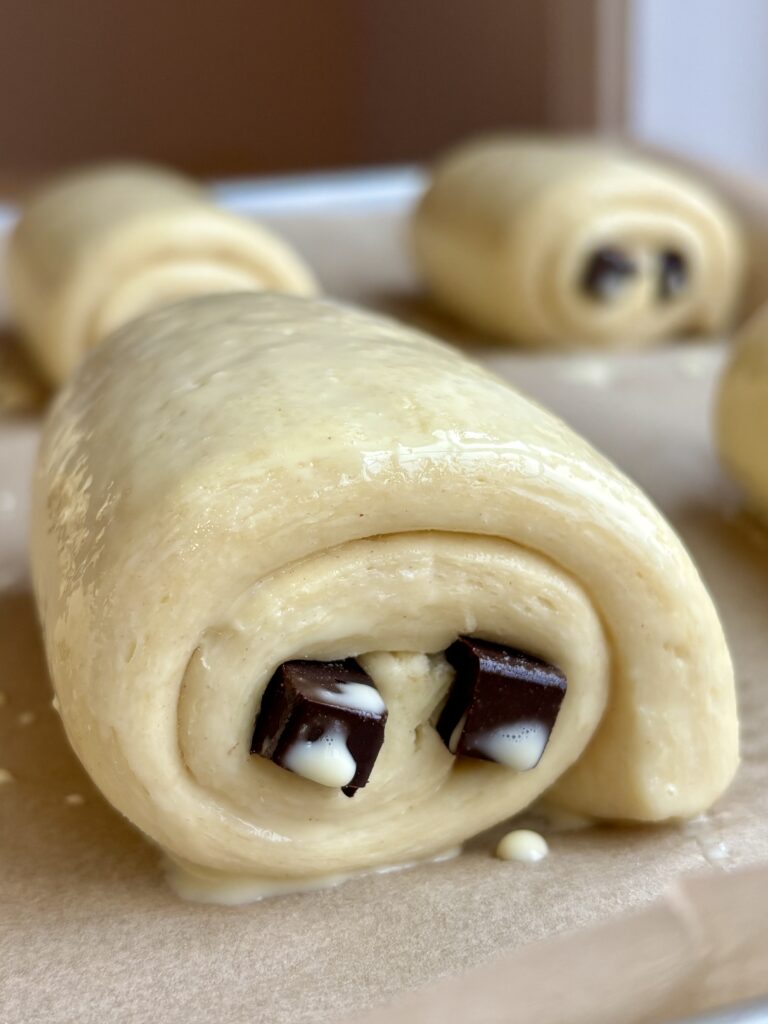
Egg Wash and Bake
But, I Still Have A Few Questions…
What temperature should my milk be for yeast?
Your milk should be between 100–110°F. This is warm enough to activate the yeast without killing it. If it feels like warm bath water, you’re in the right range.
Can I make these in one day?
Yes! While the 24 hour method is more traditional, you can complete this in a single day by shortening chill times and working efficiently (and honestly I prefer the single day method).
Why do you prefer the same-day method?
I personally love the same day method because the dough and butter stay at a more consistent, workable temperature (in my opinion). When refrigerated overnight, the butter can become too firm, which can make lamination more difficult the next day.
How do I do the 24-hour method?
- Day 1: Make the dough and complete the lamination process
- Refrigerate overnight
- Day 2: Roll, shape, proof, and bake
You can also refrigerate shaped croissants overnight and then proof them in the morning before baking.
How do I know if my yeast is dead?
If your yeast mixture doesn’t foam after 5–10 minutes, it’s likely inactive and should be replaced.
Why are my croissants dense instead of airy?
This usually means they were under-proofed. Time alone isn’t enough since proofing can be affected by the ambient temperature, so look for rounded edges, puffiness, and slight jiggle before baking.
Why is butter leaking out during baking?
This is usually caused by one of the following:
- The dough got too warm during the lamination process
- The croissants were under-proofed
- Butter broke through layers, which is usually because the dough and butter were not at the same consistency when laminating
Can I refrigerate the dough overnight?
Yes! You can place the dough in the fridge after the final fold and then refrigerate for up to 24 hours before shaping and completing the final proofing.
Can I refrigerate after shaping?
Yes! This is my second favorite option. Shape the croissants, cover them well, refrigerate overnight, then proof and bake the next day per the recipe instructions.
Can I freeze croissants?
Yes, you can freeze them either after shaping (before the final proofing step) or after baking. I prefer the freeze after shaping option. This way you can truly have a fresh croissant whenever you want one!
What’s the best chocolate to use?
Chocolate batons are ideal, but any high quality chocolate works. If using chopped chocolate, keep the pieces relatively large so they don’t melt too quickly.
How do I make chocolate batons at home?
This process is easier than you’d think! You melt your chocolate and then either pour it into silicone molds or pipe 4-inch lines onto a silicone mat and freeze until solid. See the section above about how to make them in more detail!
Why did my croissants turn out greasy?
They were likely over-proofed, causing the butter to melt out during baking.
Why didn’t my croissants rise properly while baking?
There are a few possible reasons. Most likely though they were under proofed or your yeast were inactive.

Other Recipes You’ll Love


Let’s engage!
Make sure to tag @thehomechefmomma on Instagram or Facebook, and leave a review or comment if you make these. I always get so excited to see your creations, variations of the recipe, and feedback! Just remember to be kind in your comments, there is still a person behind this screen! 🙂
Flaky Chocolate Croissants
Ingredients
Dough
- ¾ cup warm milk 100–110°F
- 2 tbsp granulated sugar
- ¾ cup cold water
- 3 tsp active dry yeast
- 2½ cups bread flour
- 1½ cups all-purpose flour
- 1 tsp salt
- 2 tbsp unsalted butter softened
Lamination Butter
- 1½ cups 340 g unsalted butter, cold
- Egg Wash
- 1 egg
- 1 tbsp heavy cream
Filling
- Chocolate batons or chopped chocolate (or homemade batons—see notes)
Instructions
Make Dough
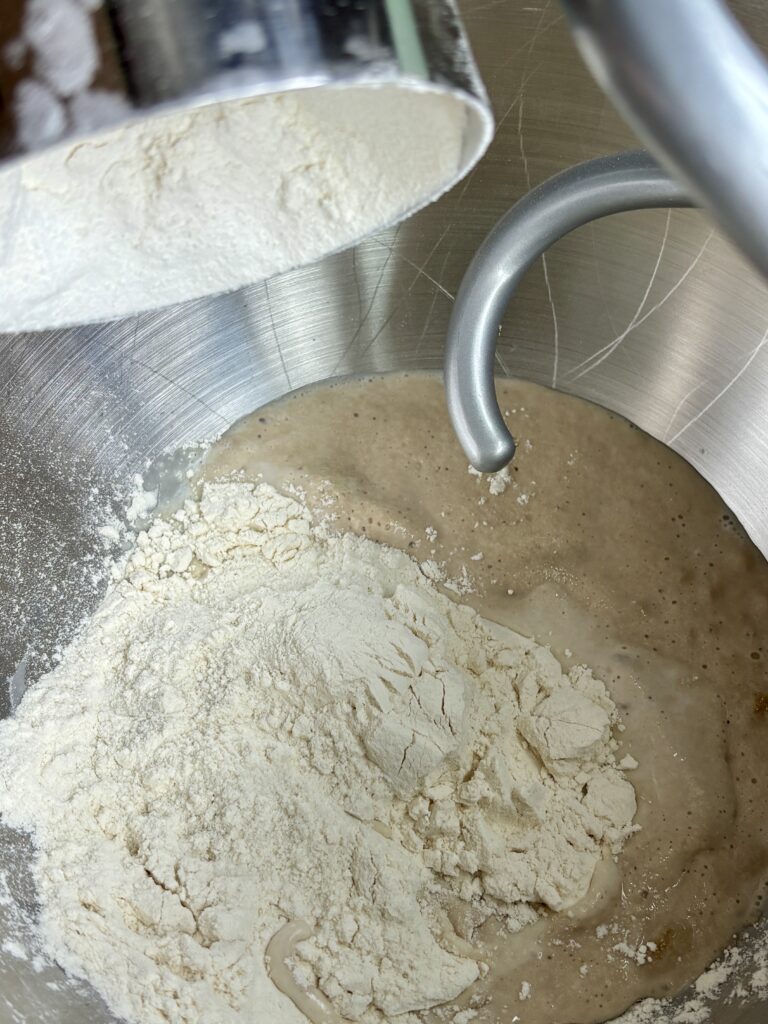
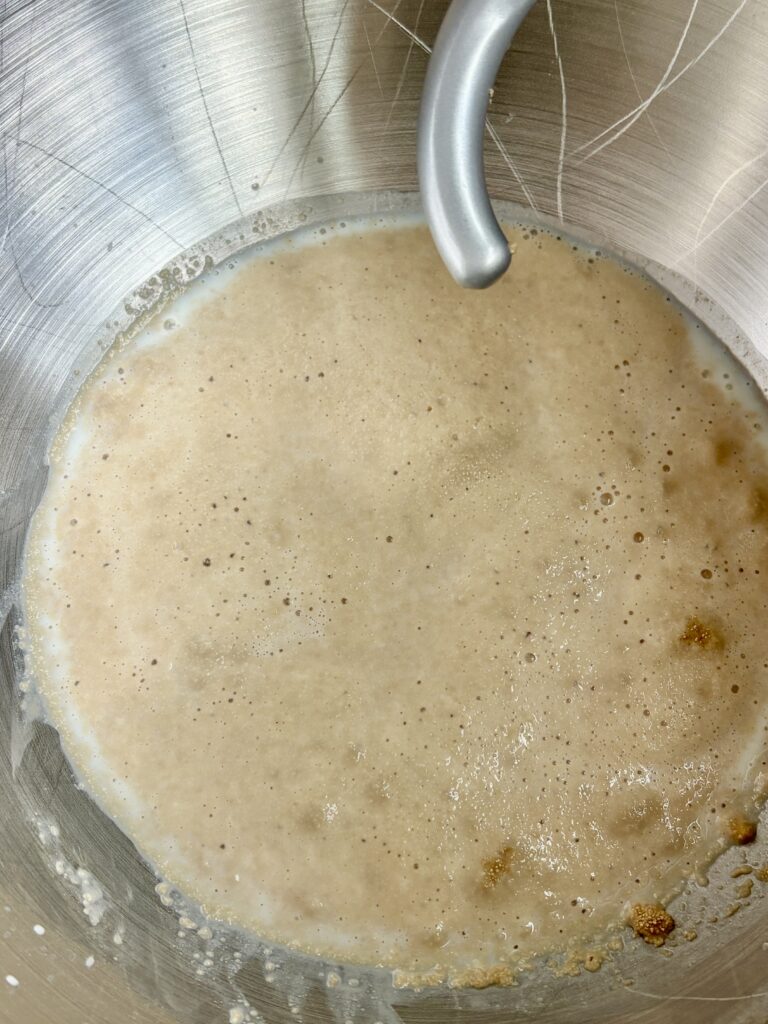
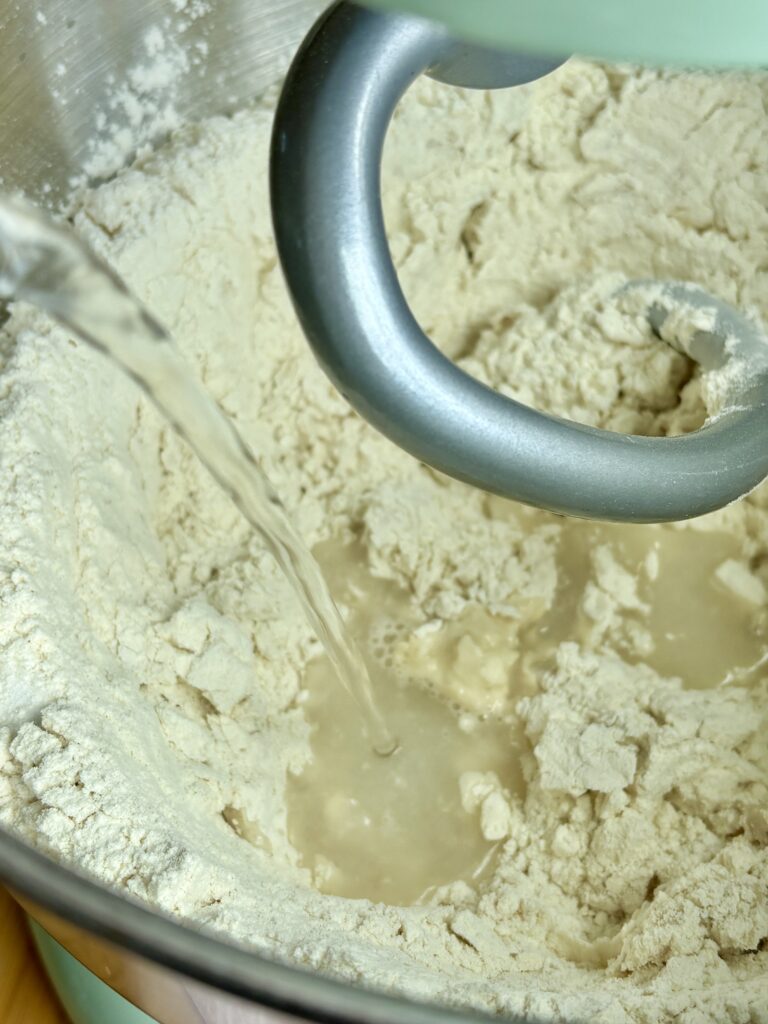
- In a small bowl, mix warm milk (100–110°F), sugar, and yeast. Let sit 5–10 minutes until foamy.
- In a stand mixer bowl with dough hook attached, combine bread flour, all-purpose flour, and salt.
- Add yeast mixture and cold water. Mix until a shaggy dough forms.
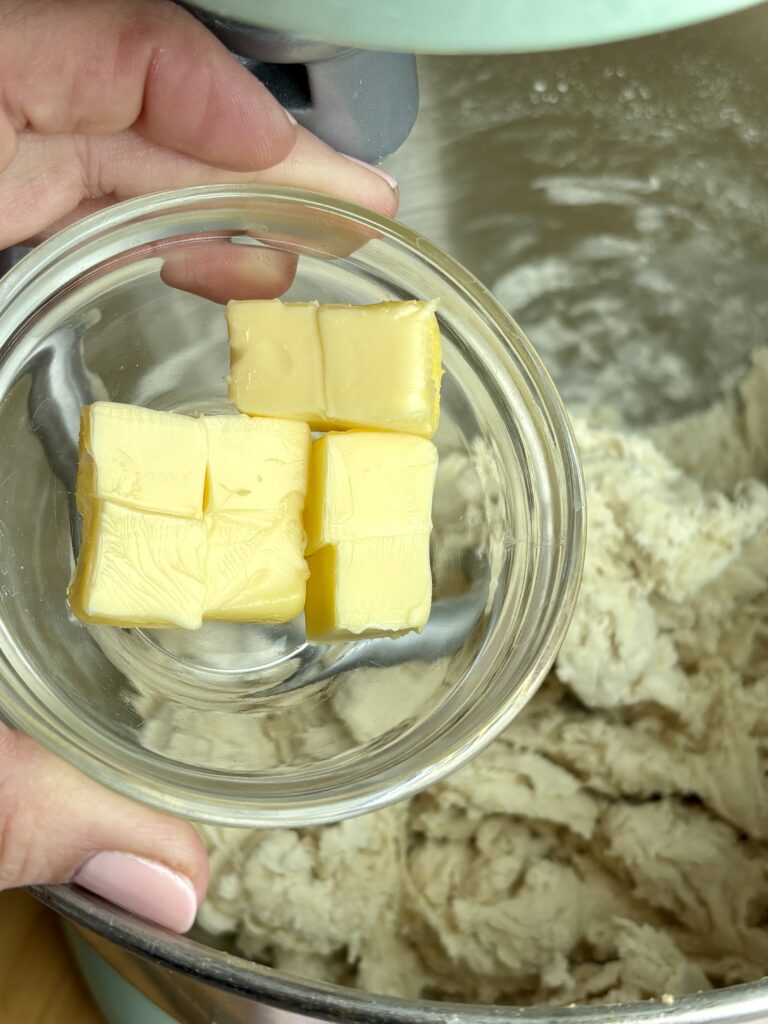
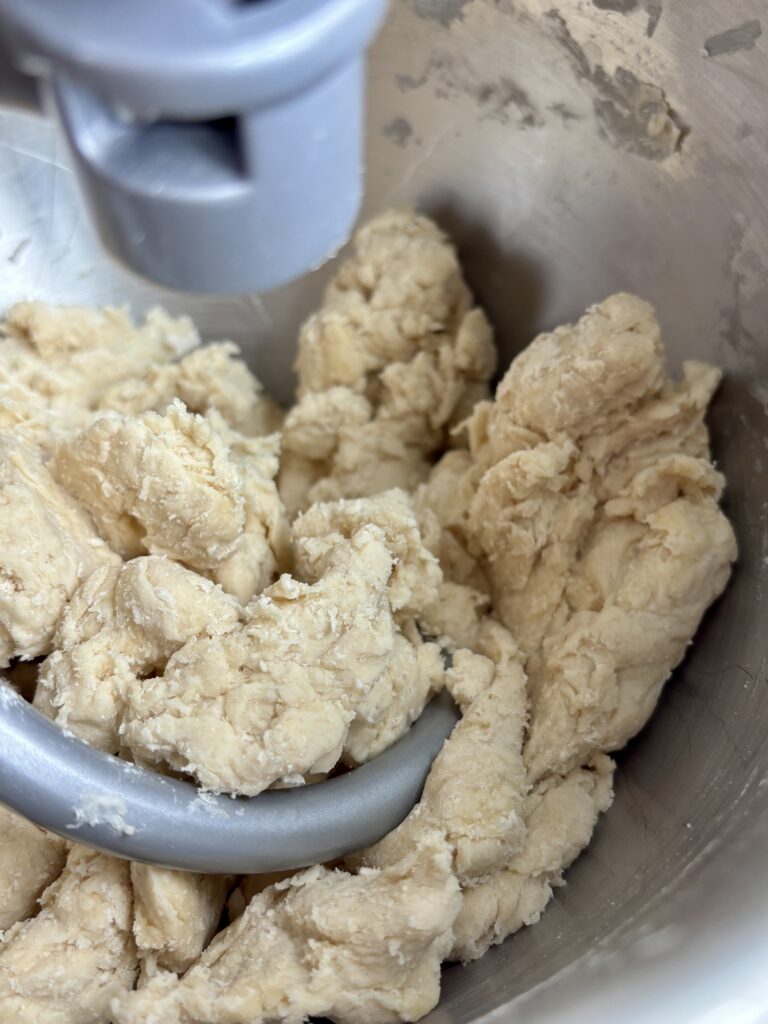
- Add butter and knead 6–8 minutes until smooth and elastic. Dough should feel slightly tacky.
- Cover and let rest 1 hour until slightly puffy.
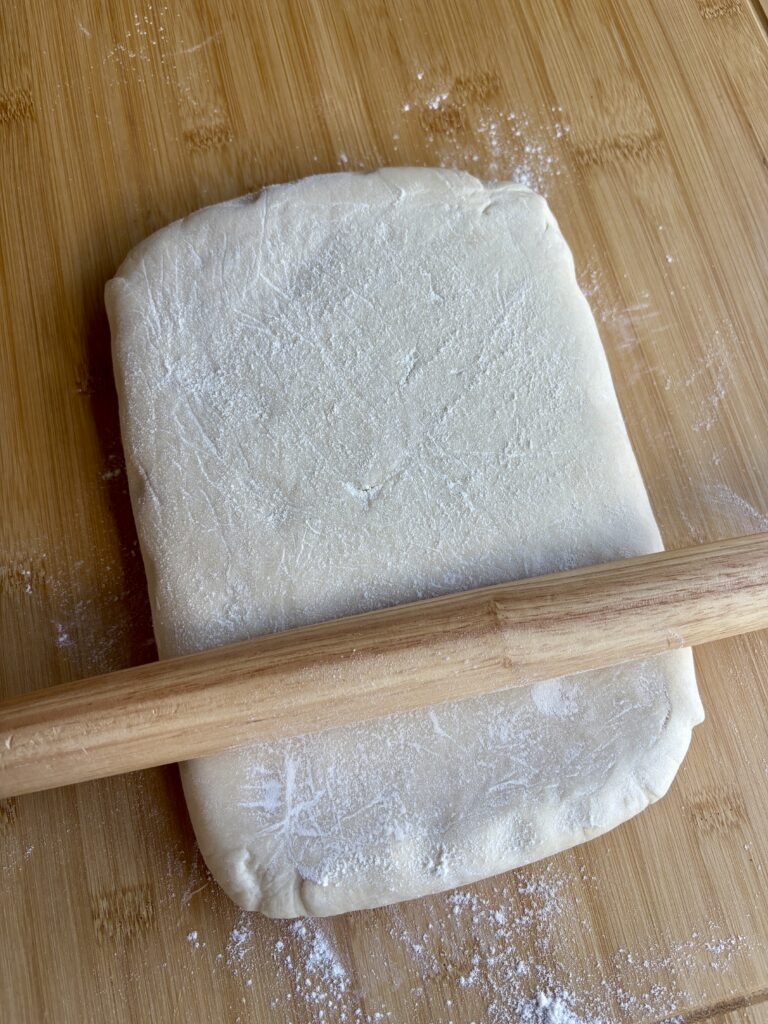
- Shape into an 8×10-inch rectangle, wrap tightly in saran wrap, and refrigerate 1–2 hours (or overnight).
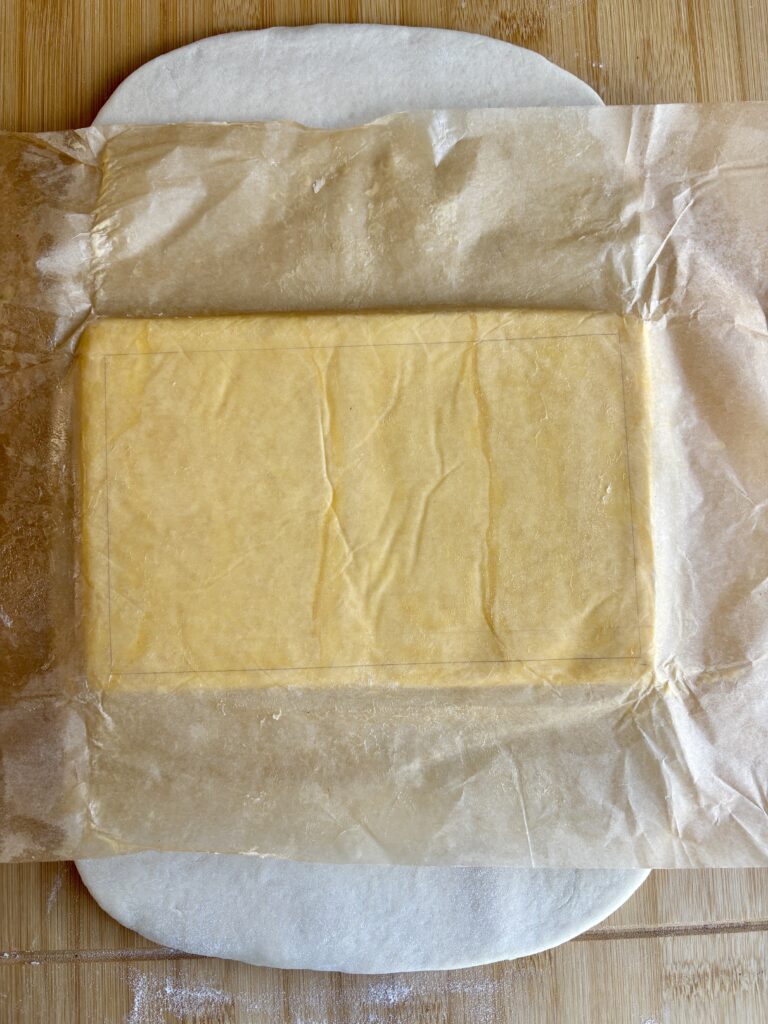
Prepare Lamination Butter
- Draw an 8×5-inch rectangle on parchment paper.
- Place butter between parchment and pound/roll the butter with a rolling pin into the rectangular shape.
- Chill until firm but pliable (should bend without cracking).
Lamination
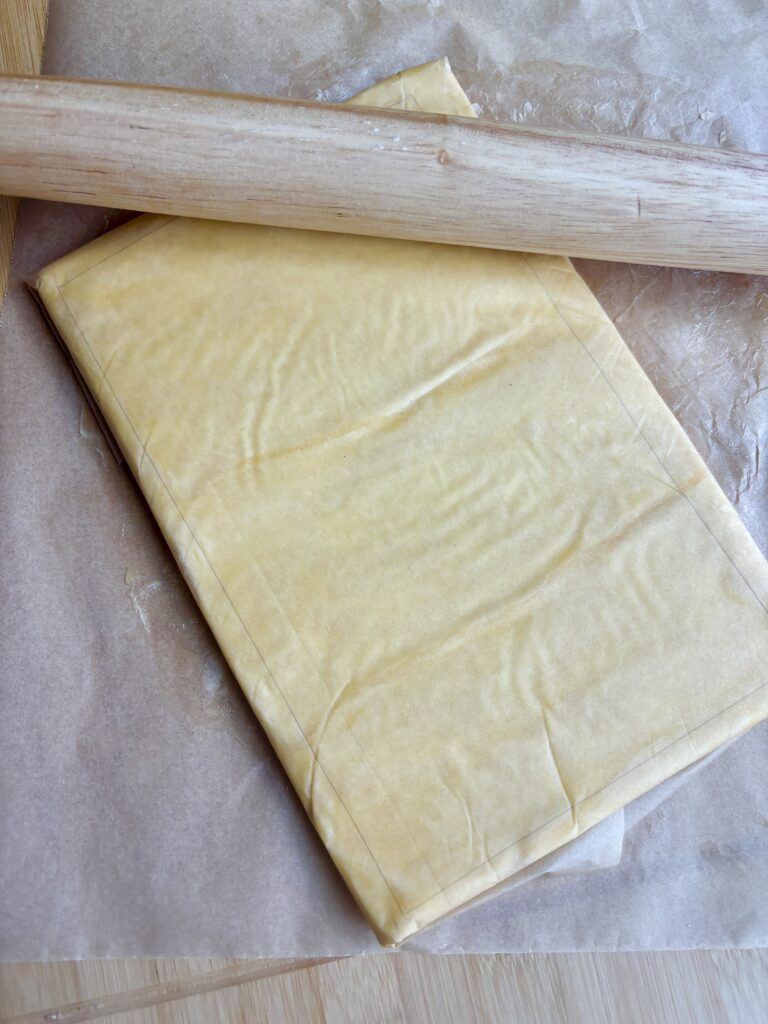
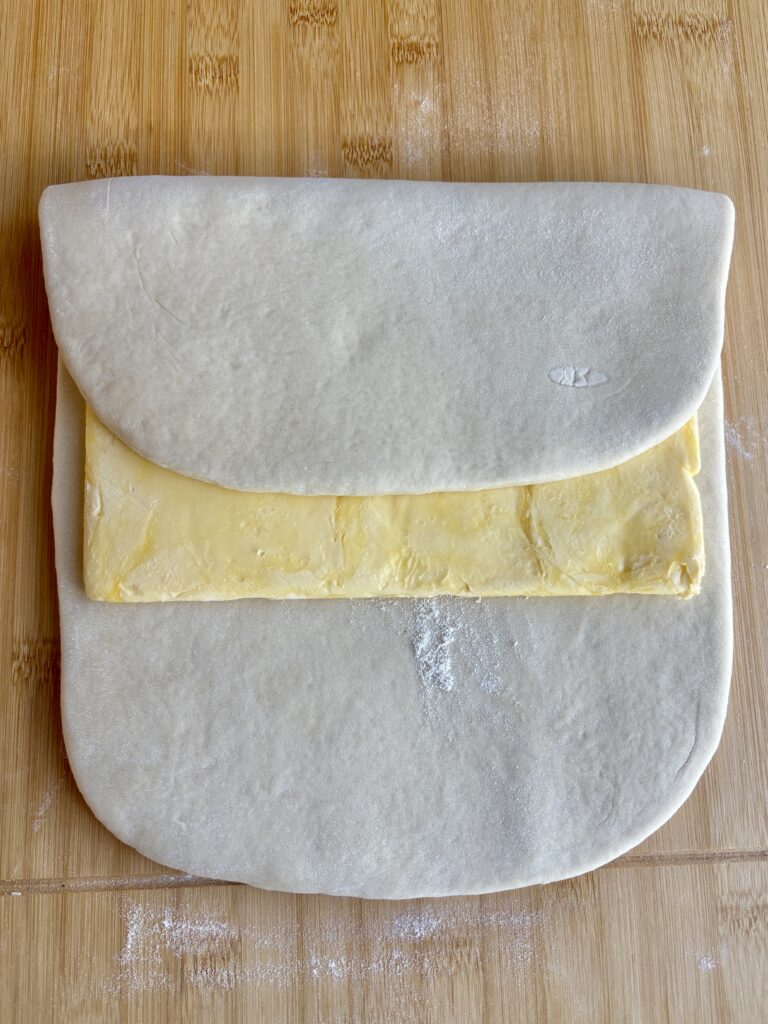
- Roll dough to about 8½ x 12 inches on a lightly floured surface.
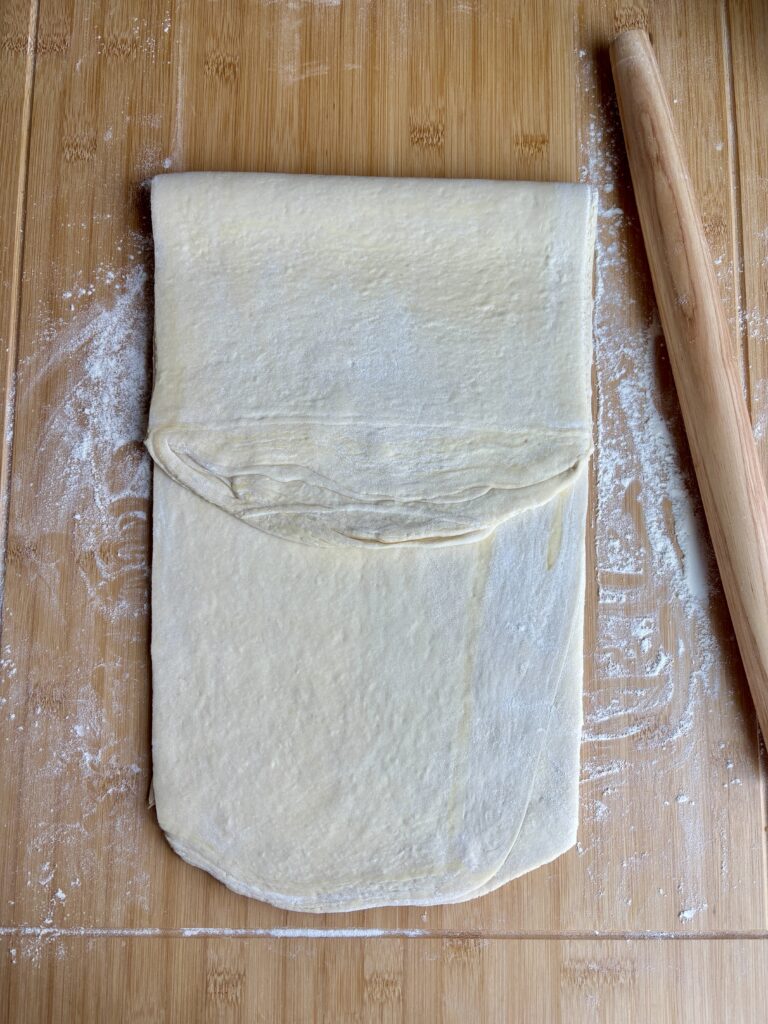
- Place butter in the center and fold the dough over the butter like an envelope and seal the edges.
First Fold
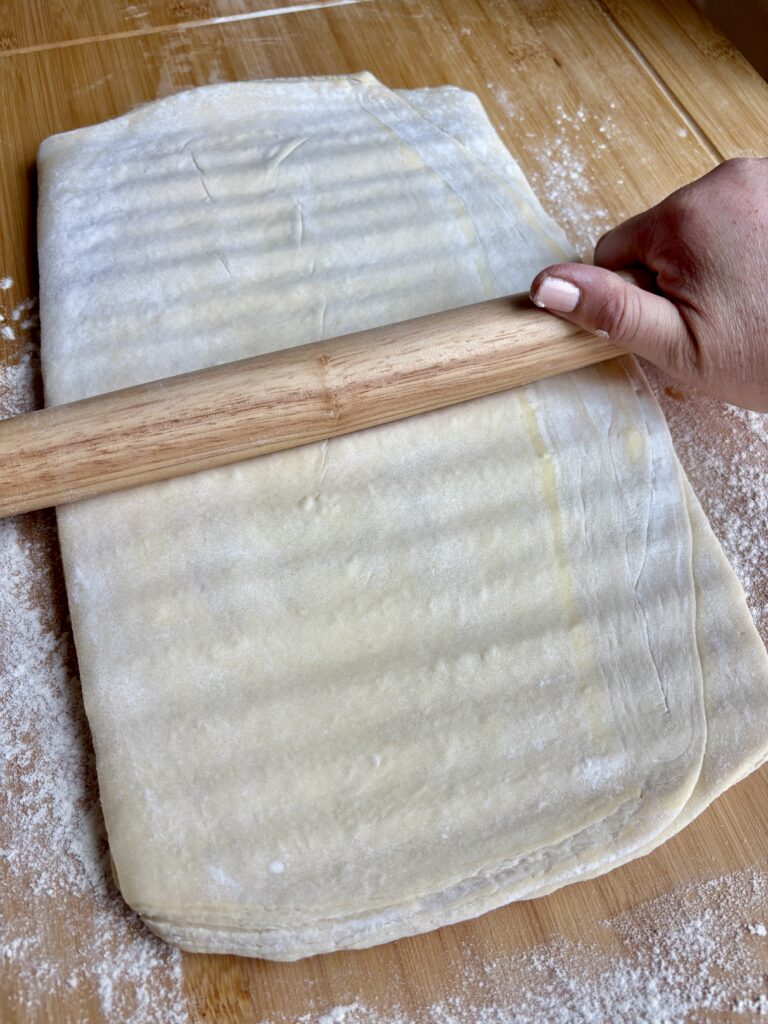
- Roll the laminated dough to 8 x 24 inches.
- Fold into thirds like a letter again.
- Wrap and chill for 30–45 minutes.
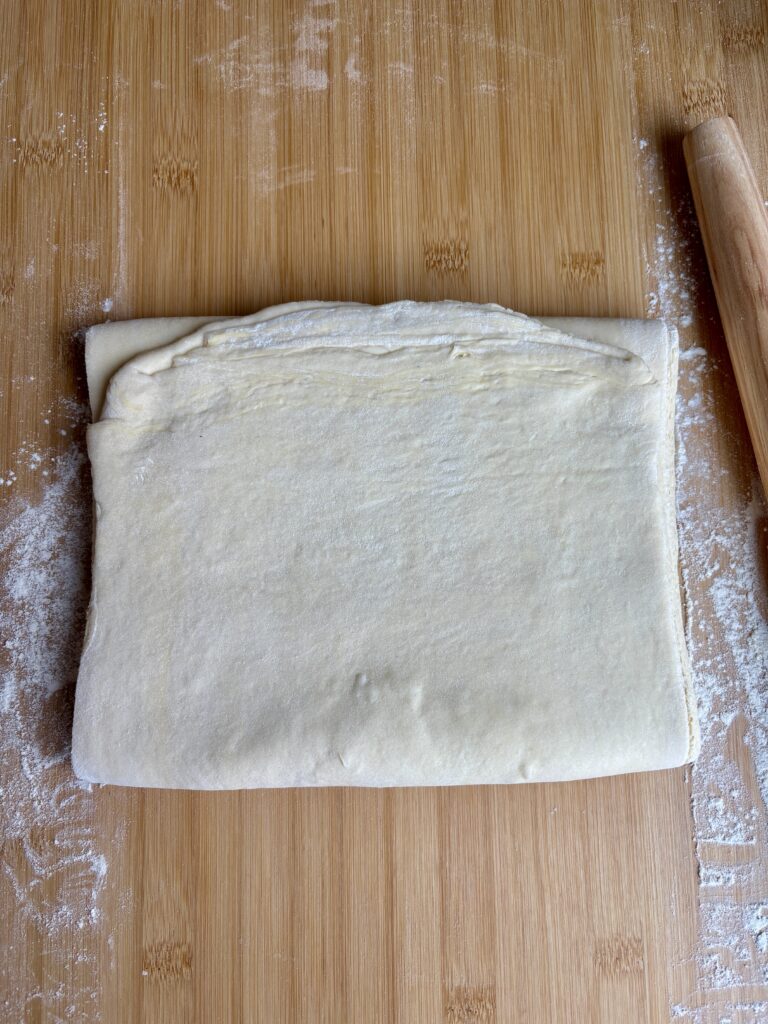
Second Fold
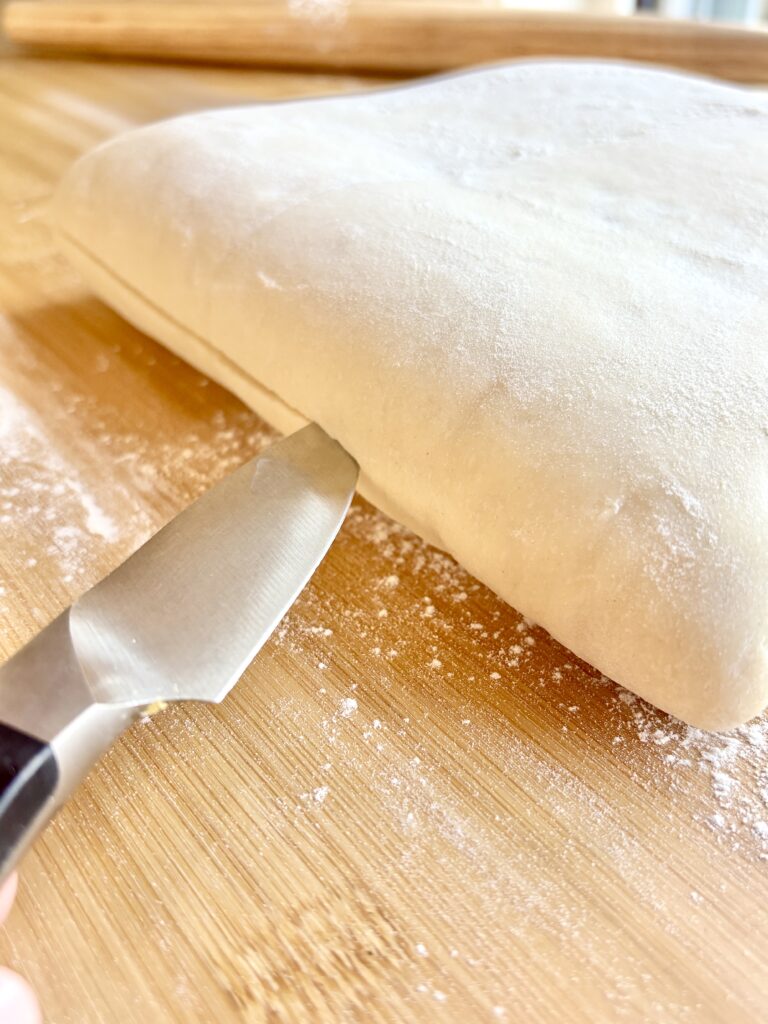
- Place the dough on a lightly floured surface with the folded edges on the sides and cut the folded edges with a knife to help with rolling. Roll the dough to 8 x 24 inches long again (if not rolling easily, use a rolling pin to slightly smash the dough and butter until easier to roll out).
- Fold into thirds like a letter again.
- Chill 30–45 minutes.
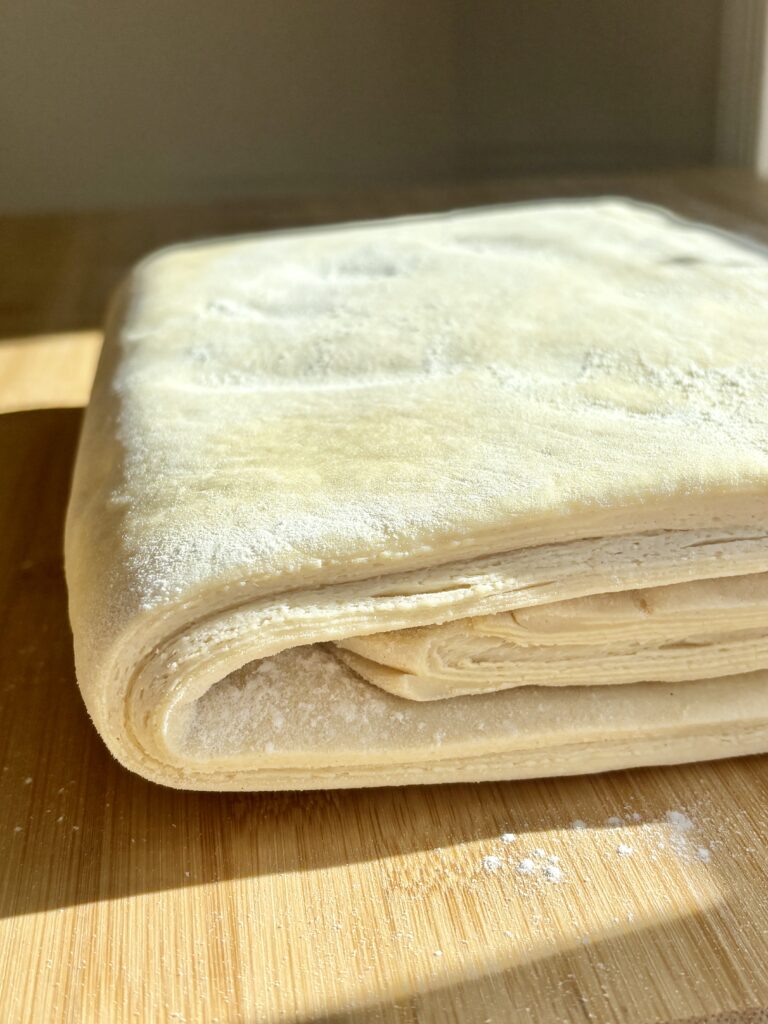
Third and Fourth Fold
- Repeat the folding/lamination process 2 more times.
- Chill at least 1 hour or overnight (up to 24 hours).
- If butter softens or starts coming through, dust with a little flour and refrigerate immediately until a little colder again.
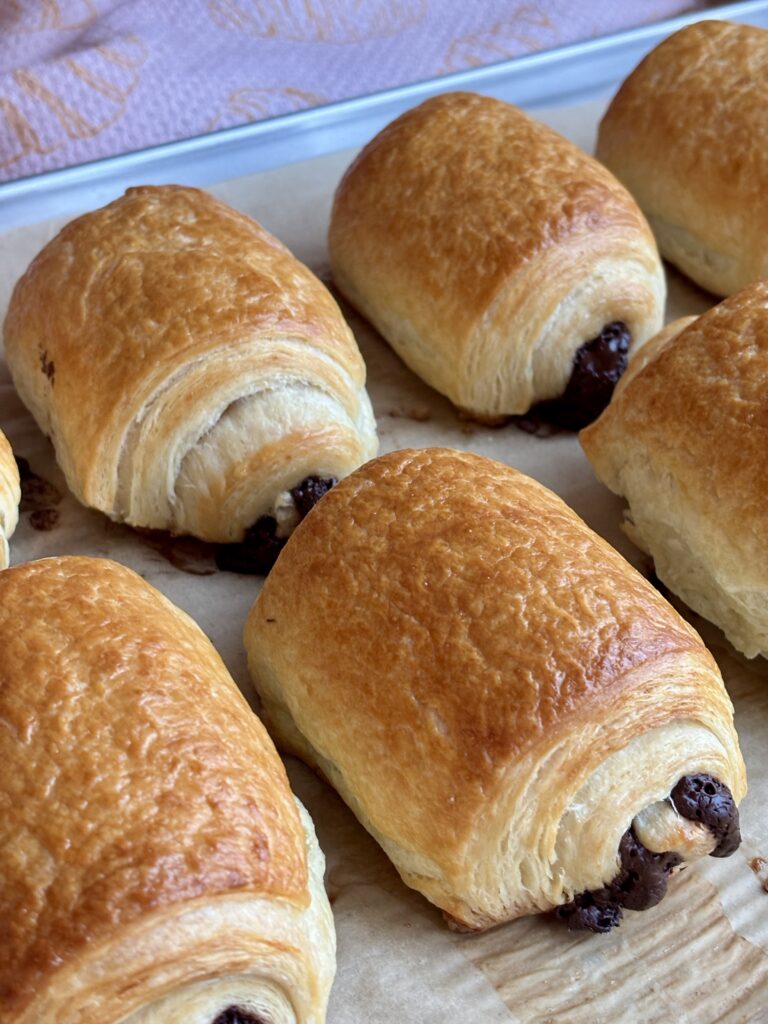
Shape Croissants
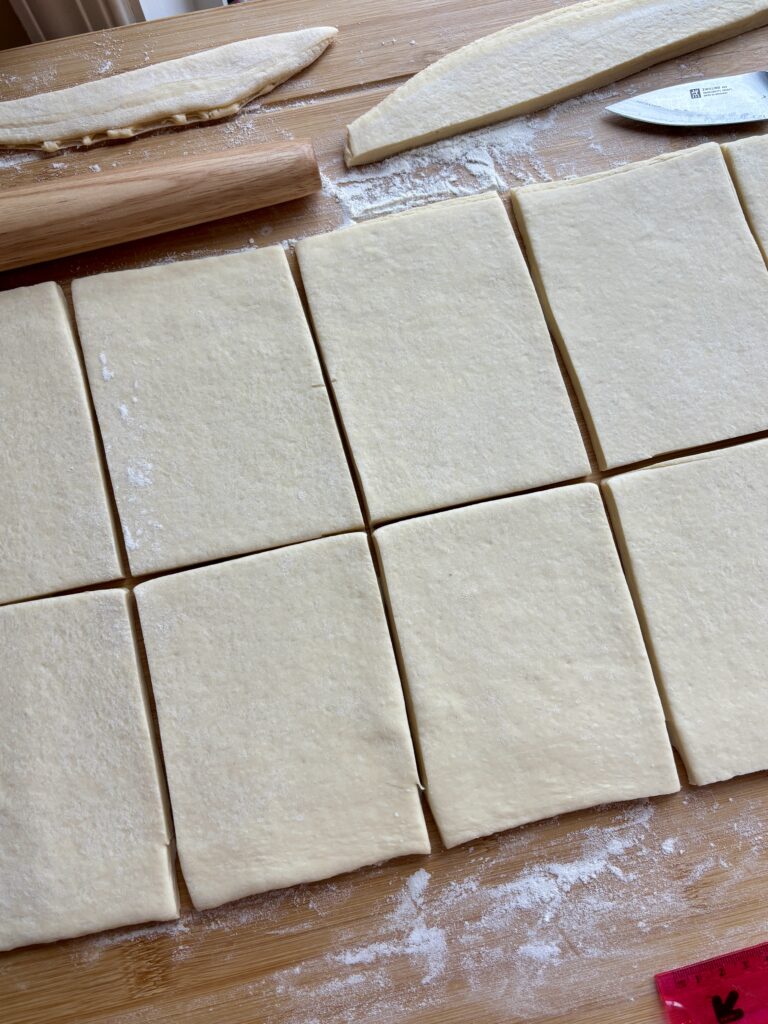
- Place the dough on a lightly floured surface again with the folded edges on the sides and cut the folded edges with a knife to help with rolling. Roll dough into a 10 x 24-inch rectangle, about ⅛-inch thick.
- Trim the edges for clean layers.
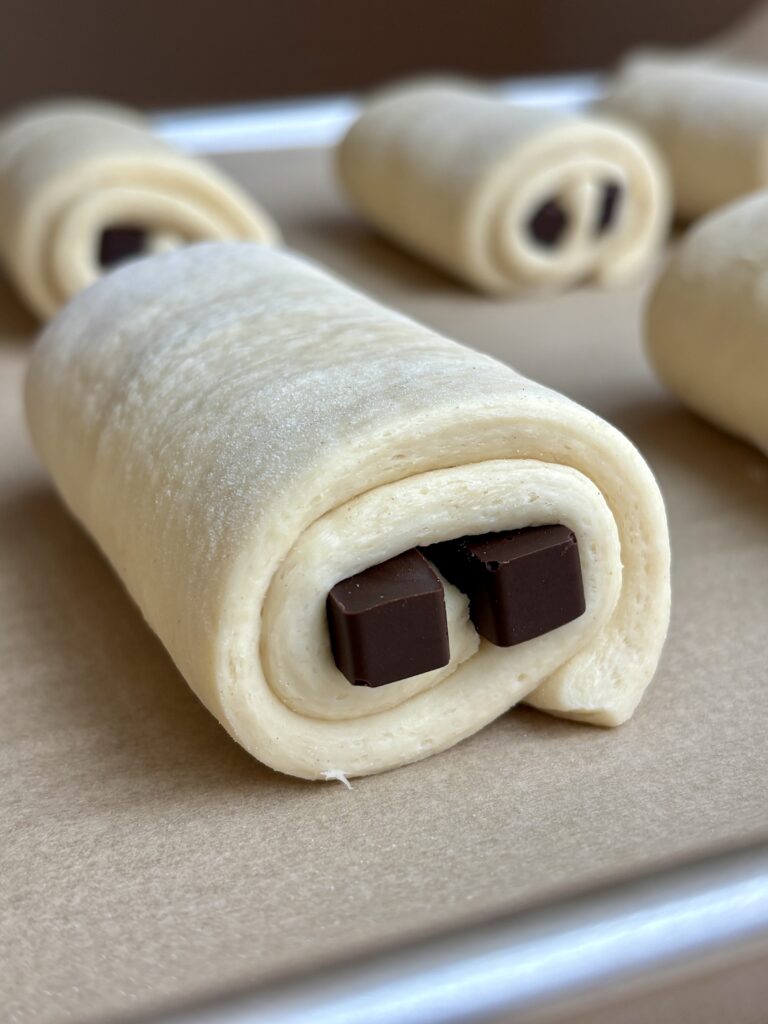
- Cut into 4 x 5-inch rectangles (about 12 total).
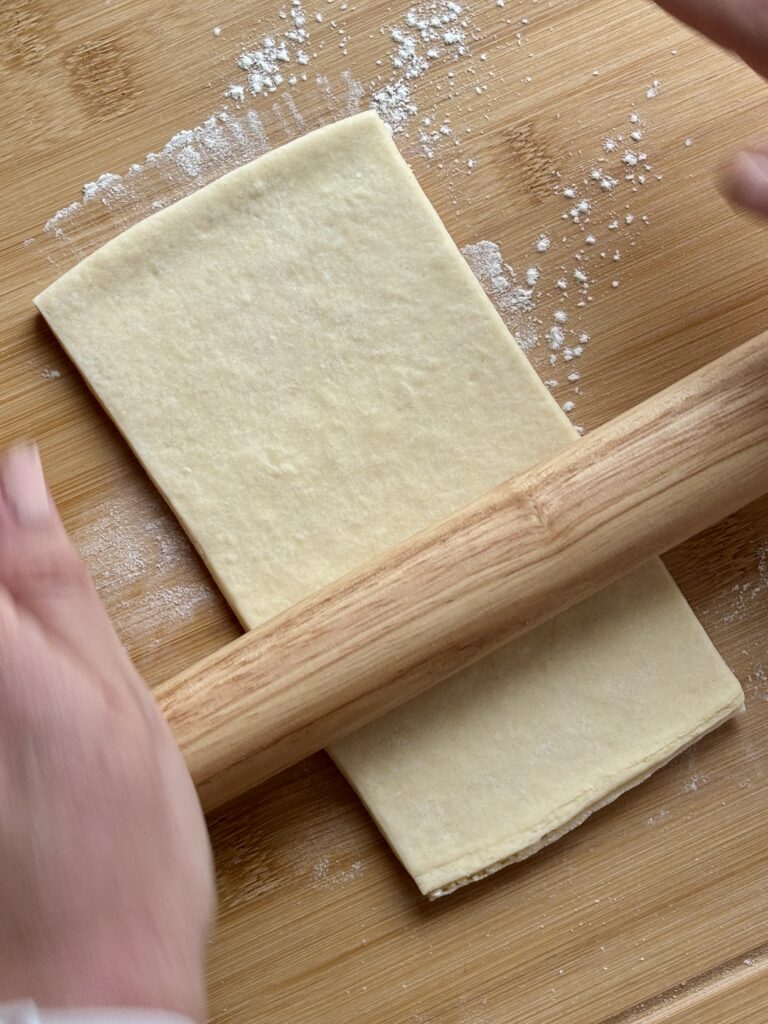
- Roll each rectangle out to about 8 inches long.
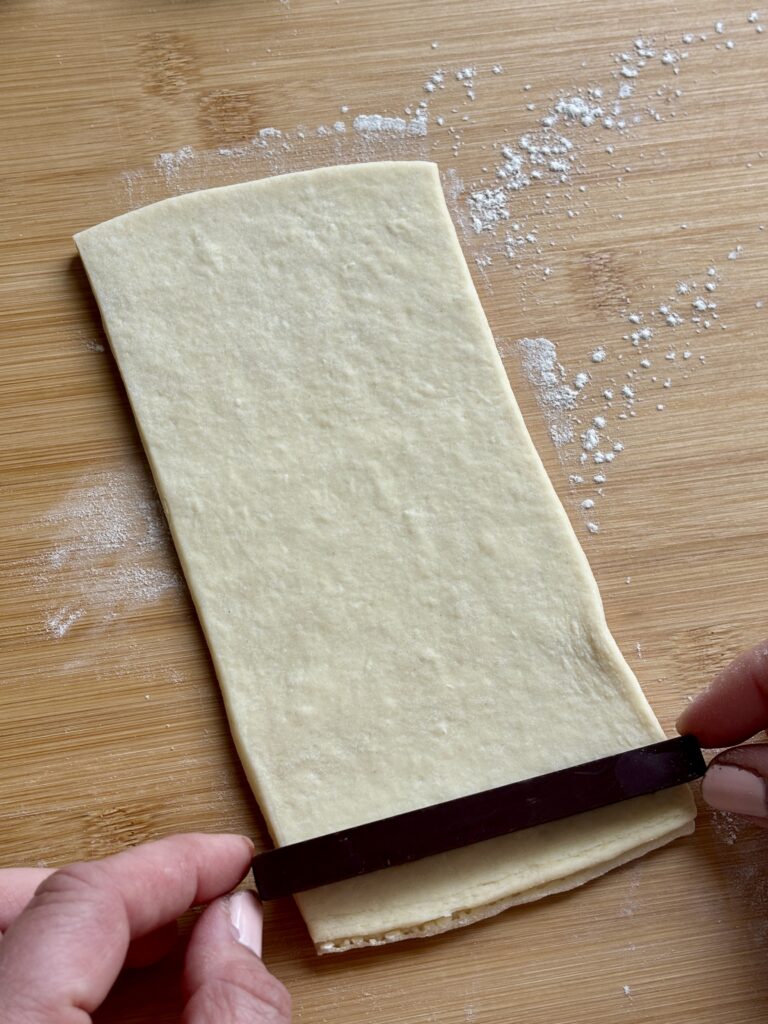
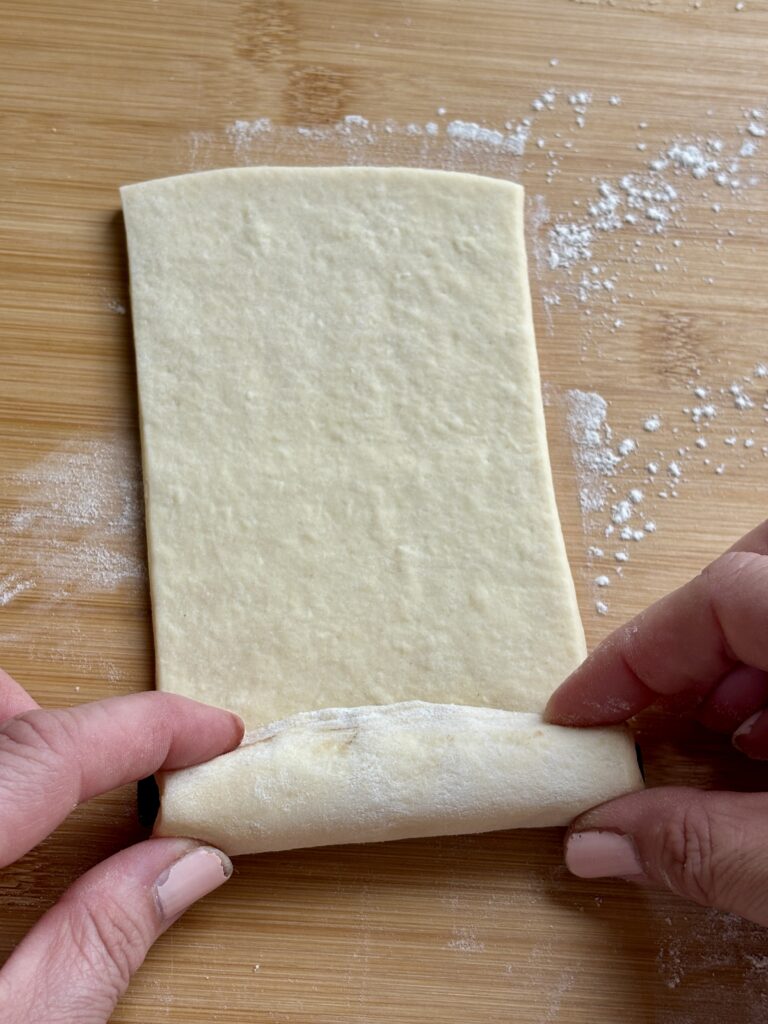
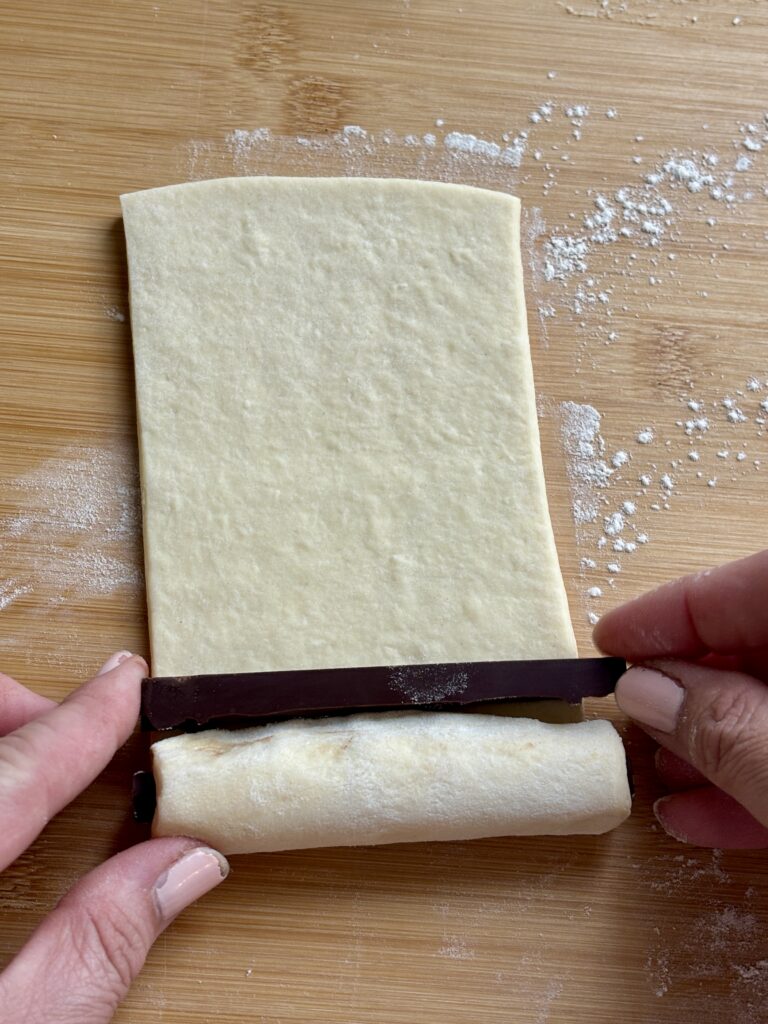
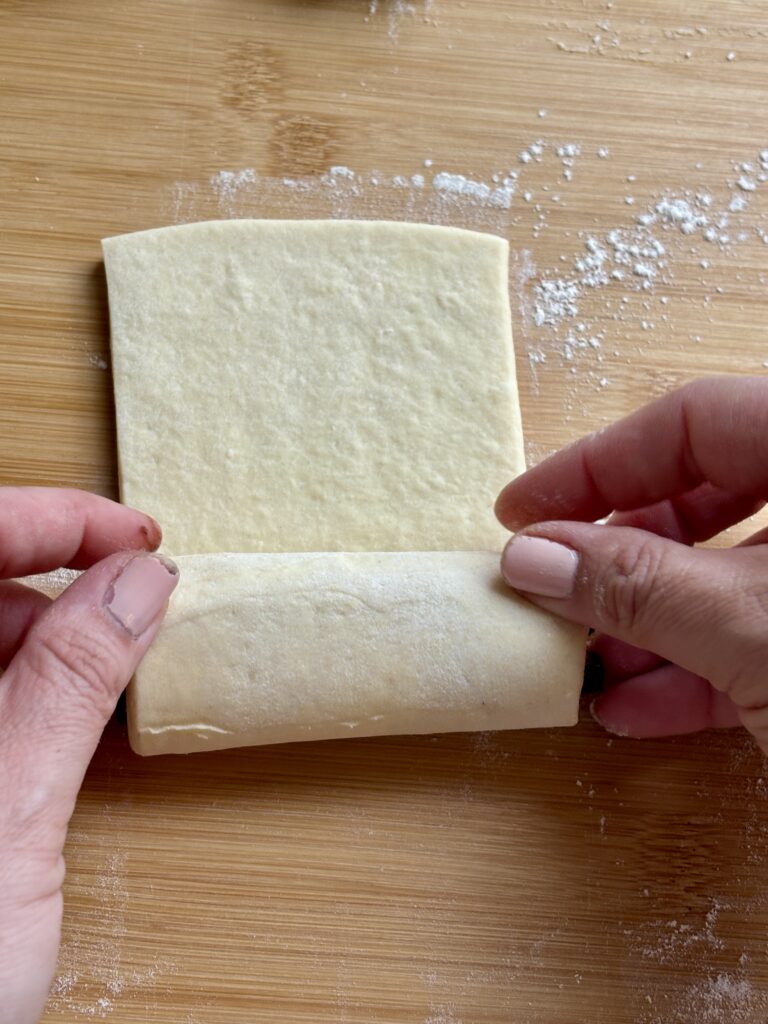
- Place 1 chocolate baton at one end.
- Roll once, then add a second baton.
- Roll fully and place seam-side down on a parchment-lined baking sheet with about 3 inches between each croissant.
Final Proof
- Cover lightly with a towel and proof at 70–75°F for 2–3 hours, until: puffy, slightly jiggly, rounded edges (if the kitchen is cool, you may need to proof longer)
- Optional: Refrigerate shaped croissants overnight, then proof in the morning.
Bake
- Preheat the oven for at least 40 minutes at 400°F.
- Whisk egg and cream and brush croissants with it.
- Bake for 8 minutes at 425°F.
- Then reduce the temperature to 375°F and bake another 18–20 minutes until deep golden brown.
- Cool 10 minutes before serving.
Notes
Notes
- Keep butter and dough cold throughout lamination.
- Final dough thickness should be about ⅛ inch for flaky layers.
- If butter leaks, the dough was too warm.
- If croissants are dense, they were under-proofed.
- If croissants are greasy, they were over-proofed.
Chocolate Baton Alternatives
- Melt chocolate and pour into silicone molds, then chill until firm
- Pipe 4-inch lines of melted chocolate onto a silicone mat and freeze
- Use chopped chocolate if needed
flaky chocolate croissants | fail proof croissant recipe | homemade pain au chocolat | laminated dough tutorial | bakery style croissants at home | chocolate croissant shaping | DIY chocolate batons | same day croissant recipe | overnight croissant method | how to make croissants from scratch
Nutritional Content Disclaimer
I choose not to include nutritional information with my recipes, as these values can be calculated from the ingredients provided. With my background as a pediatric nurse practitioner and my own family experience with disordered eating, I understand how focusing on numbers can affect our relationship with food. My philosophy is that all foods have a place—sweet, savory, nourishing, or indulgent. I aim to share recipes that support a healthy, joyful approach to eating. My hope is that this space also encourages a balanced, healthy relationship with food for you and your family too.