
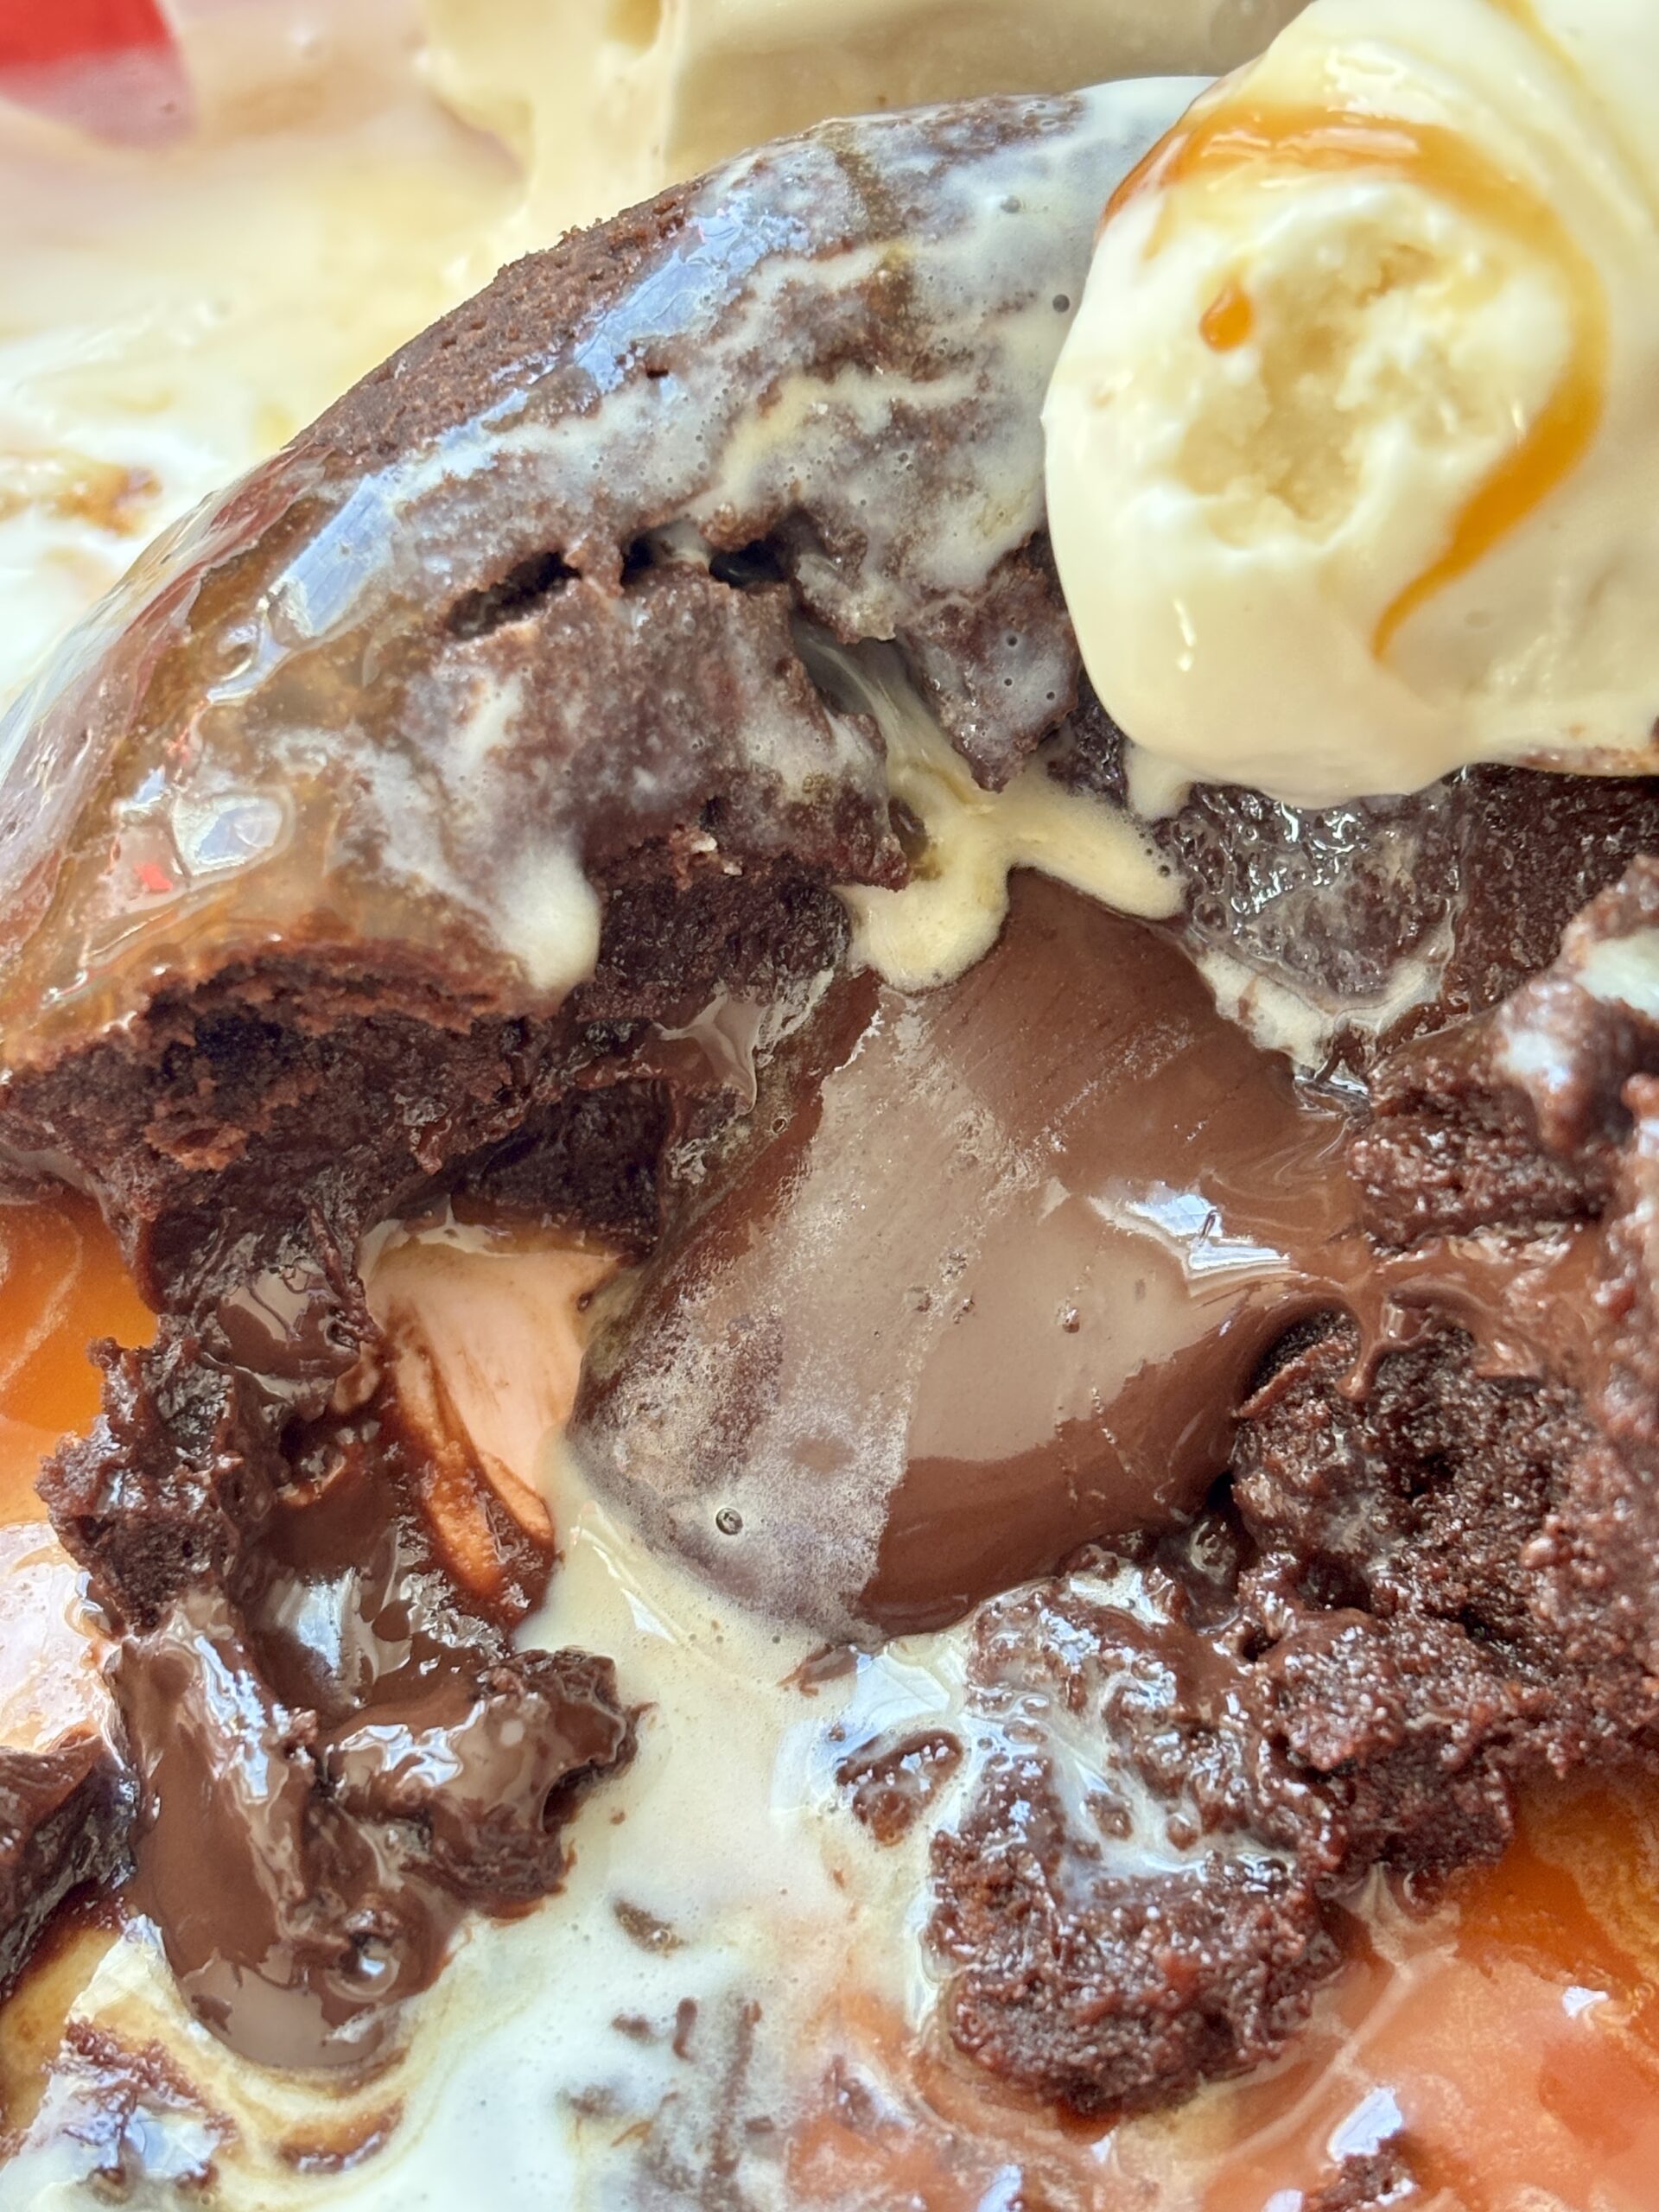
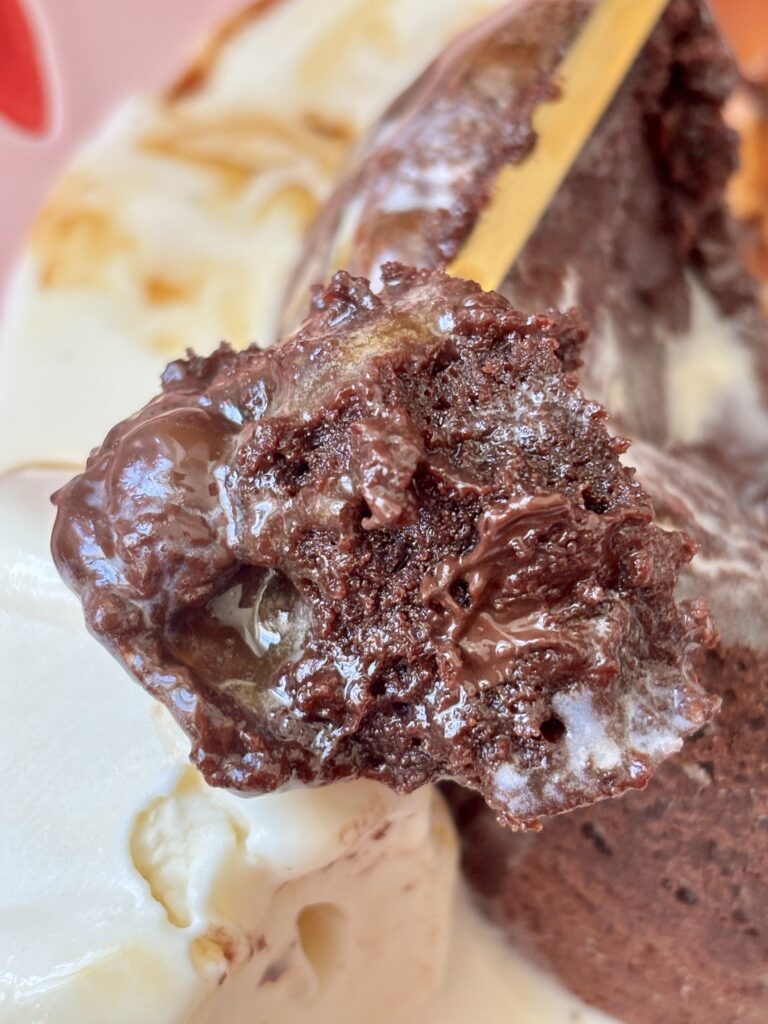
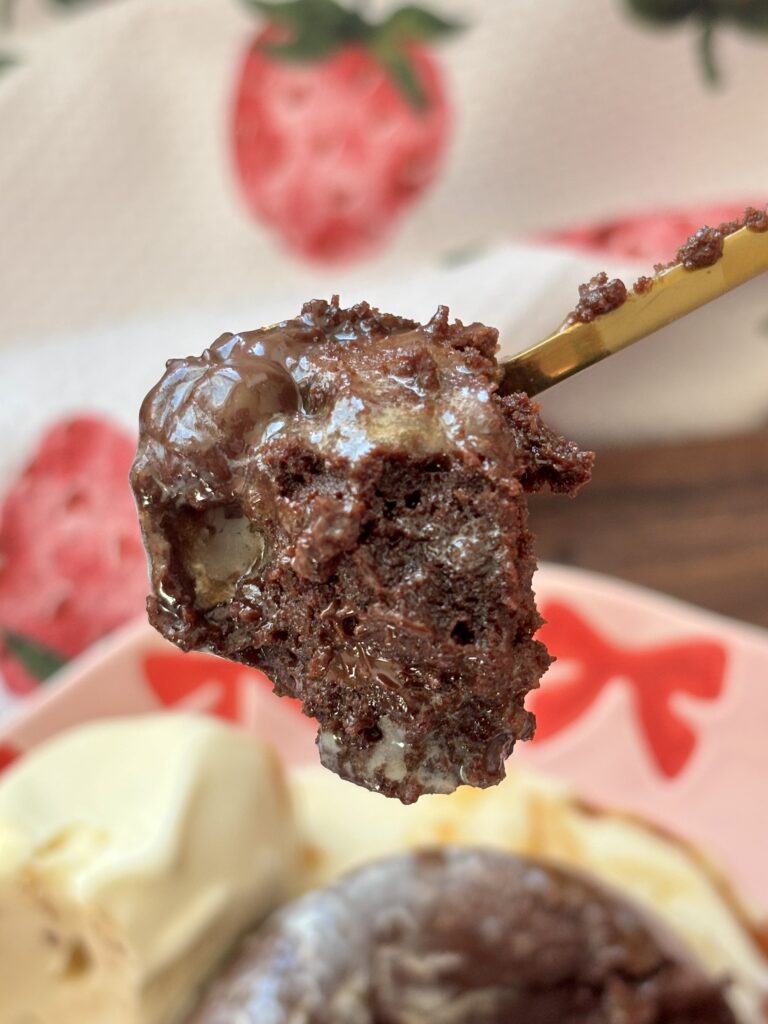
If you’ve ever ordered molten chocolate cake at a restaurant and thought it felt a little magical, you’re about to discover just how easy it is to recreate that rich, decadent experience right at home. These Dark Chocolate Mini Lava Cakes are deeply chocolatey, luxuriously soft, and filled with a warm, molten center that flows perfectly with every bite. They look elegant and impressive, but truthfully they come together in under 30 minutes with simple pantry staples.
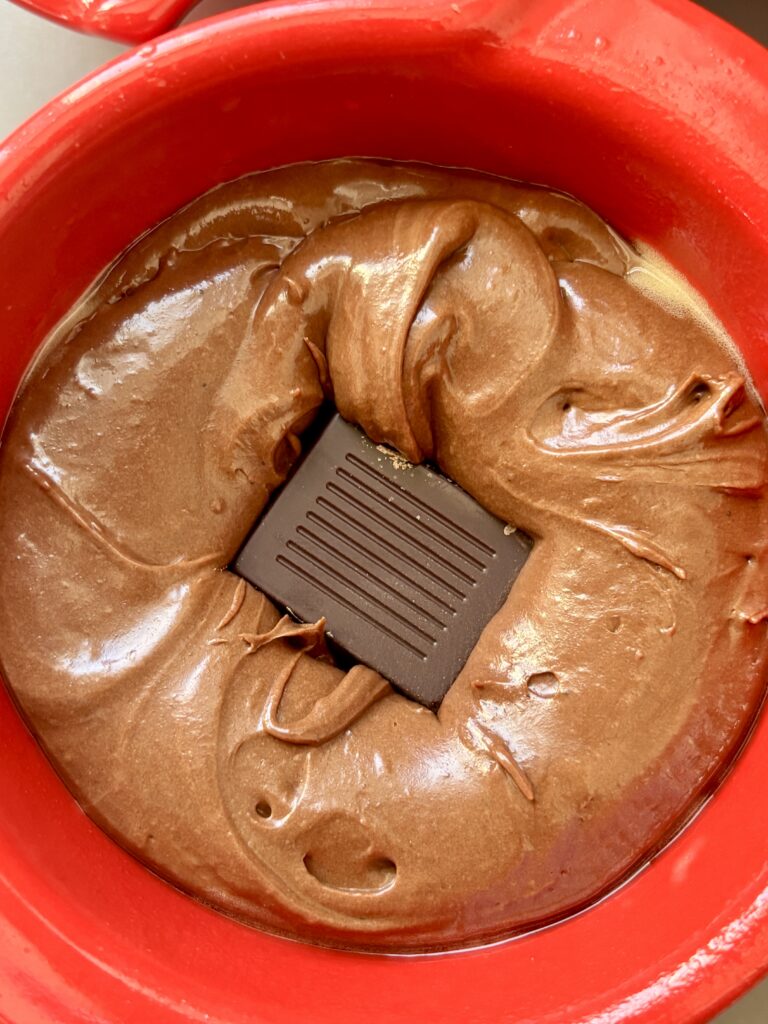
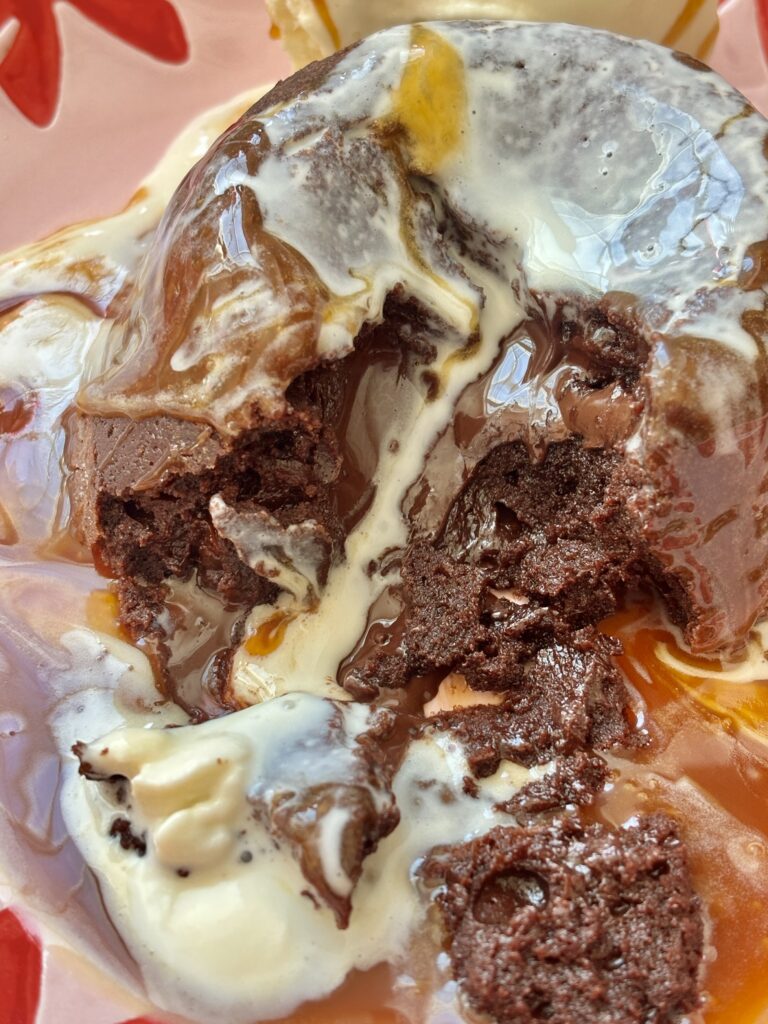
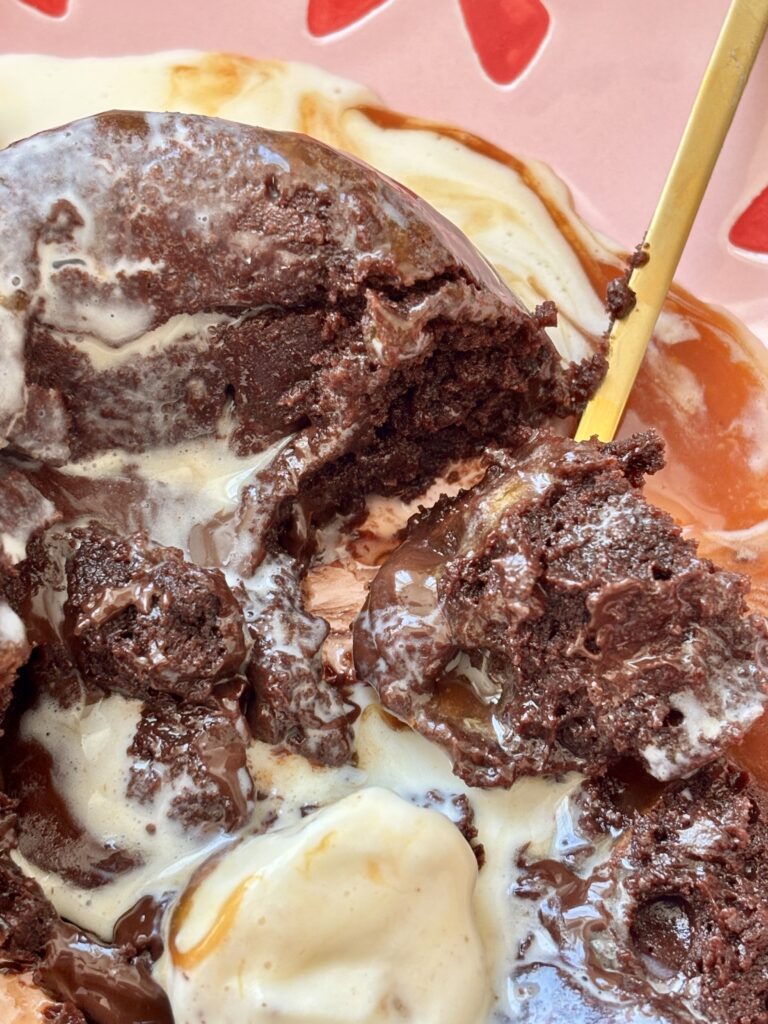
Using high quality dark chocolate gives these lava cakes a bold, sophisticated flavor that balances sweetness with a slight cocoa bitterness, making them irresistible without being overly sugary. The texture is what truly sets these apart, tender cake like edges surround a silky, molten center, enhanced even further with an extra piece of dark chocolate tucked into the middle for that guaranteed lava effect.
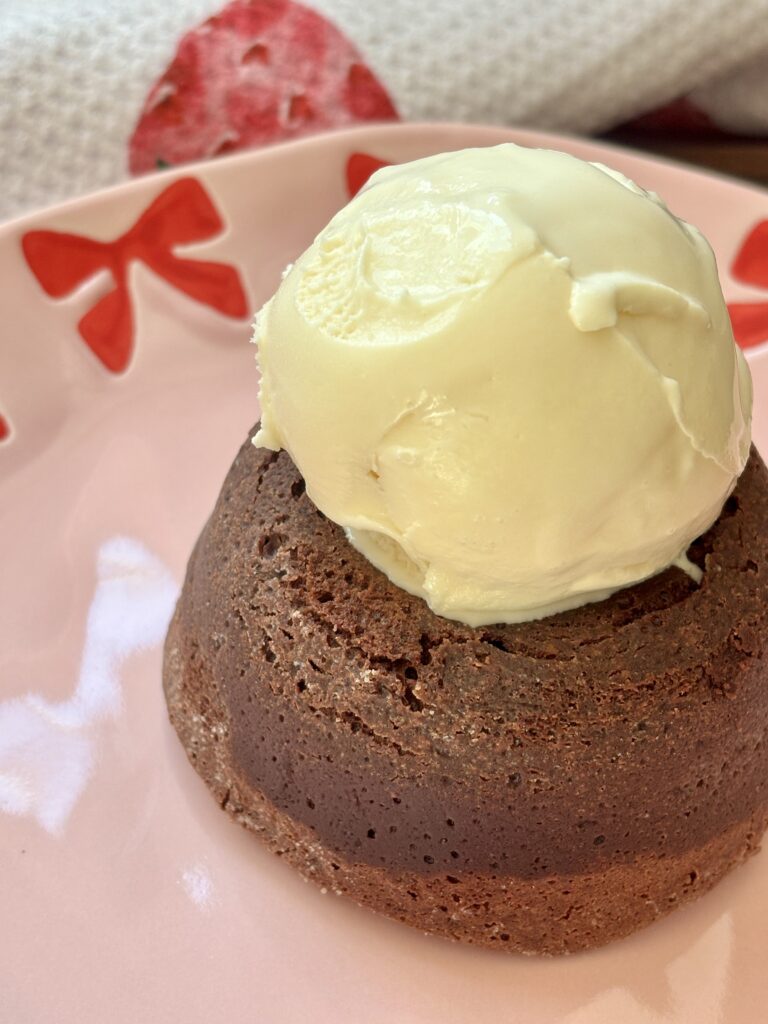
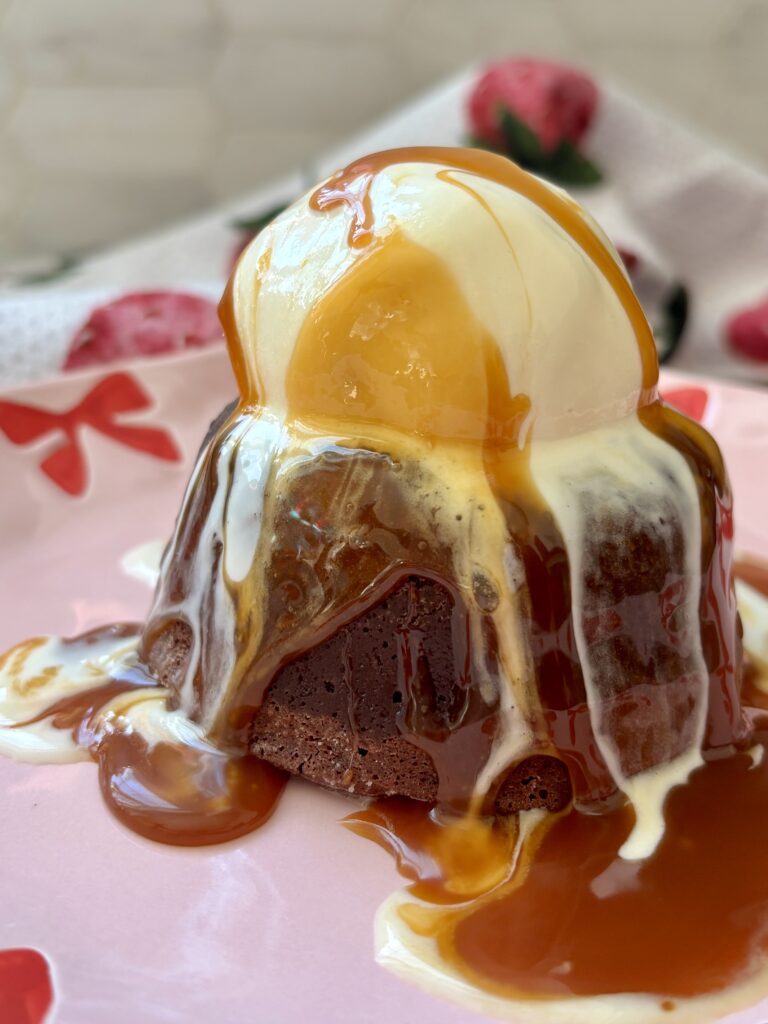
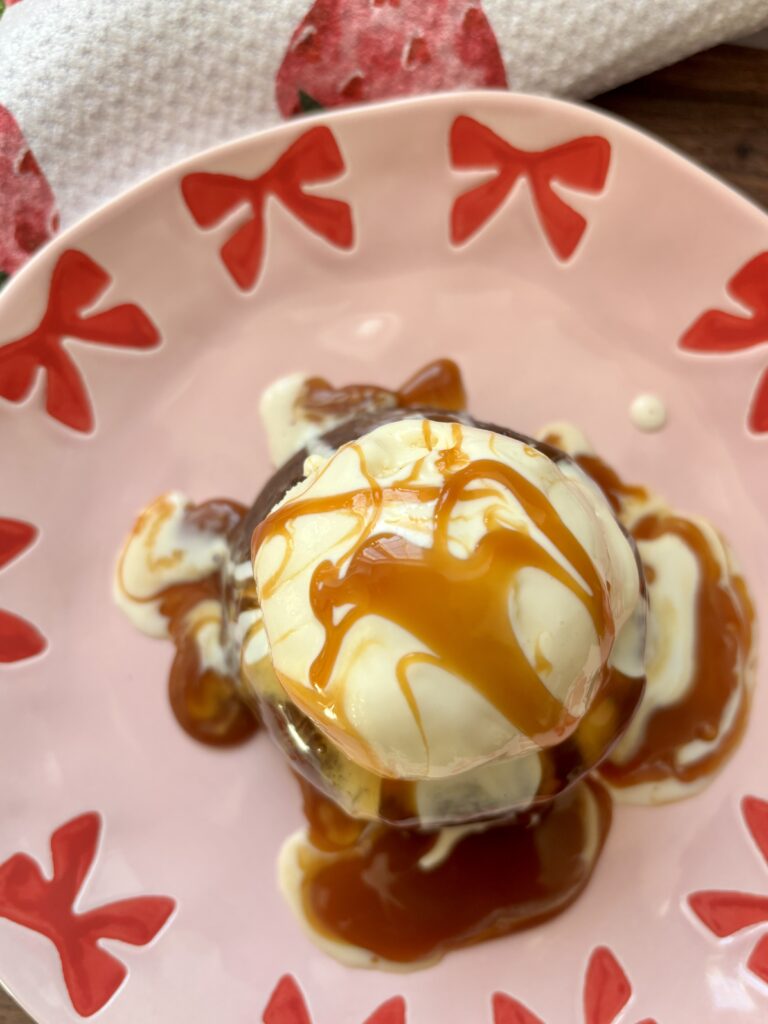
These mini cakes are perfect for date nights, dinner parties, holiday desserts, or those moments when you just need a chocolate fix that feels extra special. They can be made ahead of time, baked fresh right before serving, and pair beautifully with vanilla ice cream, whipped cream, fresh berries, or a light dusting of powdered sugar.
Even beginner bakers can master this recipe thanks to its straightforward technique and forgiving batter. Once you make these once, they’ll quickly become your go to dessert whenever you want something indulgent, comforting, and guaranteed to impress.
Why you’ll love this recipe!
What ingredients do I need?
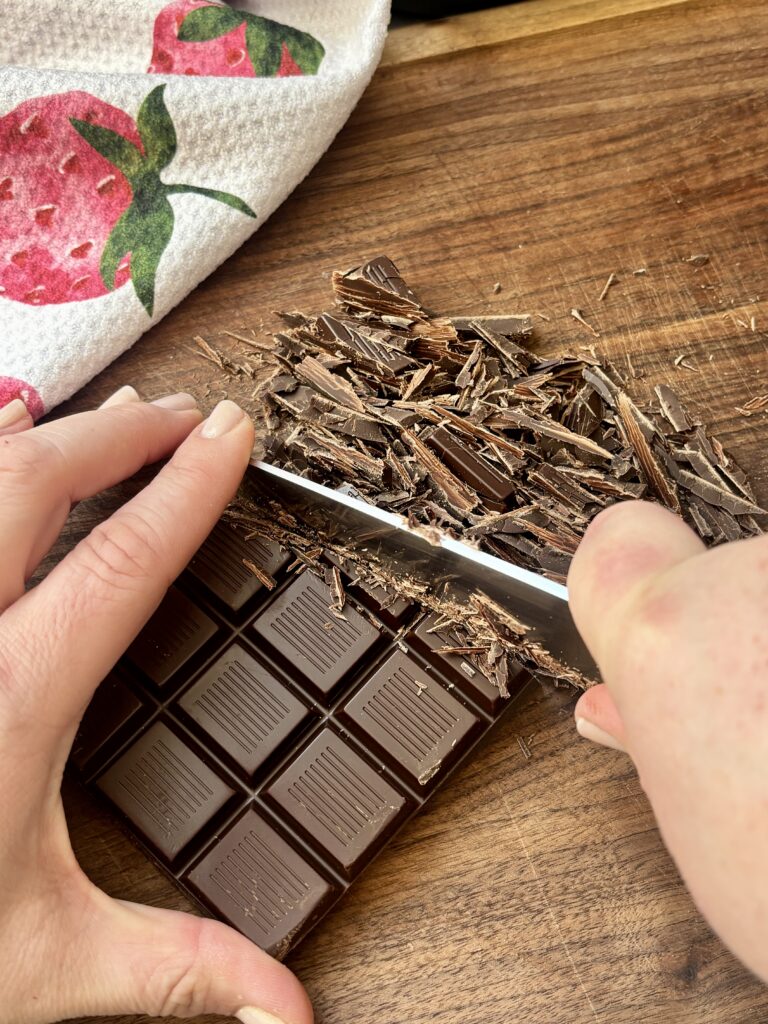
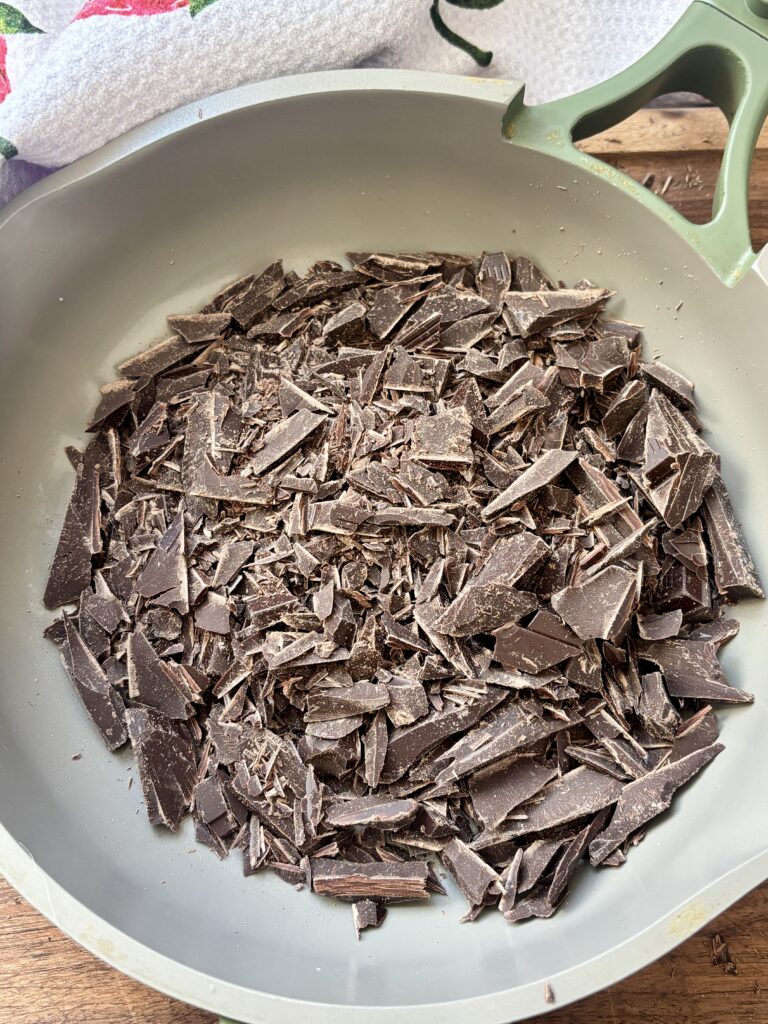
- Dark Chocolate (72% Cocoa): Provides deep, bold chocolate flavor and creates the silky molten center. Higher cocoa percentages give a richer and less sweet result.
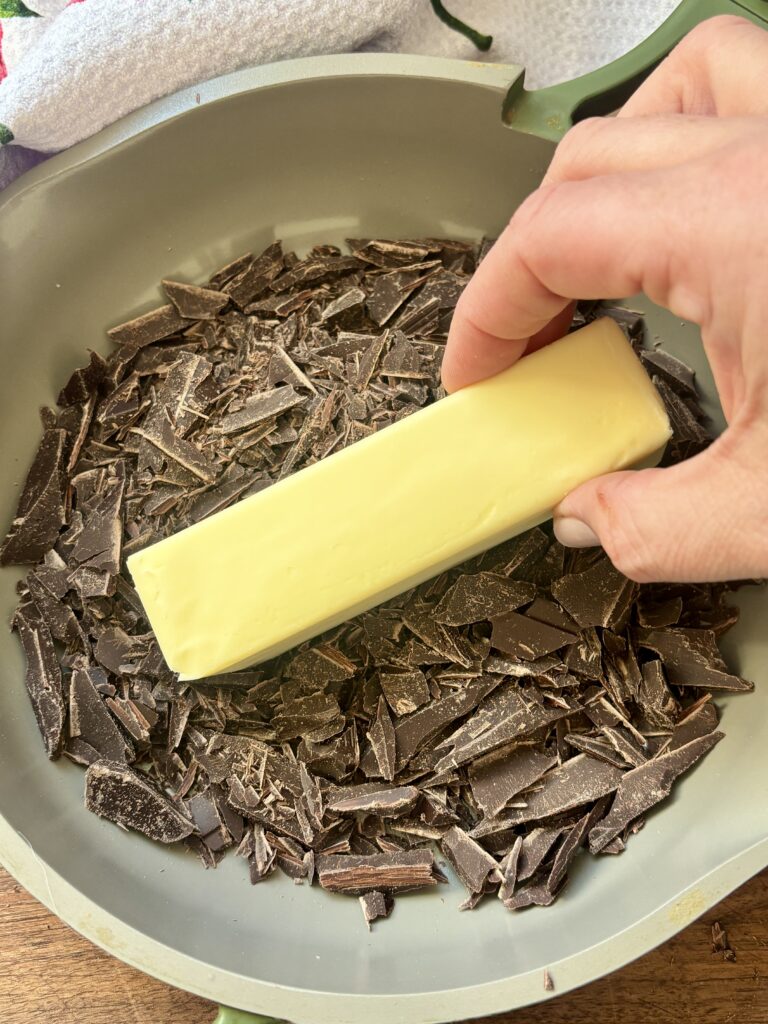
- Unsalted Butter: Adds richness, moisture, and helps create the smooth, luxurious texture of the batter.
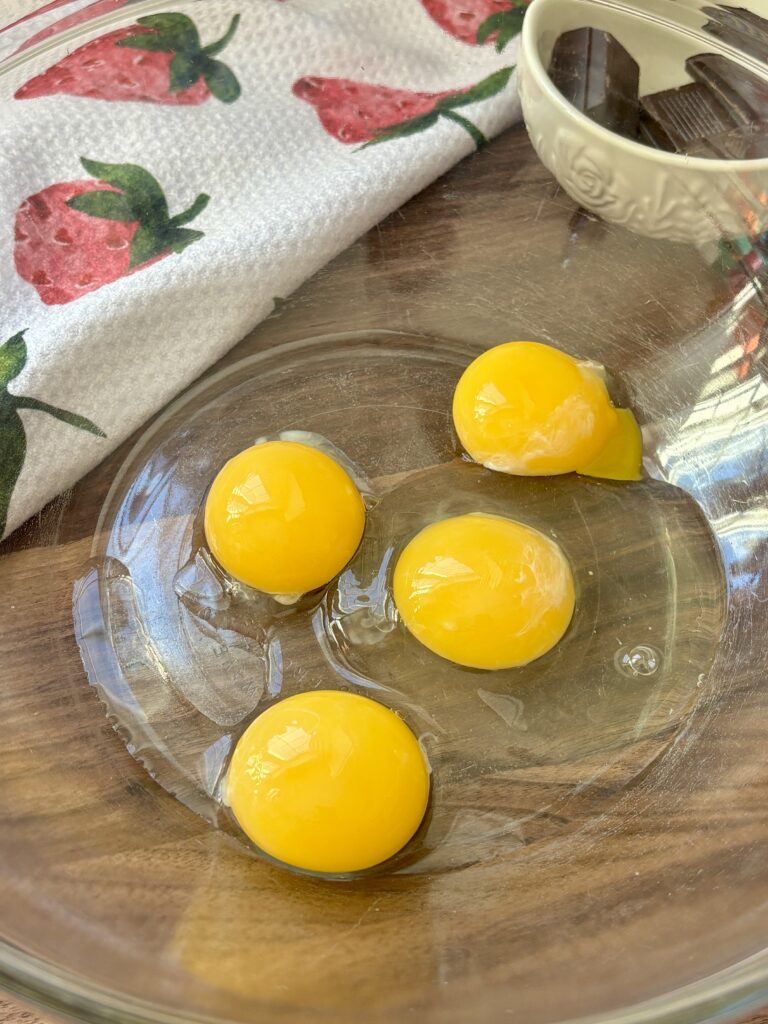
- Whole Egg and Egg Yolks: Eggs provide structure while extra yolks create that signature creamy and fudgy consistency.
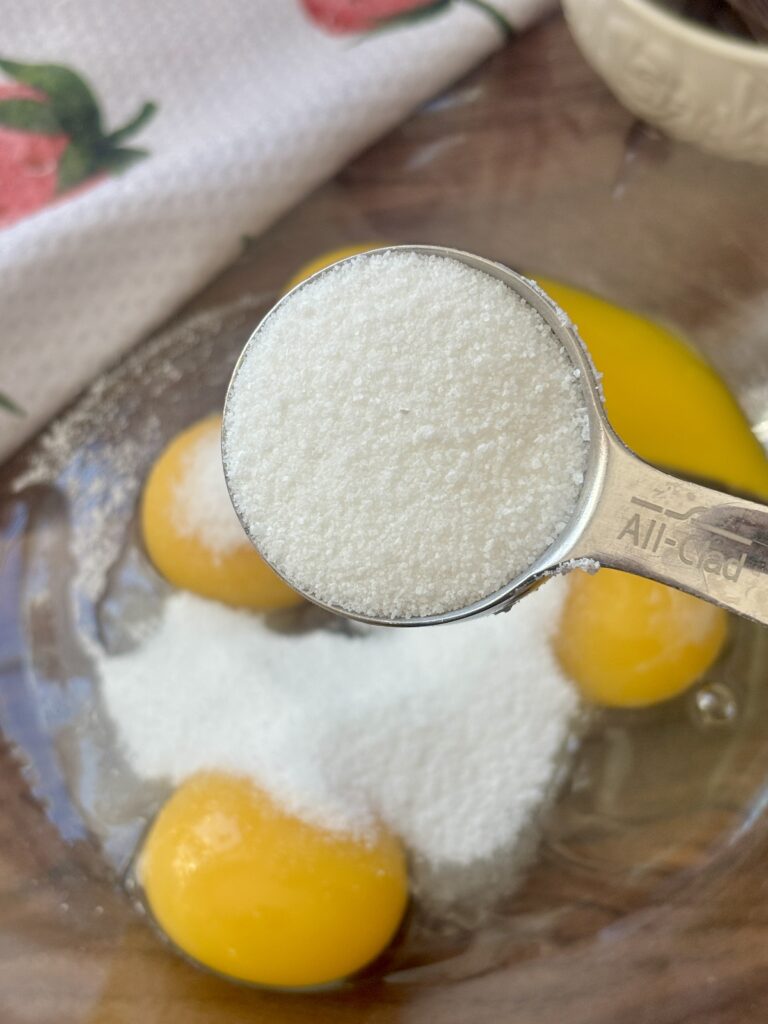
- Granulated Sugar: Balances the bitterness of dark chocolate and helps create a soft, tender crumb.
- Salt: Enhances chocolate flavor and balances sweetness.
- All Purpose Flour: Provides just enough structure to hold the cake shape while keeping the center soft and gooey.
- Vanilla Extract: Rounds out the chocolate flavor and adds warmth and depth.
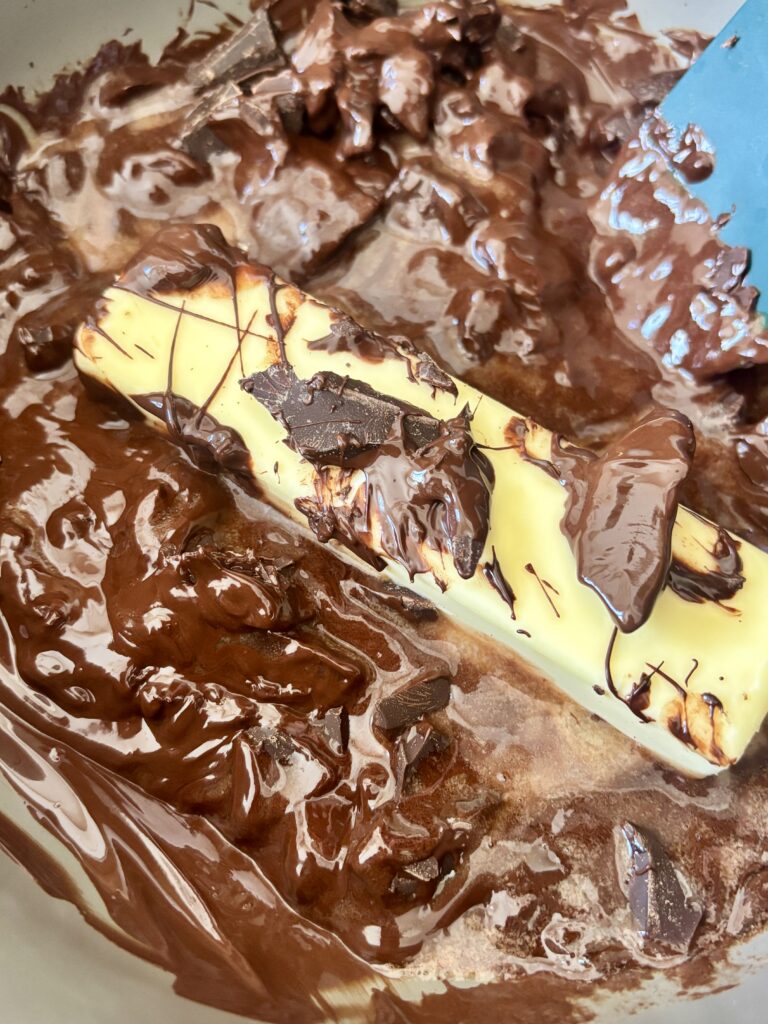
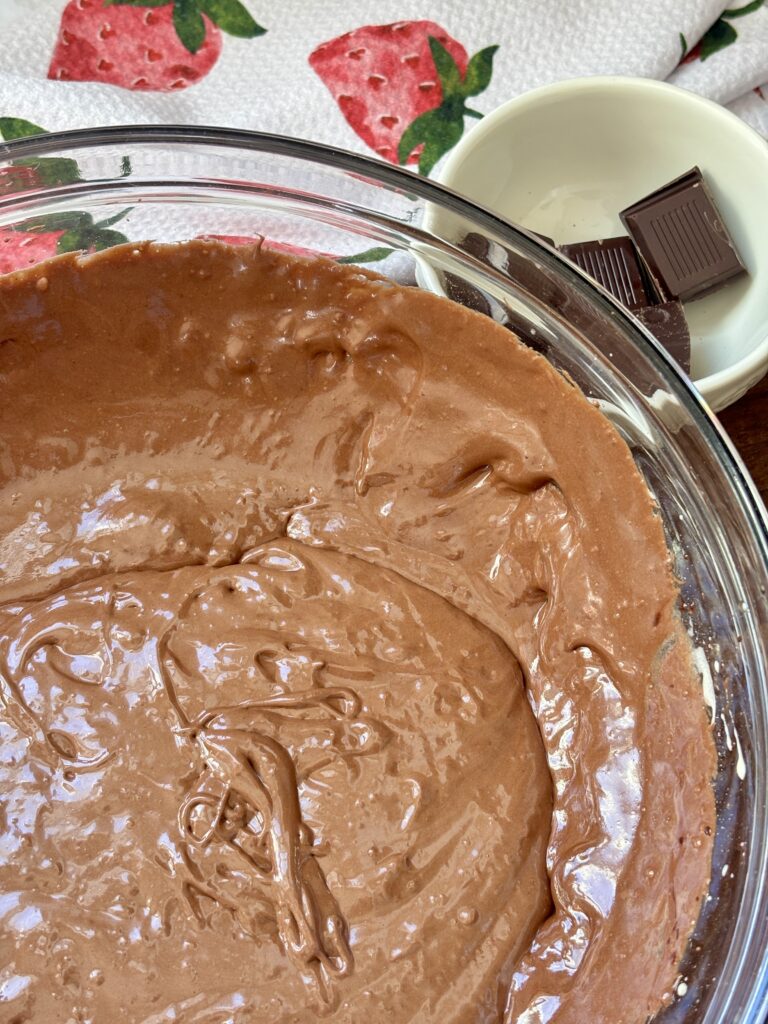
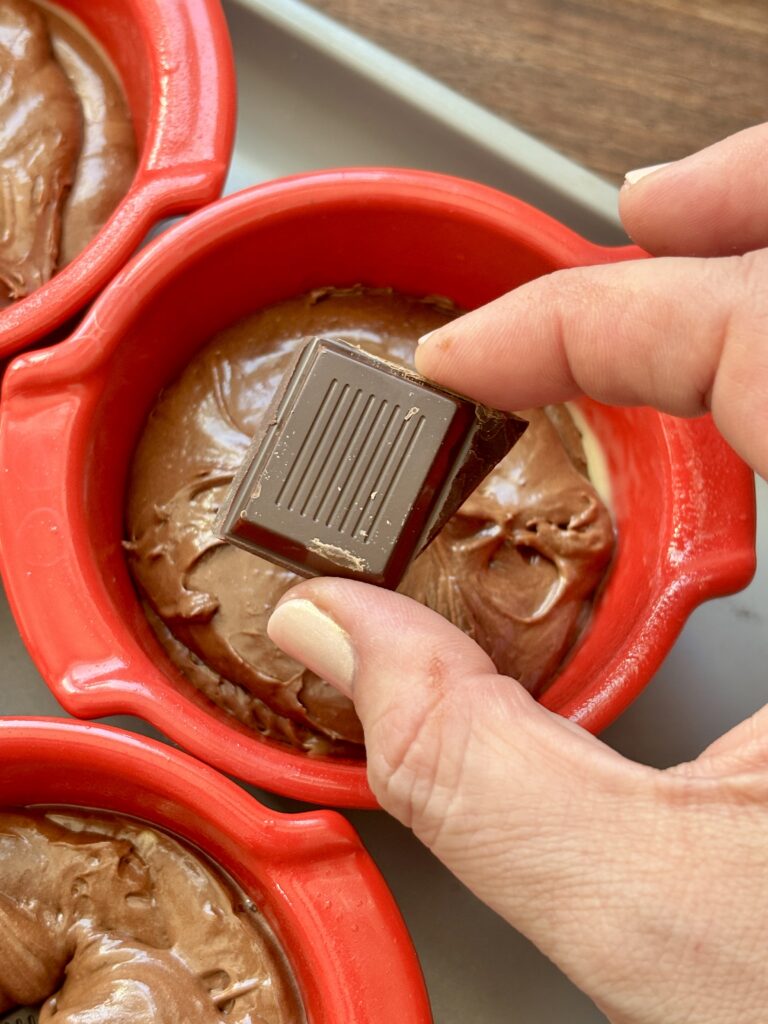
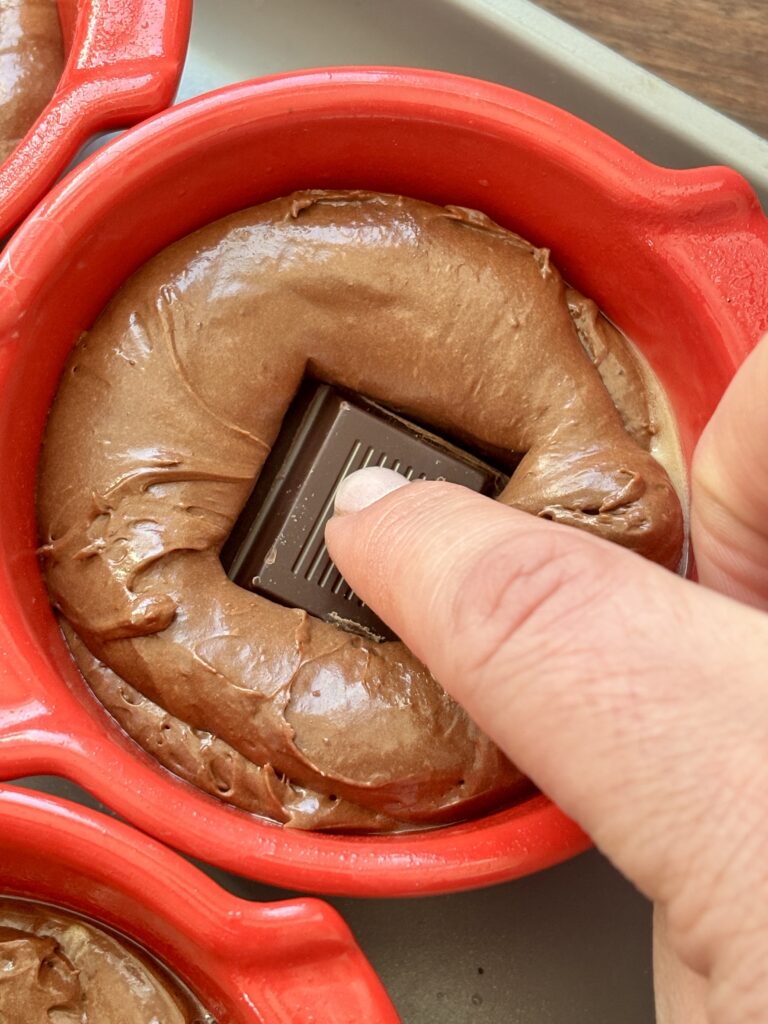
- Extra Dark Chocolate Pieces (For Centers): Guarantees a perfectly molten interior and intensifies chocolate richness.
Recipe Variations
- Salted Caramel Lava Cakes: Add a small piece of soft caramel candies into the center before baking.
- Peanut Butter Lava Cakes: Insert a 1 tsp frozen peanut butter dollop into the center before baking.
- Espresso Chocolate Lava Cakes: Add ½-1 teaspoon espresso powder to enhance chocolate flavor.
- Raspberry Chocolate Lava Cakes: Add a teaspoon of raspberry jam in the center for a fruity contrast.
- White Chocolate Center: Replace center chocolate piece with white chocolate for flavor contrast.
Pro Tips
- Try and use high quality chocolate for the best flavor and texture.
- Melt chocolate and butter slowly over low heat to avoid the chocolate seizing.
- Allow melted chocolate to cool slightly (about 5-10 minutes) before mixing into the eggs to prevent prematurely cooking the eggs.
- Beat eggs and sugar until slightly thickened, this helps create structure.
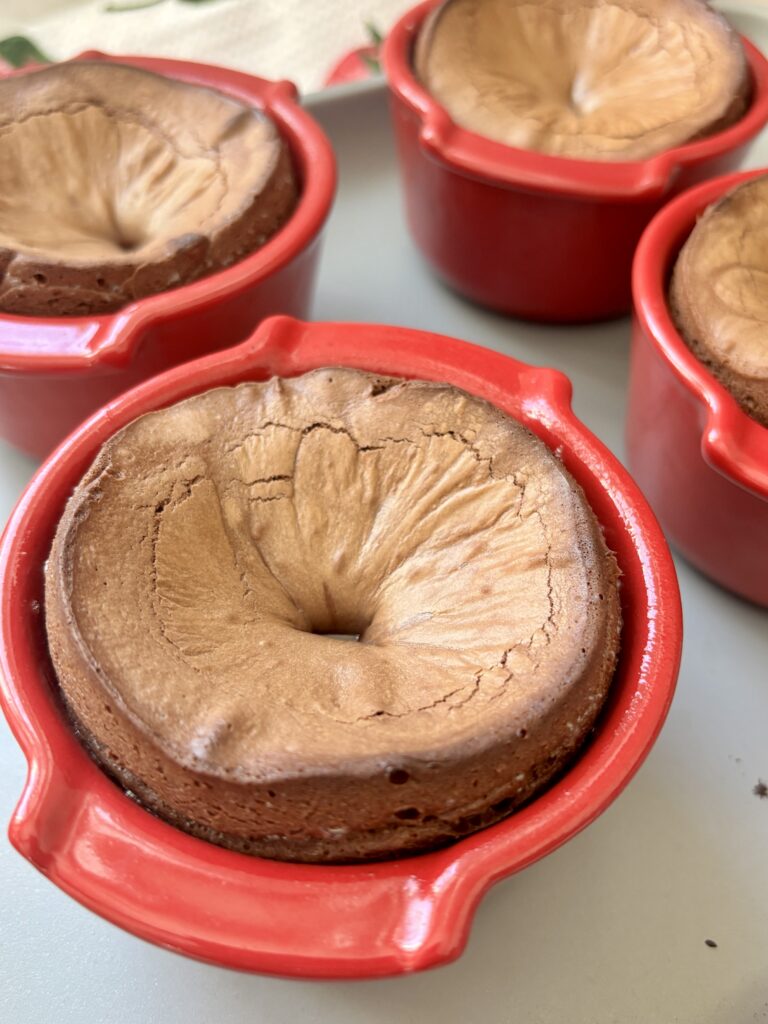
- Generously grease ramekins with baking spray (or butter and dusting of cocoa powder) to prevent sticking and ensure clean release.
- Place ramekins on a baking sheet for easier transfer and even baking.
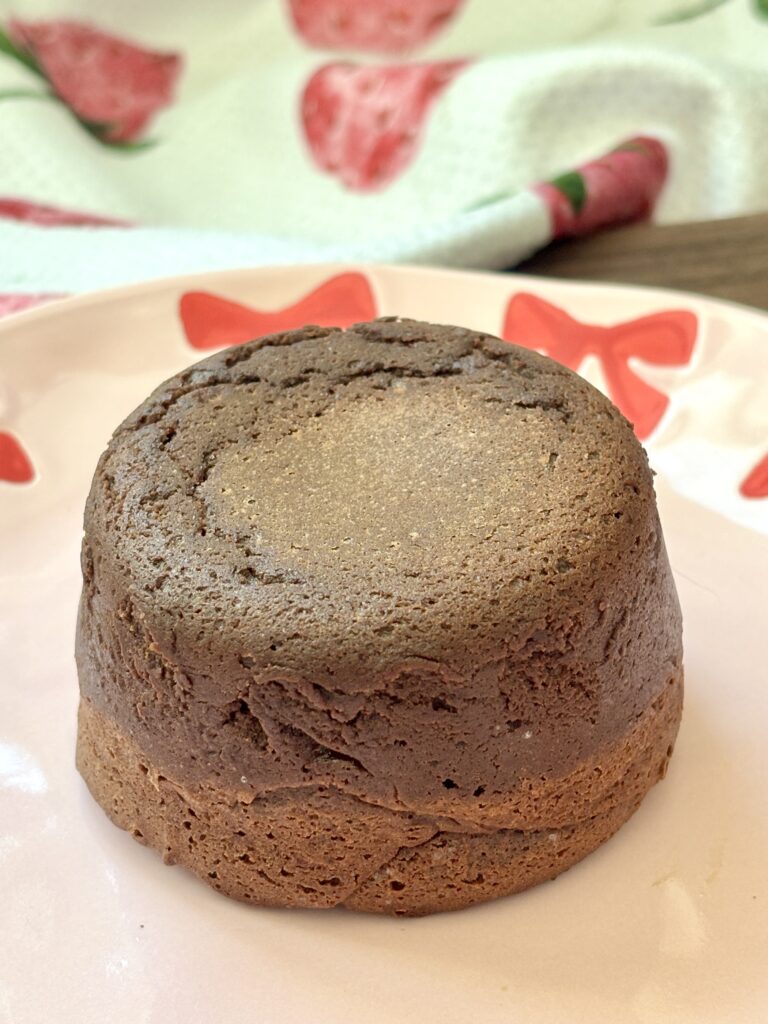
- Do not overbake! The edges should be set while centers remain soft and oozy.
- Let cakes rest briefly before inverting to help them hold their shape.
- Run a knife around the edges before flipping for easy release.
Can I Substitute?
Yes! Like always though, any substitutions made to the recipe can result in a change in texture and/or flavor.
- Dark Chocolate: Semi sweet chocolate can be used for a sweeter lava cake. Bittersweet chocolate also works well.
- Unsalted Butter: Salted butter may be used. Simply reduce or omit added salt.
- Granulated Sugar: Can be replaced with coconut sugar for a deeper caramel like flavor (may slightly alter texture).
- All Purpose Flour: Can be replaced with a 1:1 gluten free flour blend for similar structure.
- Vanilla Extract: Vanilla bean paste or scraped vanilla bean may be substituted for a more intense flavor.
Dietary Substitutions
- Gluten Free: Use a gluten free 1:1 baking flour substitute.
- Dairy Free: Use plant-based butter and dairy free dark chocolate.
Leftovers and Storage
- Lava cakes are best served fresh and warm.
- Batter can be prepared and refrigerated in ramekins for up to 4 hours before baking.
- When baking, cold cake they may require an extra 1-2 minutes of baking.
- Baked cakes can be refrigerated for up to 2 days and reheated gently in the microwave for 15-20 seconds.
But, I Still Have A Few Questions…
How do I know when lava cakes are done baking?
The edges should look set and slightly firm, while the centers still appear soft and slightly underbaked. The tops may look puffed but should not look fully dry.
Why didn’t my lava center form?
This usually happens if the cakes were overbaked. Try reducing the bake time by 30–60 seconds. Oven temperatures can vary, so checking early helps ensure a molten center.
Can I make these without ramekins?
Yes, you can use a well greased muffin tin instead. Baking time may vary slightly, and the cakes may be slightly smaller depending on the size of the muffin cups.
Can I prepare lava cakes ahead of time?
Yes. You can prepare the batter, fill the ramekins, and refrigerate them for up to 4 hours before baking. Add an extra 1–2 minutes to the bake time if baking directly from the refrigerator.
Can I freeze lava cake batter?
Yes. Fill greased ramekins with batter, cover tightly, and freeze. Bake directly from frozen, adding approximately 3–4 additional minutes to the bake time.
Can I reheat baked lava cakes?
Yes, but the center may not be as molten as when freshly baked. Microwave for 15-20 seconds until warmed through.
What type of chocolate works best?
High-quality dark chocolate between 60–75% cocoa provides the best balance of flavor, richness, and sweetness.
Why are extra egg yolks used in this recipe?
Egg yolks create a richer, creamier texture and help form the signature molten center.
How do I prevent lava cakes from sticking to ramekins?
Generously coat ramekins with baking spray or butter and a dusting of cocoa powder. Then allow the cakes to cool for several minutes before inverting. Running a knife around the edges also helps release them cleanly.
How should lava cakes be served?
They are best served warm immediately after removing from ramekins. They pair beautifully with vanilla ice cream, whipped cream, fresh berries, caramel sauce, or a dusting of powdered sugar. I have also been known to just eat it straight from the ramekin, no inverting required!

Let’s engage!
Make sure to tag @thehomechefmomma on Instagram or Facebook, and leave a review or comment if you make these. I always get so excited to see your creations, variations of the recipe, and feedback! Just remember to be kind in your comments, there is still a person behind this screen! 🙂
Dark Chocolate Lava Cakes
Ingredients
- 7 oz dark chocolate bar 72% cocoa, chopped
- ½ cup unsalted butter
- 1 large egg
- 3 large egg yolks
- 4 tablespoons granulated sugar
- ¼ teaspoon salt
- 4 tablespoons all-purpose flour
- 1 teaspoon vanilla extract
- 4 pieces dark chocolate about 0.5 oz each, for centers
Instructions
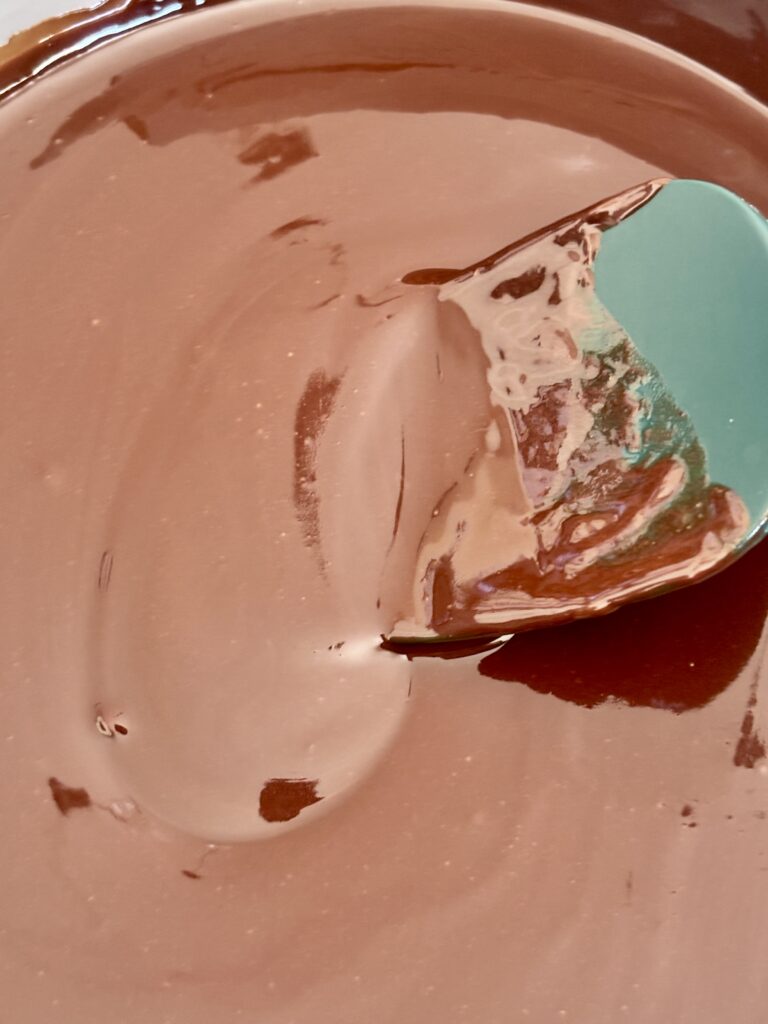
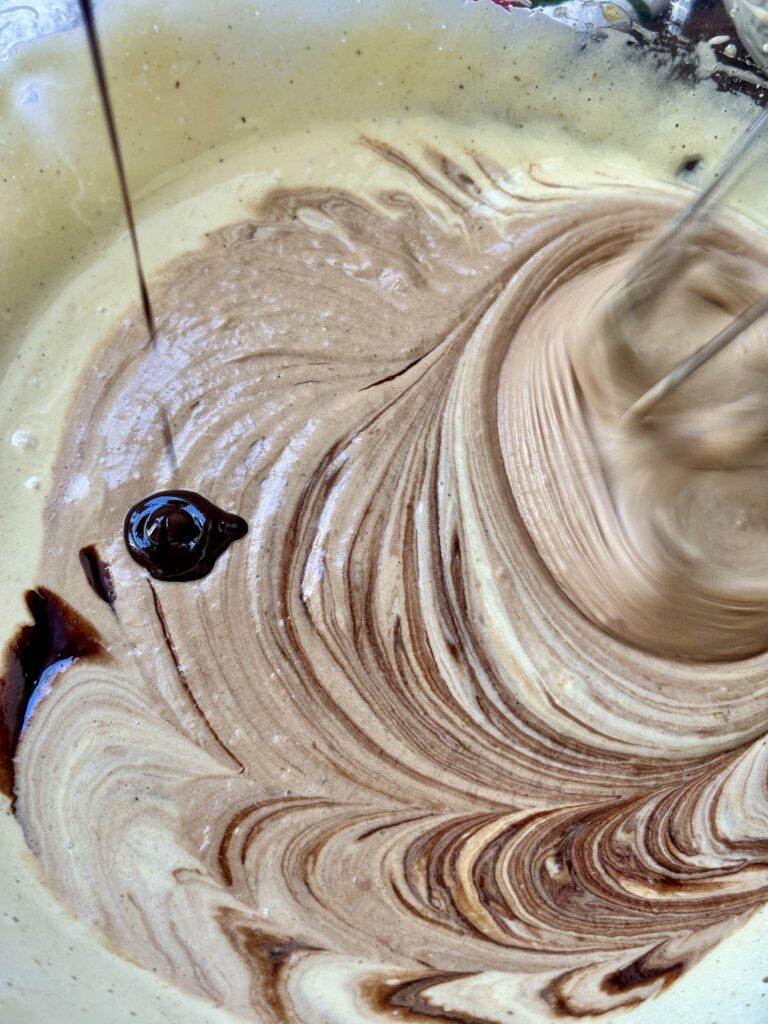
- In a small saucepan over low to medium-low heat, melt butter and chopped dark chocolate together, stirring frequently until smooth. Remove from heat and cool for 5–8 minutes.
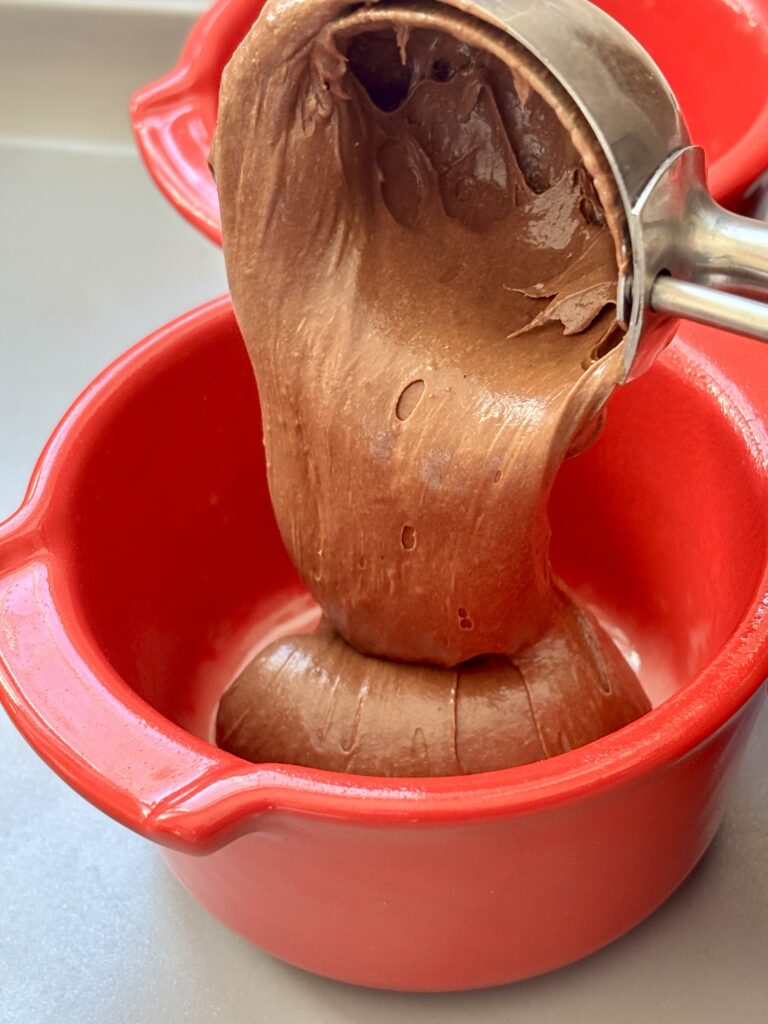
- Preheat oven to 425°F (220°C). Generously spray four ramekins with baking spray (or butter and lightly dust with cocoa powder) and place on a baking sheet.
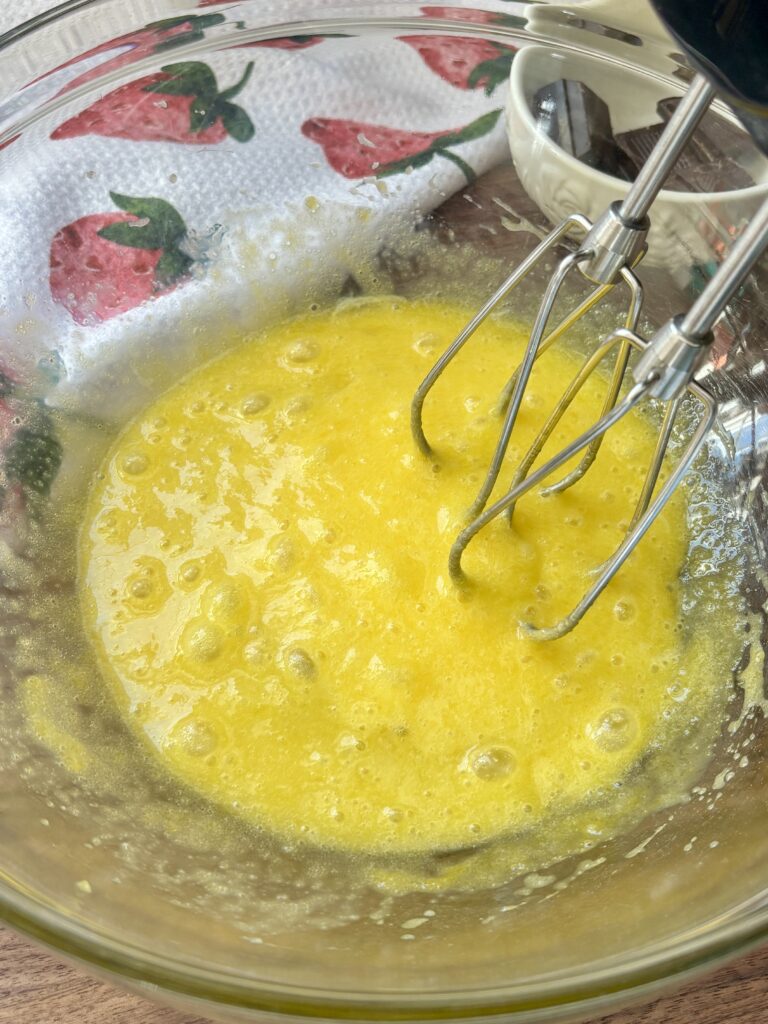
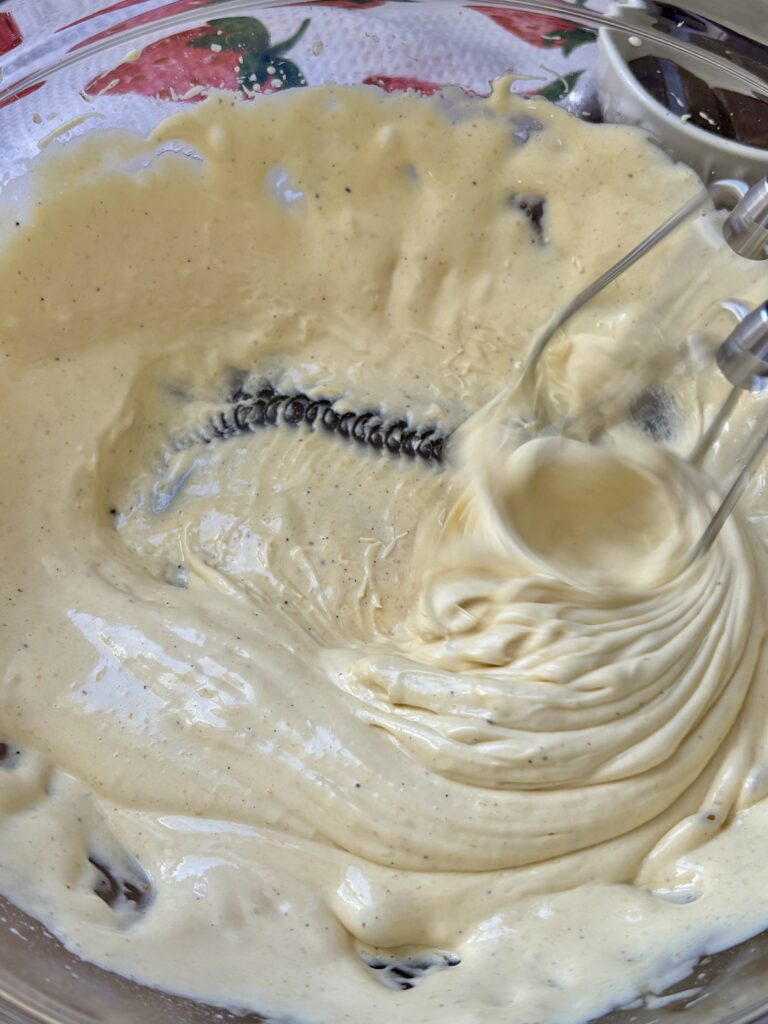
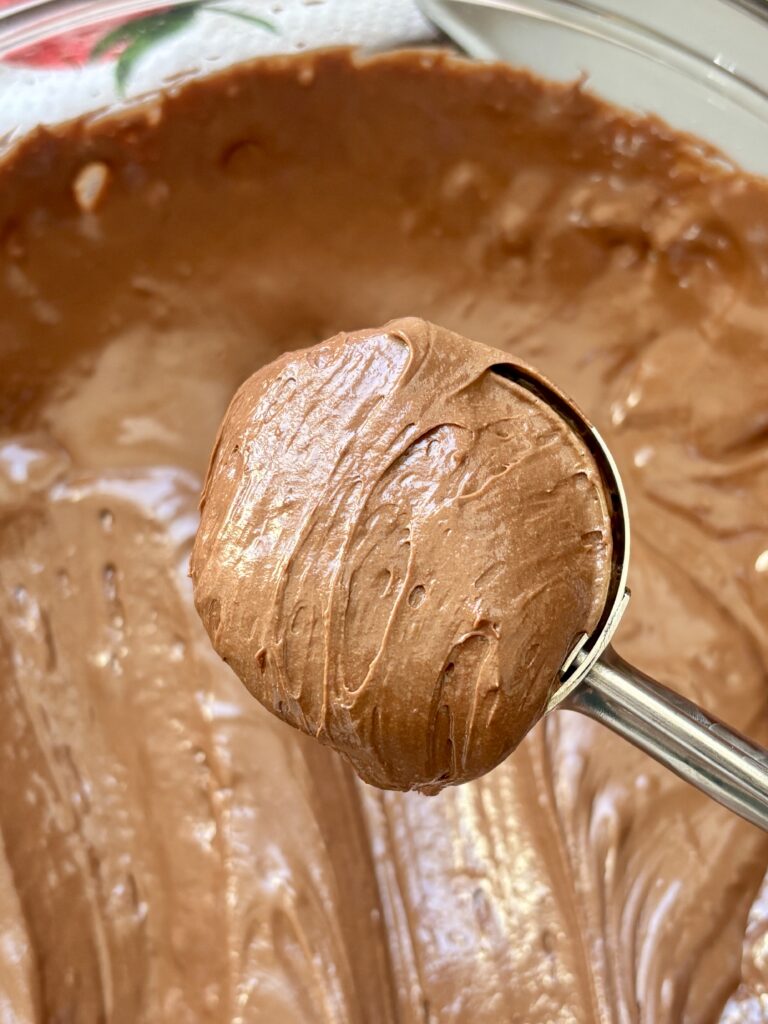
- In a medium bowl, beat egg, egg yolks, and sugar using a hand mixer on medium speed for about 2 minutes until slightly thickened and pale.
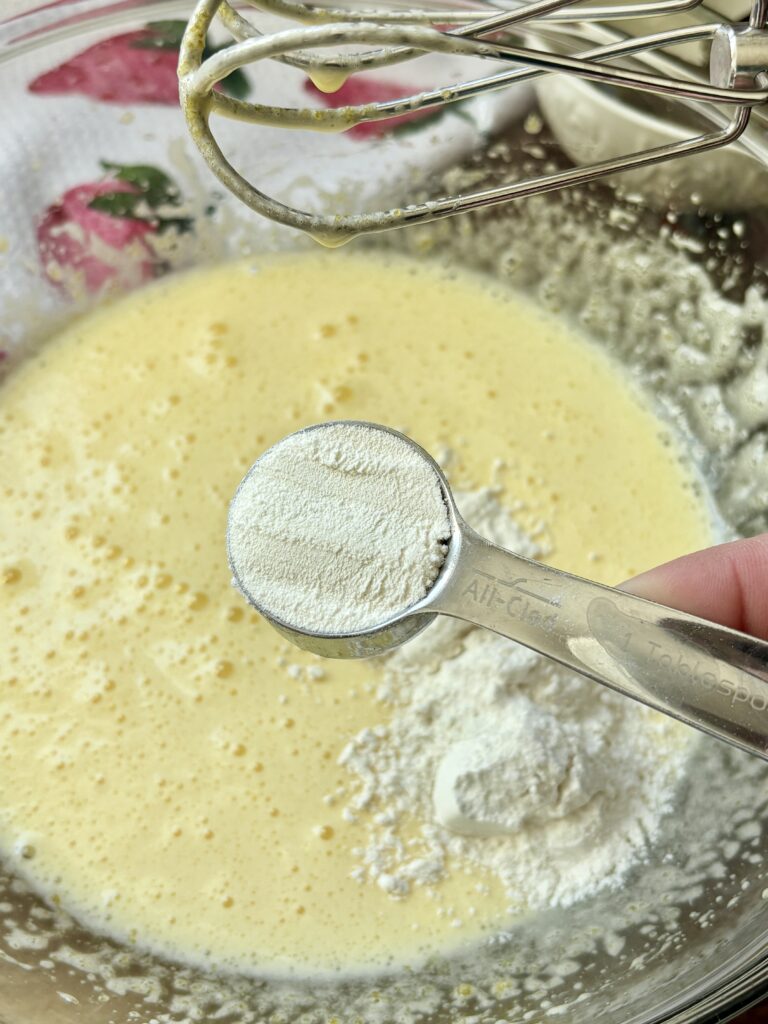
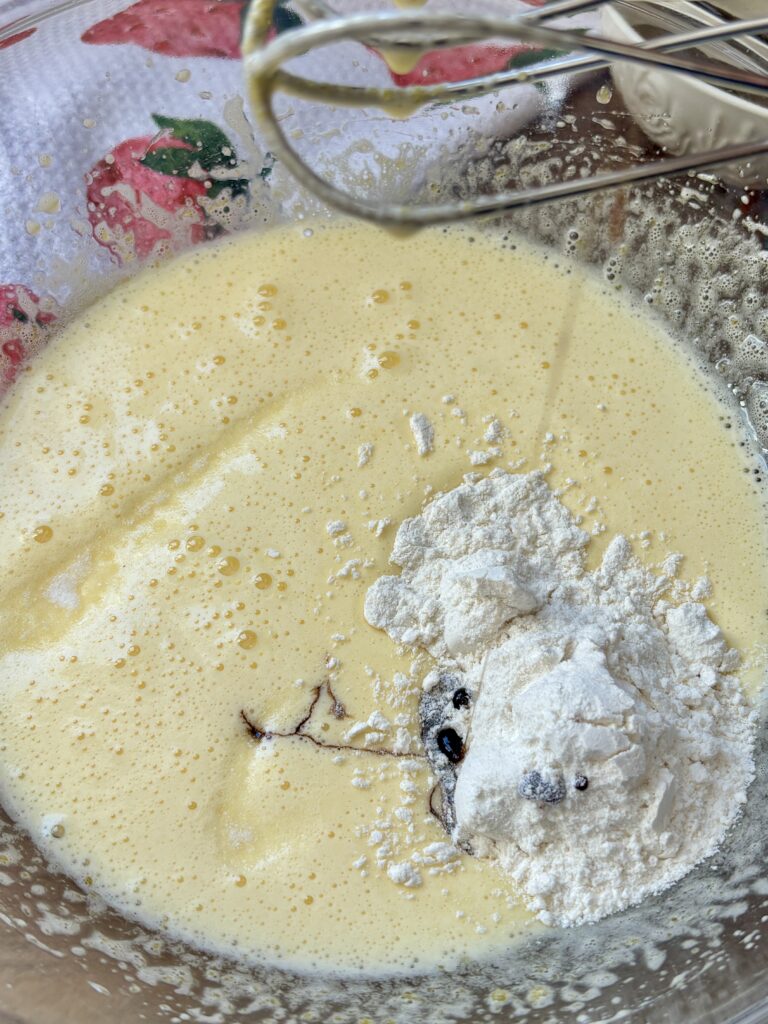
- Add flour, salt, and vanilla extract. Beat again for 1–2 minutes until smooth.
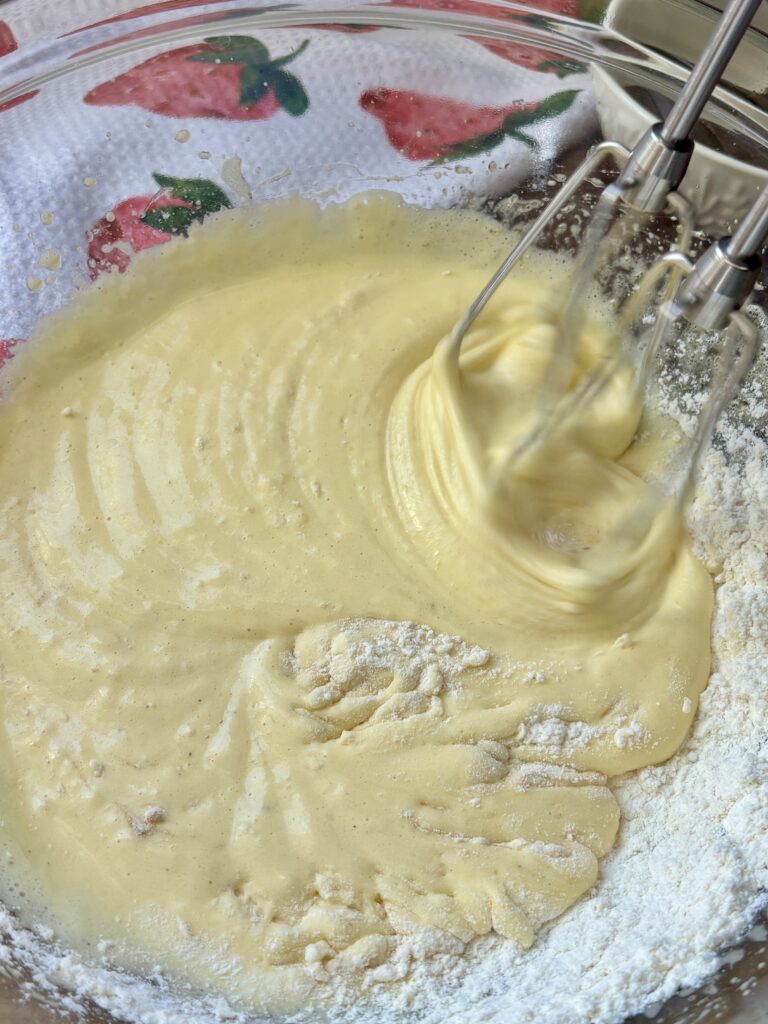
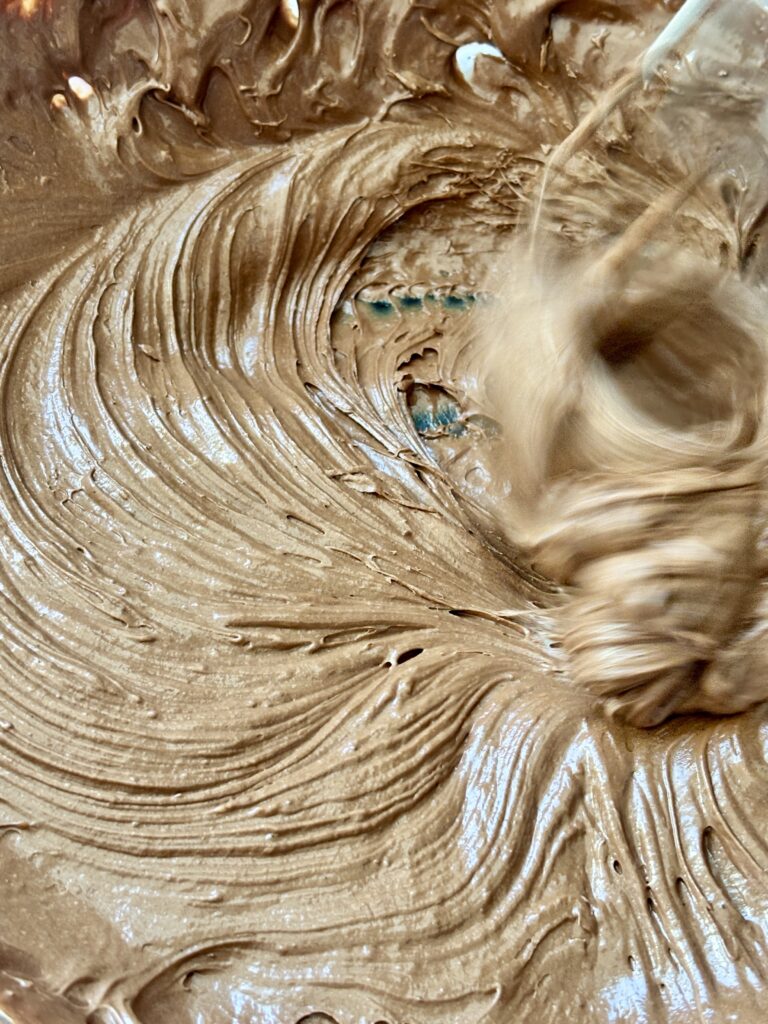
- With mixer on low, slowly drizzle in melted chocolate mixture until just combined. Batter will be thick and glossy.
- Divide batter evenly among prepared ramekins.
- Press one piece of dark chocolate into the center of each ramekin.
- Bake for 10–11 minutes until edges are set but centers remain soft.
- Cool for 5–10 minutes. Run a knife around edges, place a plate on top, and carefully invert to release.
- Serve warm with optional vanilla ice cream or whipped cream.
Dark Chocolate Lava Cakes | Mini Molted Chocolate Cakes | Easy Lava Cake Recipe | Homemade Chocolate Lava Cake | Molten Chocolate Dessert | Dark Chocolate Dessert Recipe | Mini Chocolate Cakes | Romantic Dessert Recipe | Valentine’s Day Dessert | Quick Chocolate Dessert | Decadent Chocolate Cake | Decadent Desserts | Lava Cakes | Chocolate Lovers Dessert | Rich Chocolate Cake | Holiday Recipes | Individual Chocolate Cakes
Nutritional Content Disclaimer
I choose not to include nutritional information with my recipes, as these values can be calculated from the ingredients provided. With my background as a pediatric nurse practitioner and my own family experience with disordered eating, I understand how focusing on numbers can affect our relationship with food. My philosophy is that all foods have a place—sweet, savory, nourishing, or indulgent. I aim to share recipes that support a healthy, joyful approach to eating. My hope is that this space also encourages a balanced, healthy relationship with food for you and your family too.